
Find your VPN credentials for manual configuration
To find your VPN credentials log into the PureVPN Member Area. Click 👉 here to visit Member Area.
- Login to the Member Area using your PureVPN registered email address and password.
- On Subscriptions tab scroll down to be able to view your VPN credentials.

- You will be able to see and copy your VPN credentials.
- Note down your PureVPN username and click the Eye icon to make your password visible and use it in the manual configuration.

How to set up OpenVPN on Windows 8
Installing OpenVPN:
- Click 👉here to download PureVPN OpenVPN installer.
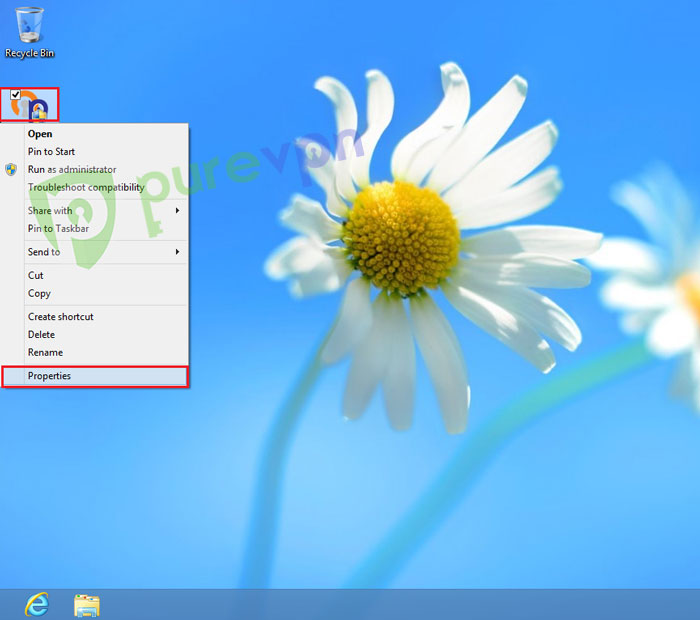
- Click OpenVPN client and select Properties.
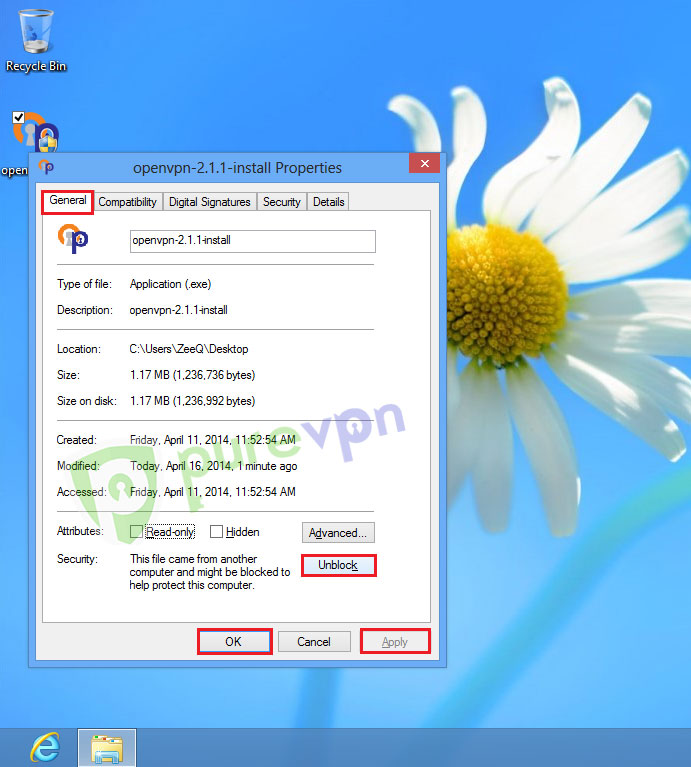
- From General tab, click Unblock, apply, and OK.
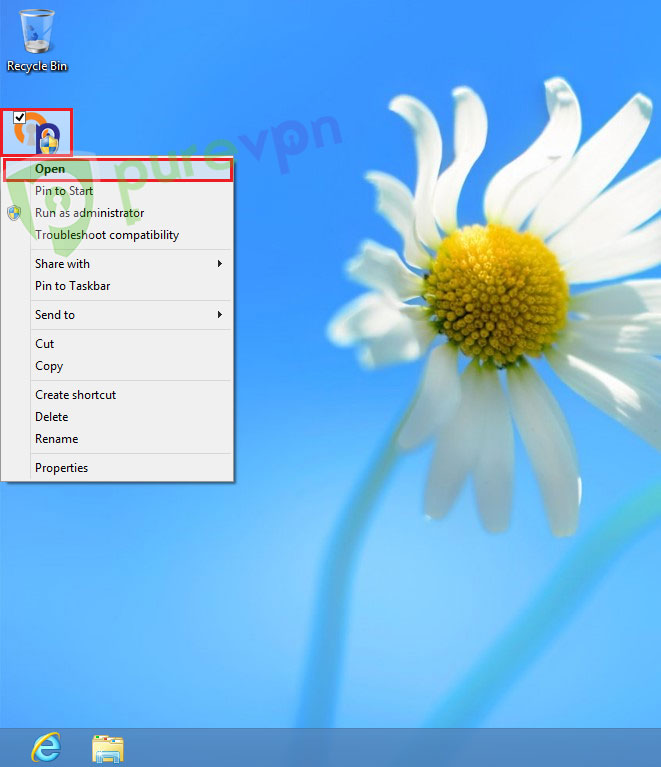
- Click OpenVPN installer and select Open or double click to Execute.
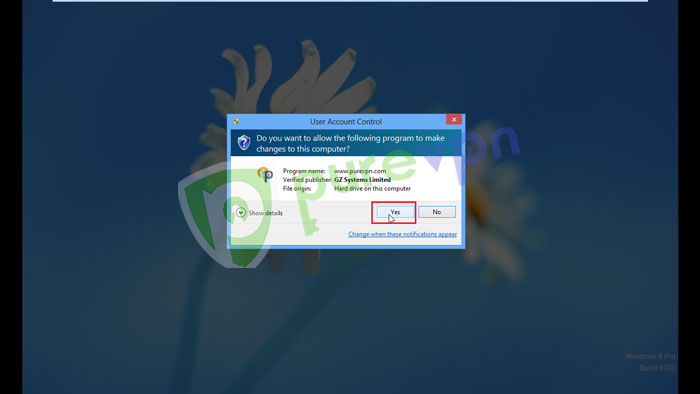
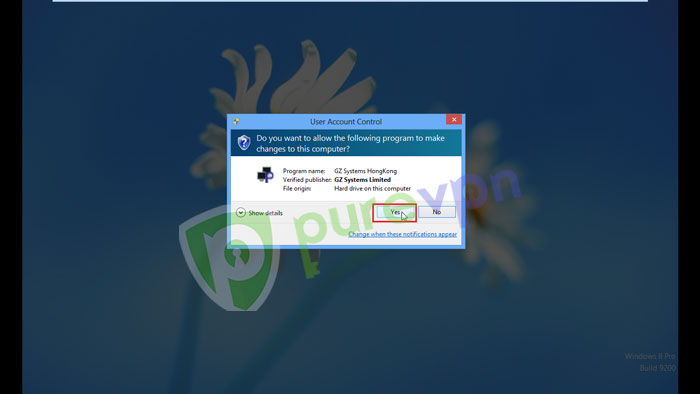
- Click Yes to allow installation.
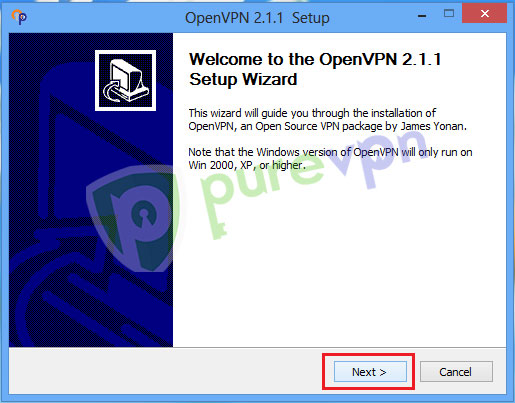
- Click Next.
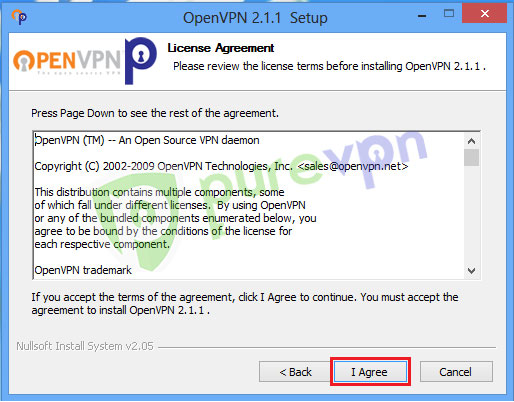
- Click I Agree.
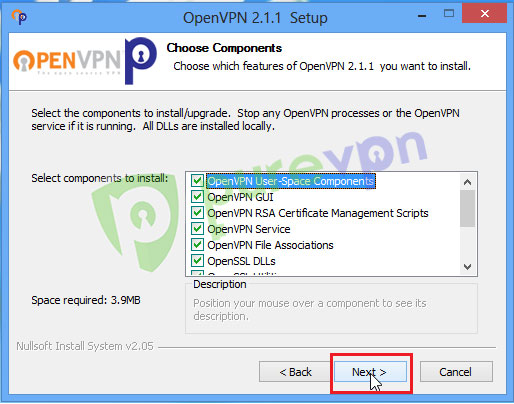
- Click Next.
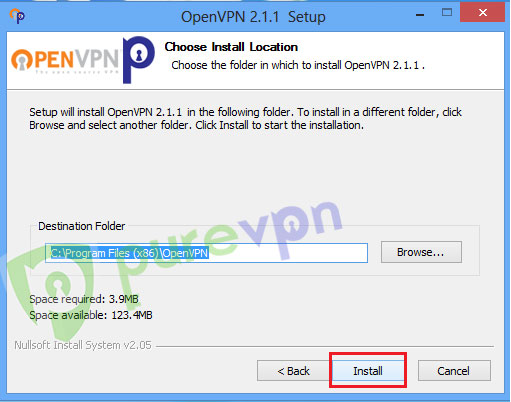
- Click Install to begin installation.
- Check Always trust software from GZ System Limited and click Install.

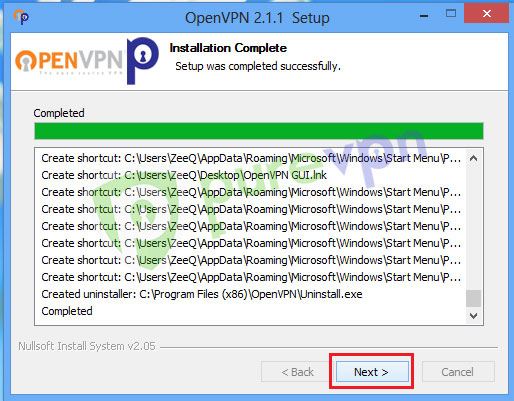
- Click Next once installation completes.
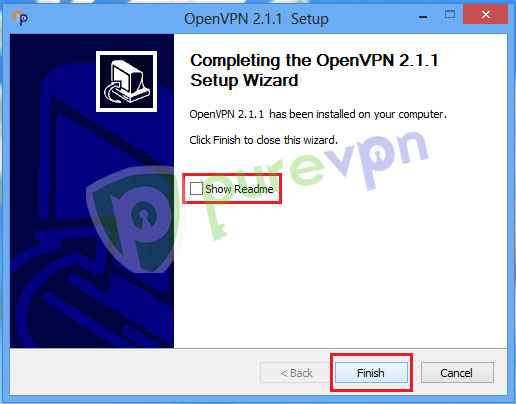
- Uncheck Show Readme and click Finish.
Configure OpenVPN GUI
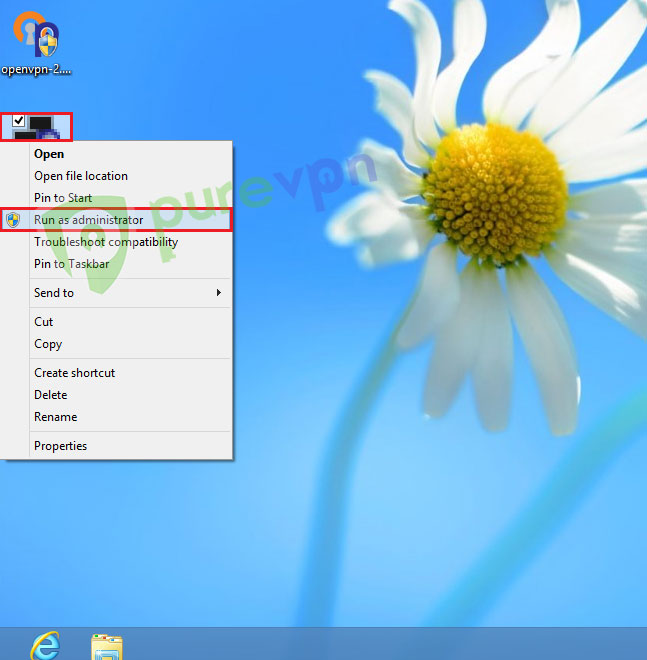
- Click OpenVPN GUI icon and Run as administrator.
- Click Yes to allow application to run.
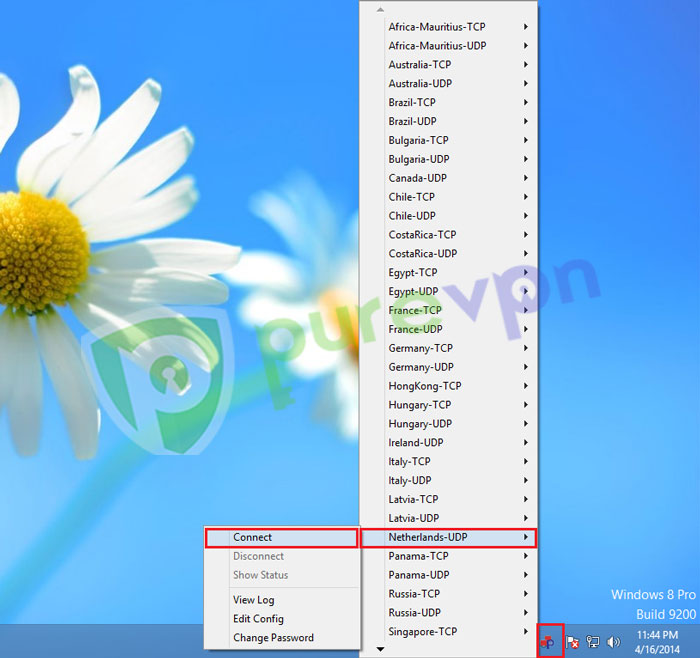
- Click OpenVPN icon from System tray, go to desired server and select Connect.
- Enter your PureVPN credentials. Here is how you can find your 👉VPN credentials.

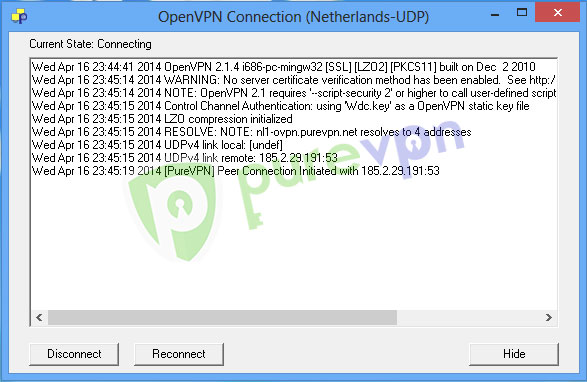
- VPN will establish connection in few seconds,
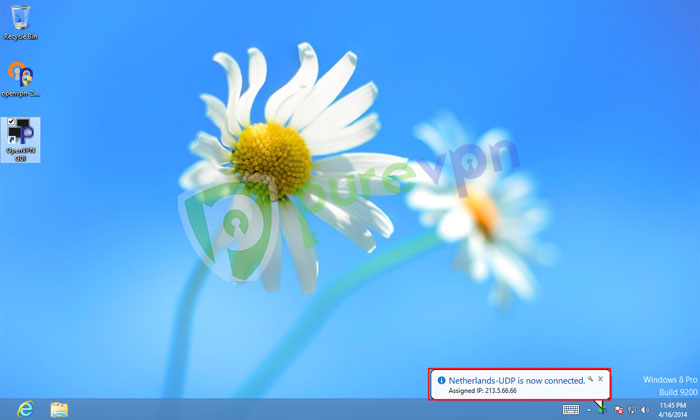
- You are now Connected.
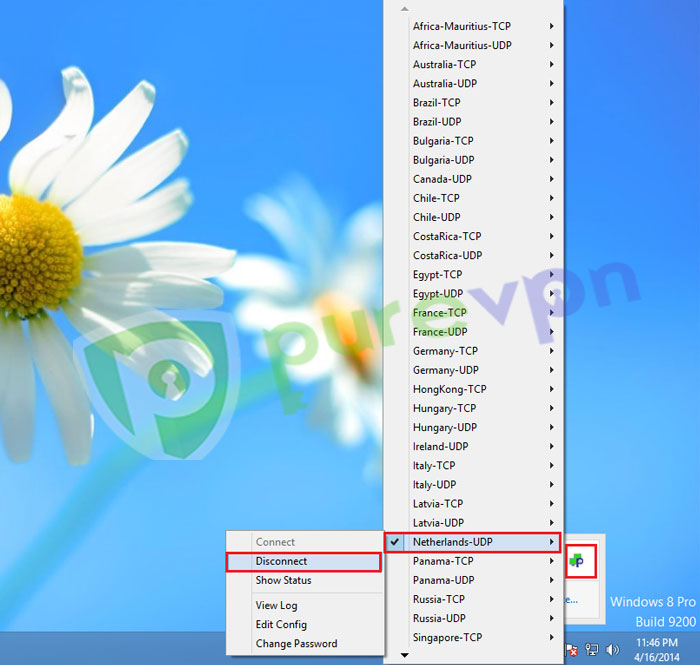
Disconnect OpenVPN GUI
- To disconnect OpenVPN. Click OpenVPN icon from system tray, go to connected server and select Disconnect.
Saving account details
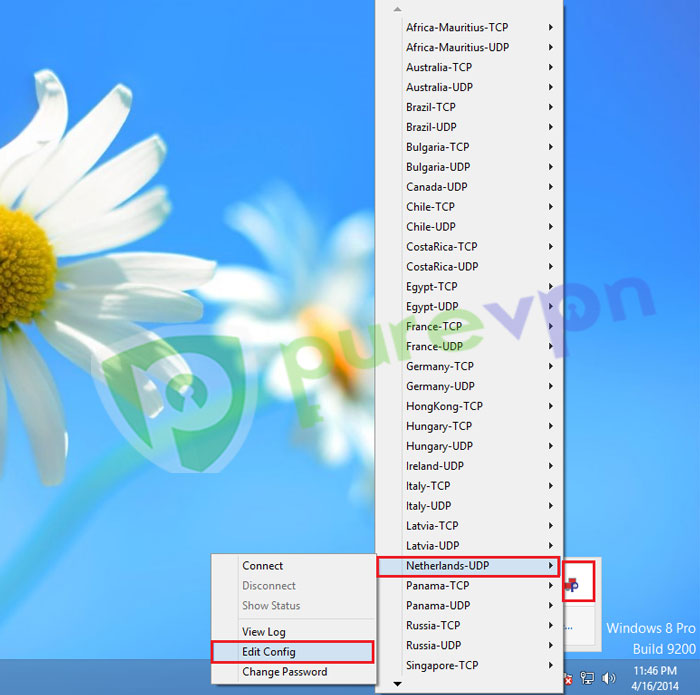
- Click OpenVPN icon from system tray, go to desired server and select Edit Config.
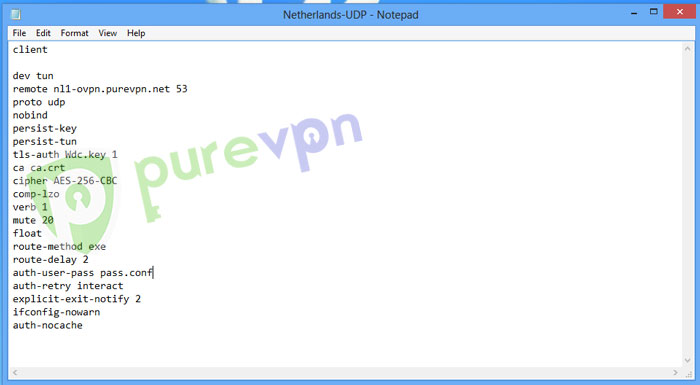
- Add pass.conf after auth-user-pass parameter and Save.
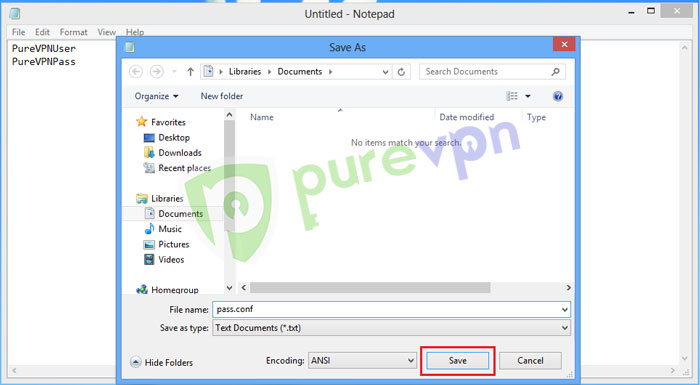
- Open Notepad and insert PureVPN credentials and Save it.
- Open the folder where you saved the file, click View from the top and check File name extensions.
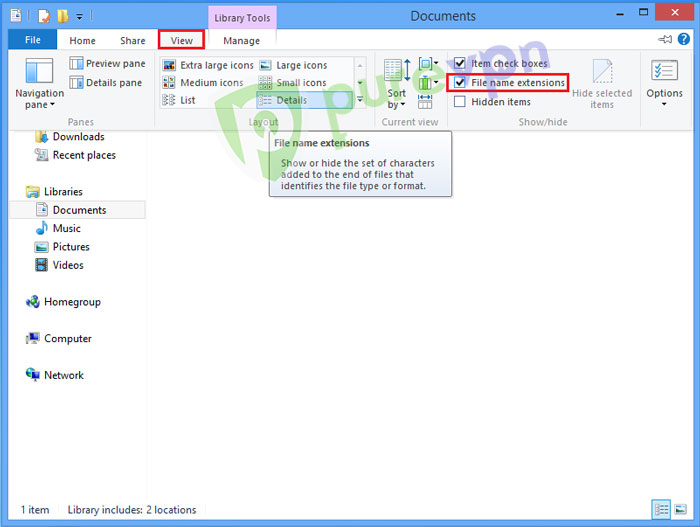
- Click View tab and uncheck Hide extensions for known file types, click Apply and OK.
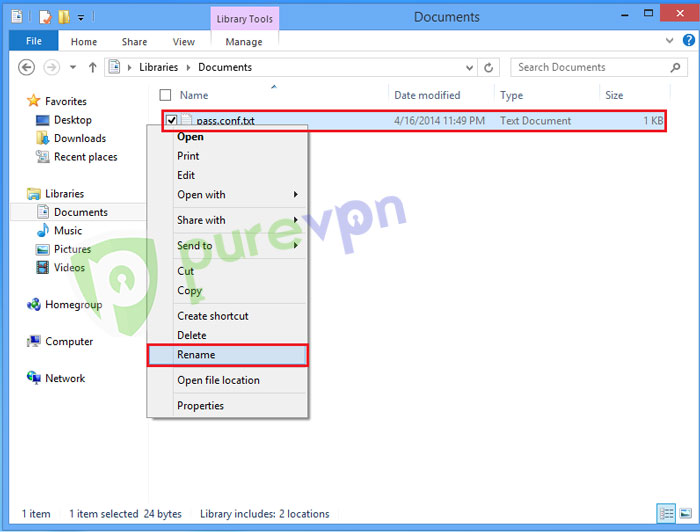
- Click pass.conf.txt file and Rename it.
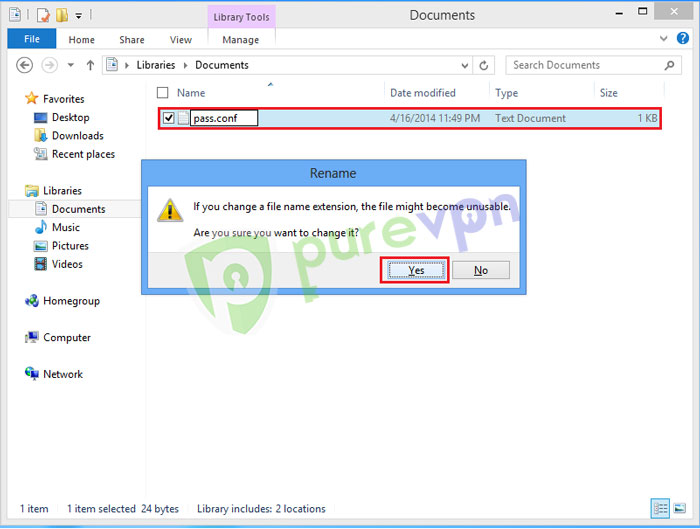
- From pass.conf.txt, remove.tx, hit enter and click Yes.
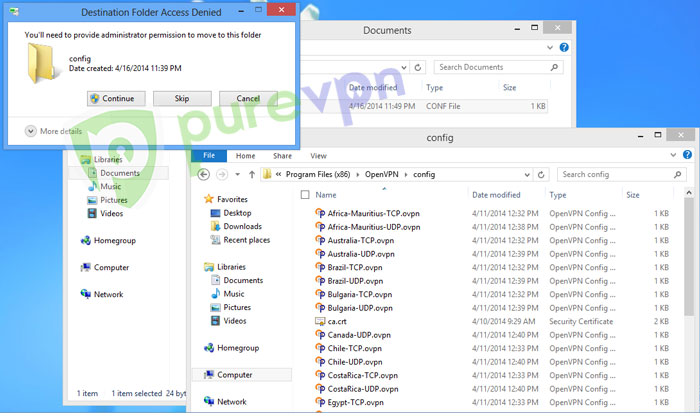
- Open OpenVPN installation folder and drag/ copy pass.conf file in config folder.
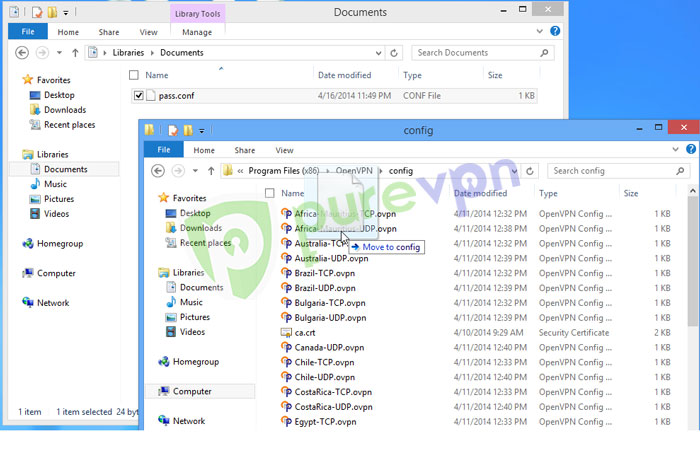
- Click Continue to copy file.
Repeat below steps to edit all servers.
Step A: Click OpenVPN icon from system tray, go to the desired server and click edit config.
Step B: Add pass.conf after auth-user-pass parameter and save.
How to set up IKEv2 on Windows 8
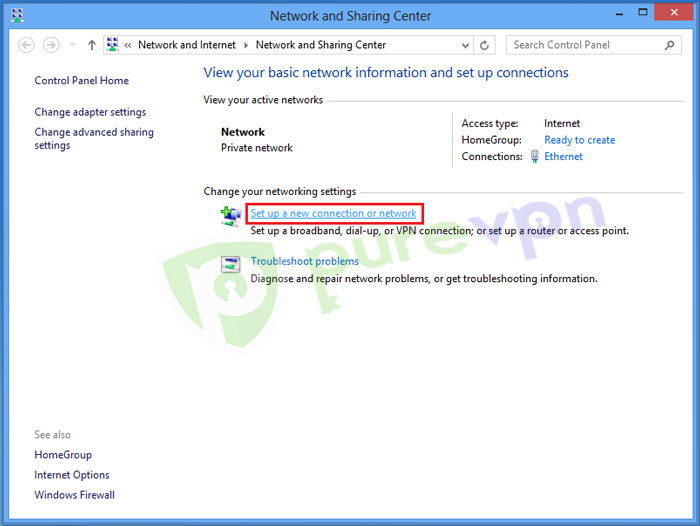
- Click LAN/ Wifi icon from System tray and select Open Network and Sharing Center.

- Click Set up a new connection or network.
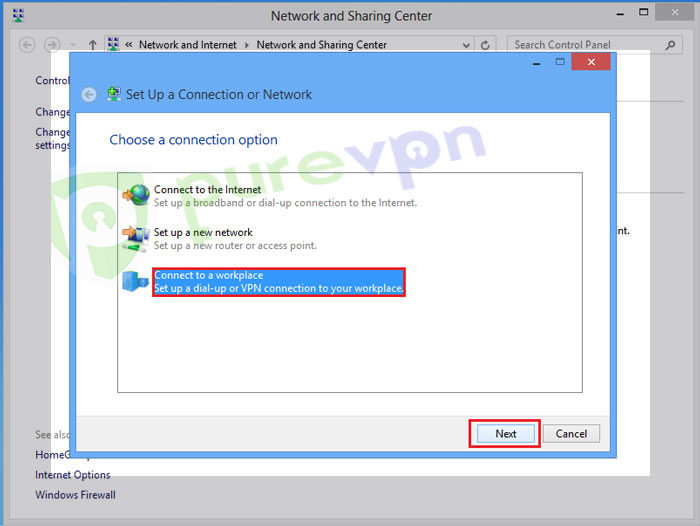
- Select Connect to workplace and click Next.
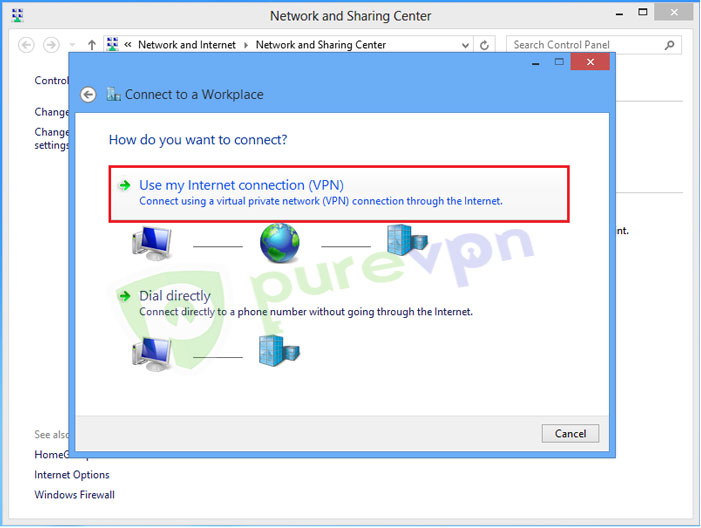
- Select Use my Internet connection (VPN)
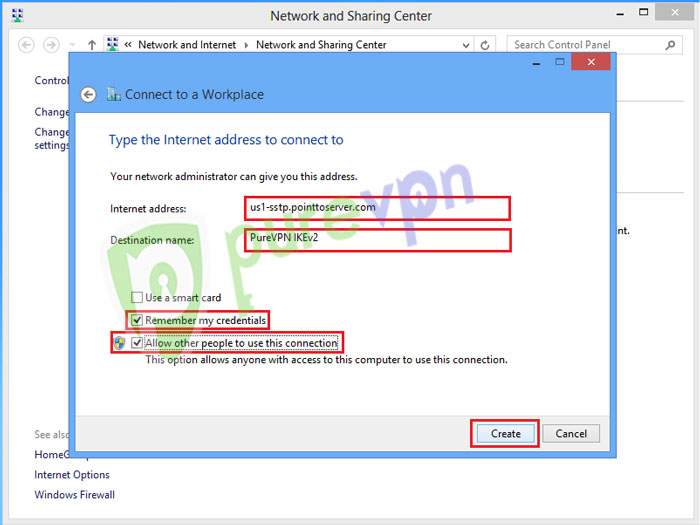
Insert the following info:
- Enter the server address. Click 👉 here to get the server address list.
- Insert destination name as PureVPN IKEv2 or PureVPN US etc.
- Select Remember my credentials.
- Select Allow other people to use this connection.
- Click Create.
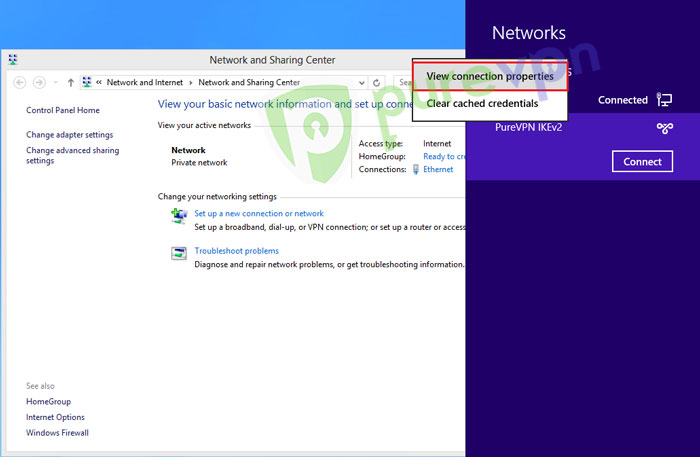
- Click PureVPN IKEv2 connection and select View connection properties
- Click Security tab and select IKEv2.
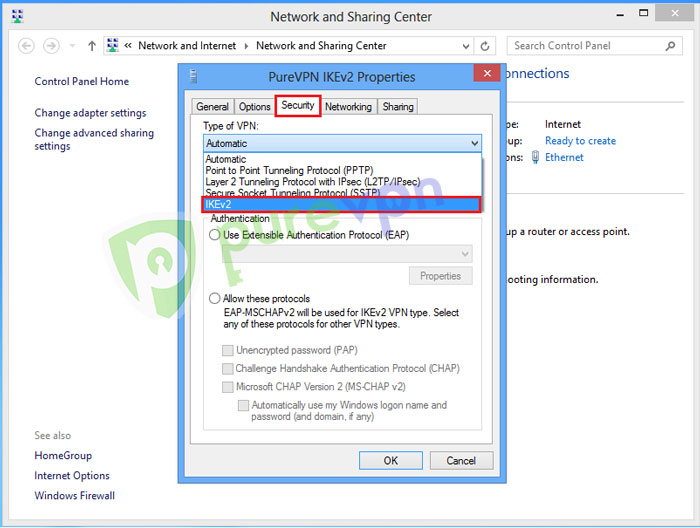
- Select optional or Require encryption from Data encryption drop down menu.

Insert the following info:
- Click Networking.
- Uncheck Internet Protocol Version 6 (TCP/IPv6) and File and Printer Sharing for Microsoft Networks.
- Click OK.

- Click Wifi/ LAN icon from system tray.

- Click PureVPN IKEv2 connection and click Connect.

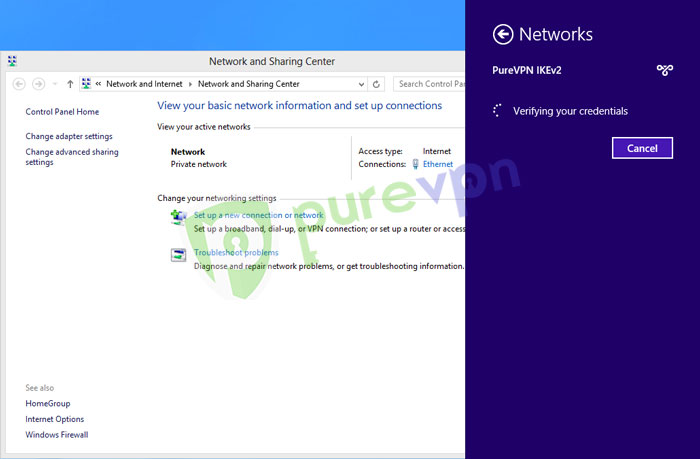
- Enter your PureVPN credentials. Click 👉 here to know how to find your VPN credentials.
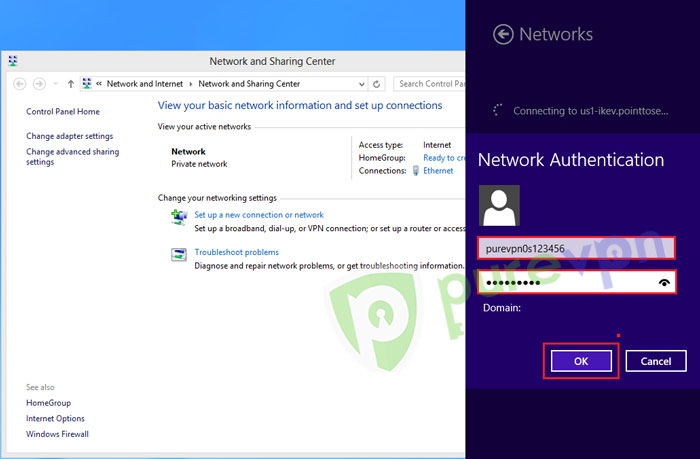
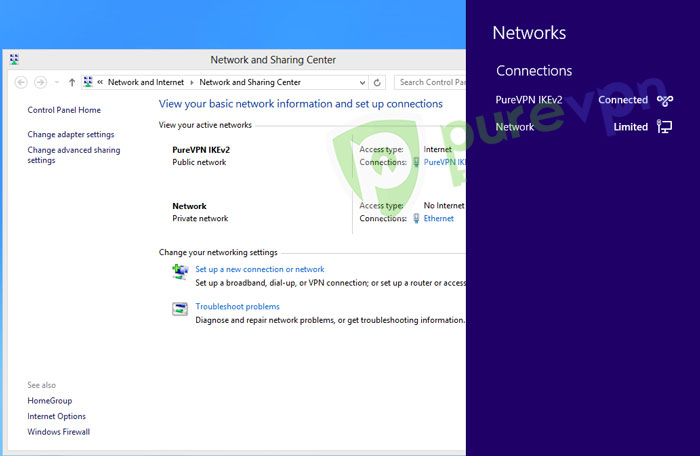
- VPN connection will establish after verifying account details.
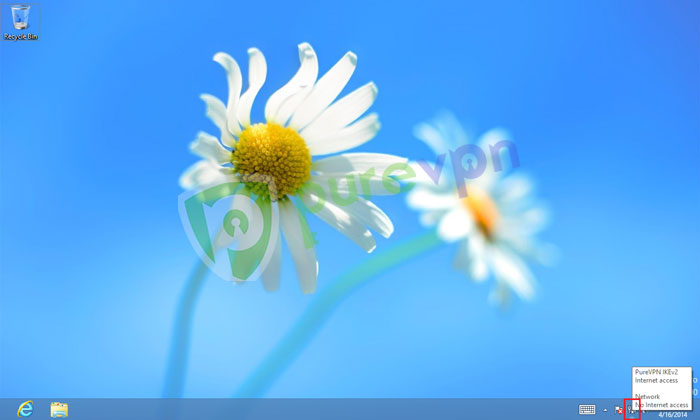
- You are Connected now.
- To disconnect VPN, click Lan/ Wifi icon from system tray.
- Click VPN connection and then click Disconnect.

