How to set up Openvpn on Mac Using Viscosity in Restricted Countries?
Here is a simplified step-by-step guide to setting up OpenVPN on a Mac using Viscosity in countries with internet restrictions, allowing you to bypass censorship and access blocked websites.
Written By Fahad Ahmed
Updated at September 27th, 2023
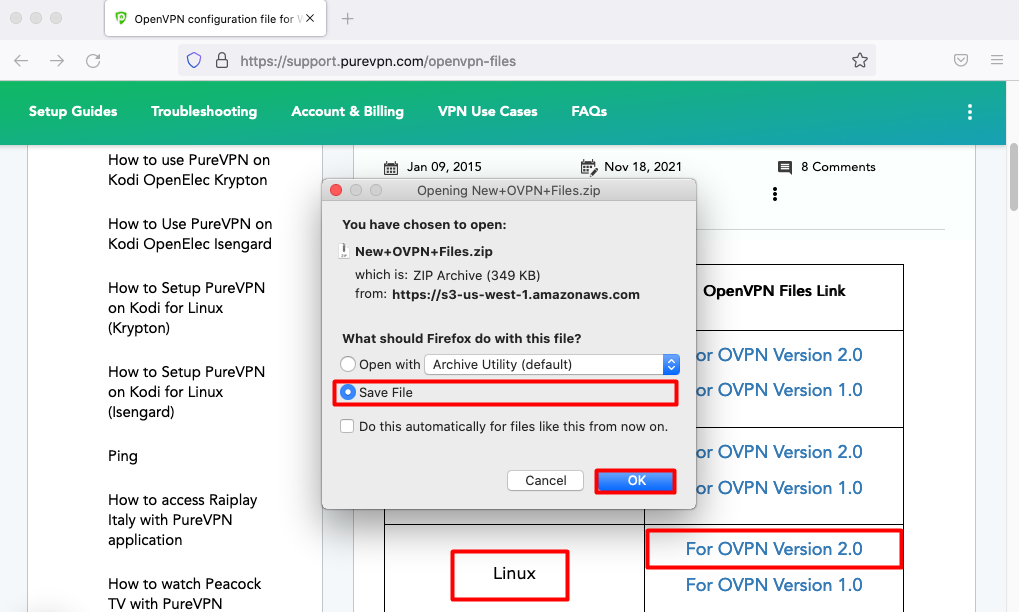
Firstly, download the PureVPN OpenVPN configuration files from 👉this link below then save and extract them. If you already have the required ovpn file then skip this step.
Now go to the Viscosity website and download the latest version 👉from there:
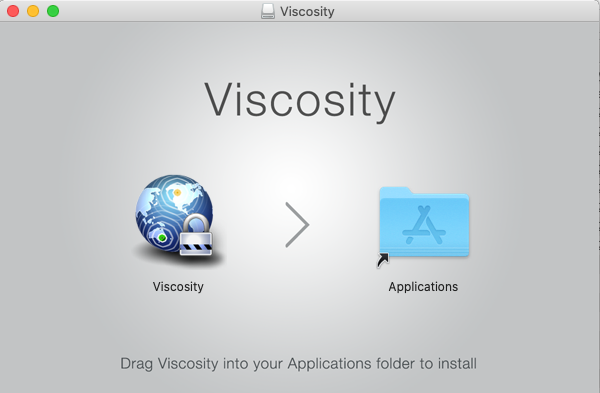
Now double click the Downloaded (.dmg) file, drag & drop the Viscosity icon to the Applications folder to start the installation process.
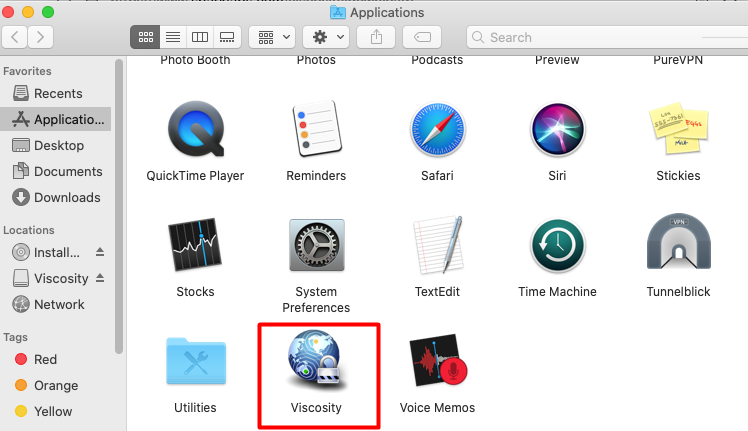
Once the installation is finished, open the Viscosity client from the Applications folder.
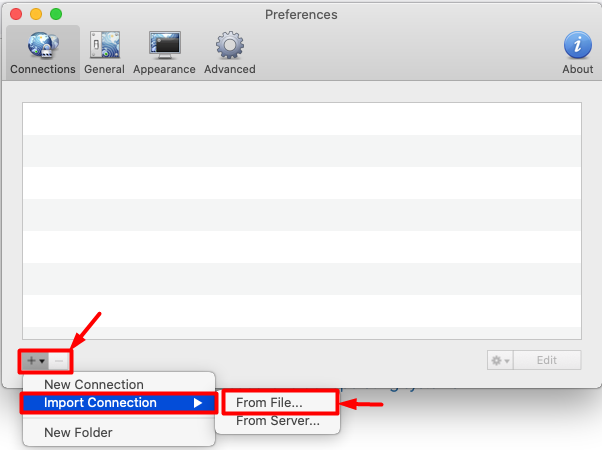
Now click the button, select Import Connection then From File… and go to the folder where you have downloaded the ovpn files and choose your desired file to connect.
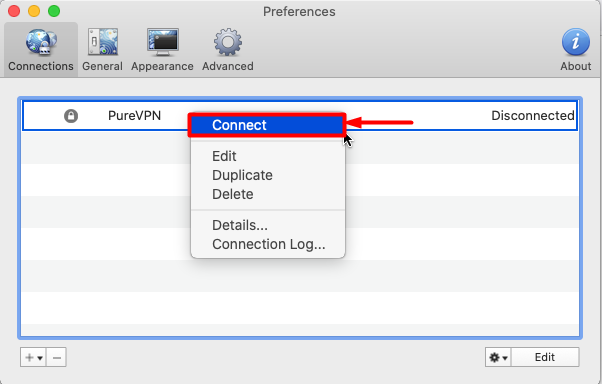
Once the file is loaded, right-click the Profile and then click Connect button to initiate the VPN connection.
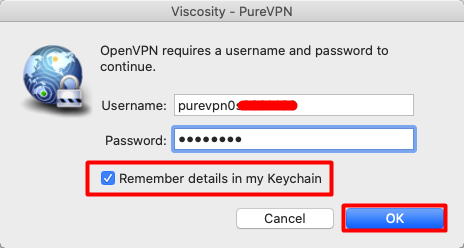
Enter your PureVPN credentials. Here is how you can 👉find your VPN credentials and its password in the pop-up window and click OK. Check the Save in keychain option in order to save the credentials in the client.
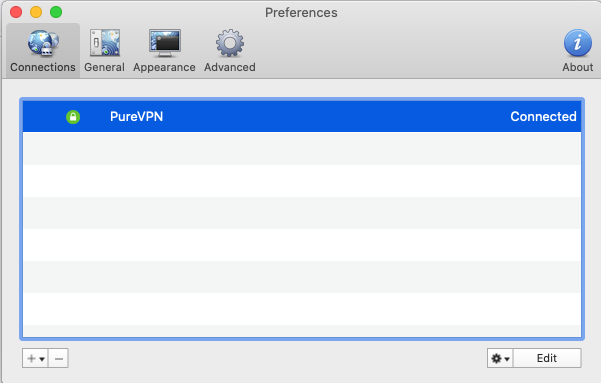
PureVPN OpenVPN connection is now Connected your Viscosity client.