
This article provides a simple guide on using the PureDome console to assign different roles to various members.
- Understanding Roles
- Assigning a role to a member
- Changing a role
- Breakdown of roles and permissions
Understanding roles
- Sub-Admin: Sub-Admins have the ability to change permission settings and give roles to their fellow team members.
- Billing Manager: Billing Managers can make changes to the billing information, view invoices, and update payment methods.
- Analyst: An analyst can access the logs and reporting section, as well as download the apps.
- Configuration Manager: Configuration Manager can invite team members, create or delete gateways, and manage dedicated IP addresses.
- Member: Member can access the apps and download screen.
Assigning a role to a member
- To assign a role to a team member, click the click the Workspace > Members tab in the PureDome console on the left side.
- Click Assign Roles.
- A pop up box will show up on your screen. In that box, you can pick a role, then find the team member you want to choose for that role, and finally, click Apply.
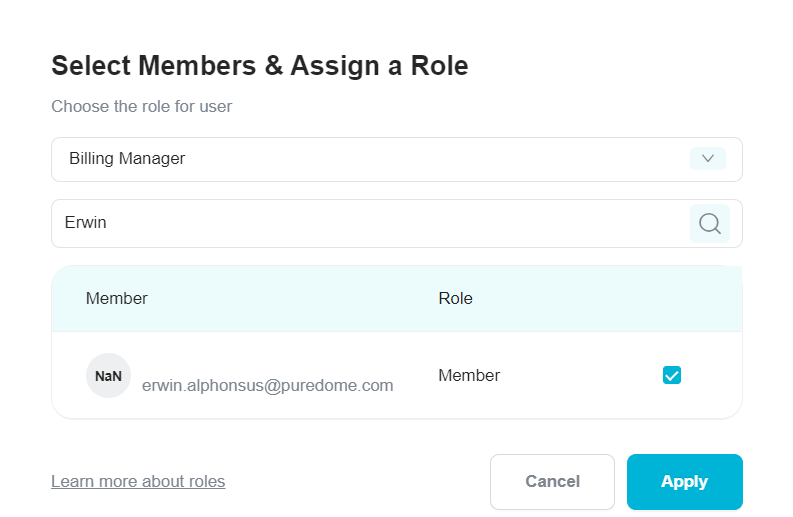
Note: By default, all team members will be on-boarded as members.
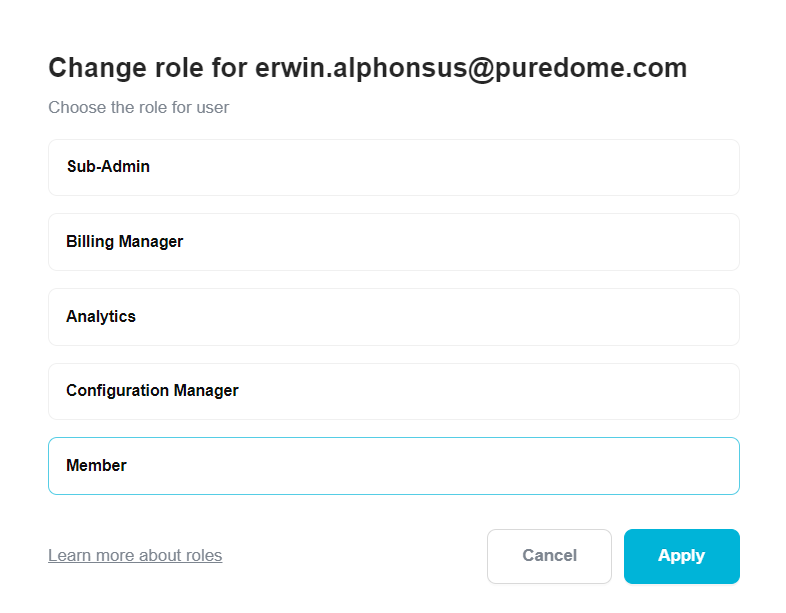
Changing a role
- To change the role of a team member, click the Team Members tab in the PureDome console on the left side.
- Click the three-dot icon next to a team member's name to change the role.
- Click Change Role in the drop-down list.
- A pop up box will show up on your screen showing various roles you can choose from. Simply pick the role you want for your team member and click Apply.
Breakdown of roles and permissions
If you have any questions or are experiencing any issues, please don’t hesitate to contact our 24/7 customer support team via live chat or email at support@puredome.com. We’re always happy to help!