
In this article, you will learn how to set up a manual VPN connection on your macOS device.
Find your VPN credentials for manual configuration
- In order to create a manual VPN configuration, you will need to obtain a VPN username and password from the PureDome console page.
- The option to access VPN Agent credentials is now located in the profile section of the PureDome console. Members of the team, including administrators, can now easily see, copy, and generate their own passwords for setting up the VPN manually.
- To access, simply log into the PureDome console at: app.puredome.com, click Profile in the upper right corner, scroll down, and there you’ll find the VPN Username (purevpn0sxxx) along with a button to generate a new VPN Password under VPN Agent.
- Once you have your account details for manual configuration, you can follow the steps given below to manually configure the VPN on your macOS device.
Set up manual configuration on macOS
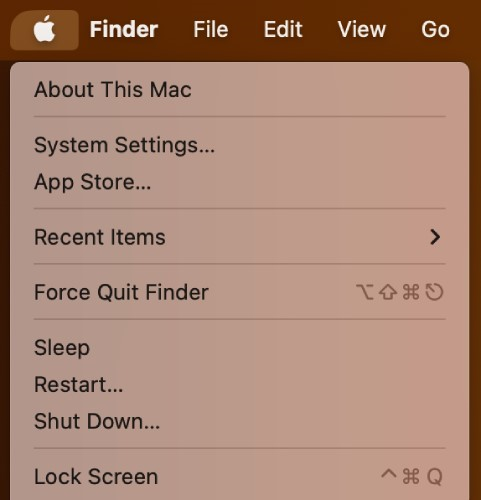
- Click Apple logo in the upper-right corner of the screen and select System Settings.

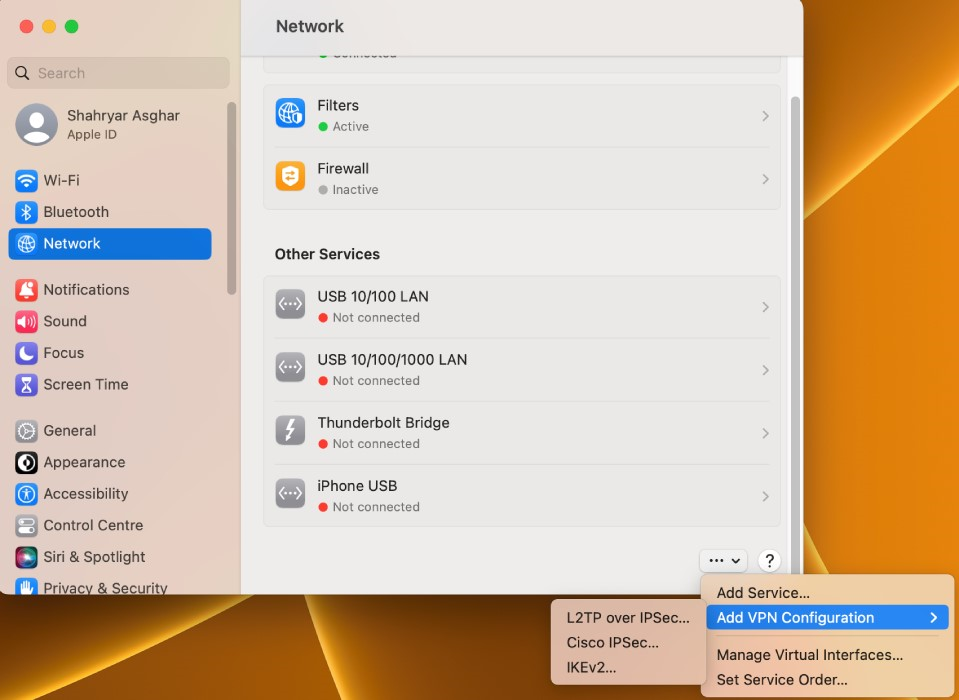
- Click Network.


- Click arrow down icon (...) in the lower-right corner (you must have administrator privileges) and then click Add VPN Configuration. After that, select the protocol required to connect to the particular VPN server. For this tutorial, we used IKEv2. Other supported protocols are L2TP over IPsec and Cisco IPsec.

- A pop up window will appear.
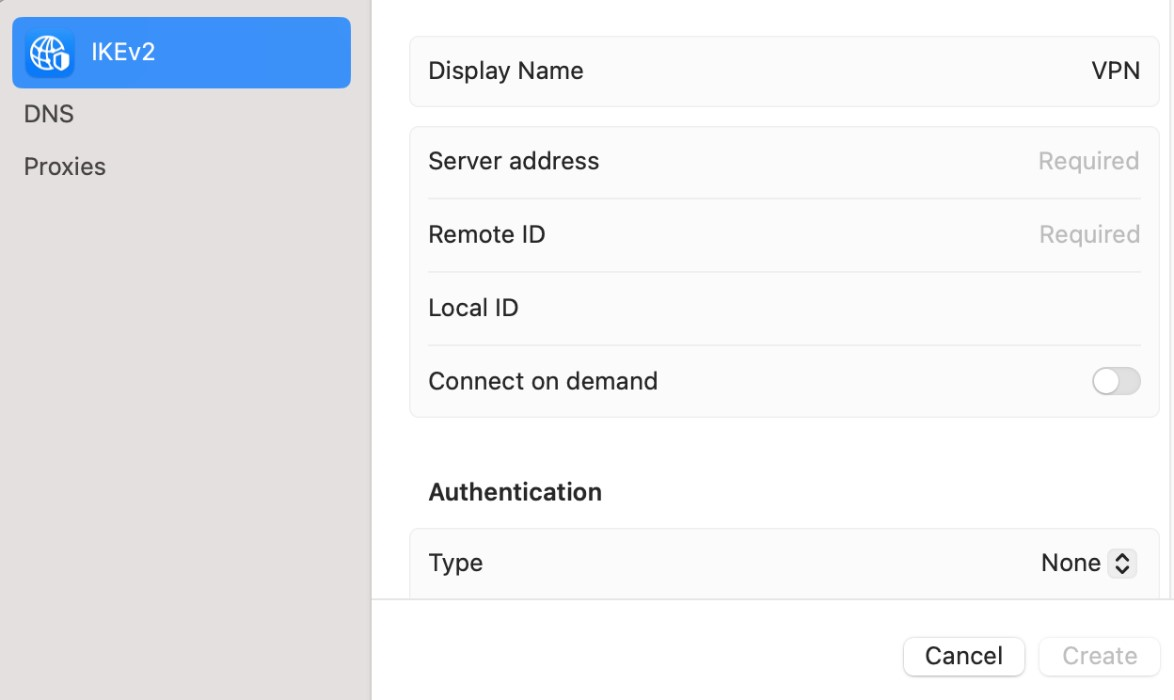

- Enter the following details:
- Display Name: Enter a name to identify the connection; for example, you can use the service name like PureDome manual connection.
-
Server address:
- For shared IP VPN users: You can see the list of manual server addresses from this link.
Note: Only limited server locations are supported on SSTP, PPTP and L2TP protocols.
- For dedicated IP/ gateway users: Please contact the administrator of your PureDome account who can log into the console at: app.puredome.com and provide you with the server name for your dedicated IP/ gateway account.
Note: Gateway is only supported on IKEv2, IPsec and OpenVPN protocol.
- IKEv2:
- Remote ID: pointtoserver.com
- Local ID: Leave it blank
Note: If your hostname is not puredomegateways.com, use pointtoserver.com as the remote ID. But if it includes puredomegateways.com, then use the same hostname as the remote ID.
- L2TP:
- Shared Secret: 12345678
- IPsec:
- Shared Secret: 12345678
- Authentication Type: Username
- Username: Instructions to fetch the username and password for manual connection provided above.
- Password: Instructions to fetch the username and password for manual connection provided above.
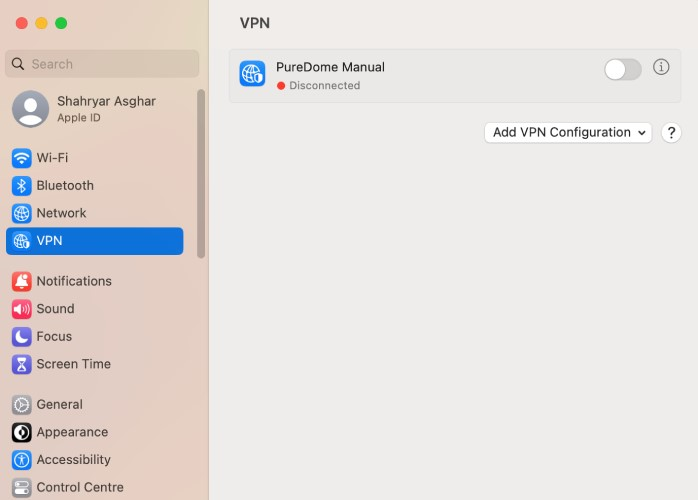
- After entering your details, click the Create button. You will see your newly created manual VPN profile below Network in the System Settings.

- In order to connect to your manual VPN profile, you will need to click a button next to it. The status of the manual VPN profile will change to Connected indicating the start of your secure and anonymous browsing experience.
Set up OpenVPN on macOS
The Tunnelblick application is one of the alternative ways to connect to PureDome servers on your macOS. While it offers a manual connection option and appeals to open-source enthusiasts, it may be more complex to set up compared to the PureDome app. Find step-by-step instructions below to configure a manual connection using Tunnelblick on macOS.
- Download Tunnelblick, a free and user-friendly app for managing OpenVPN connections on macOS. You can find the OpenVPN files you'll need to extract onto your desktop by clicking here.
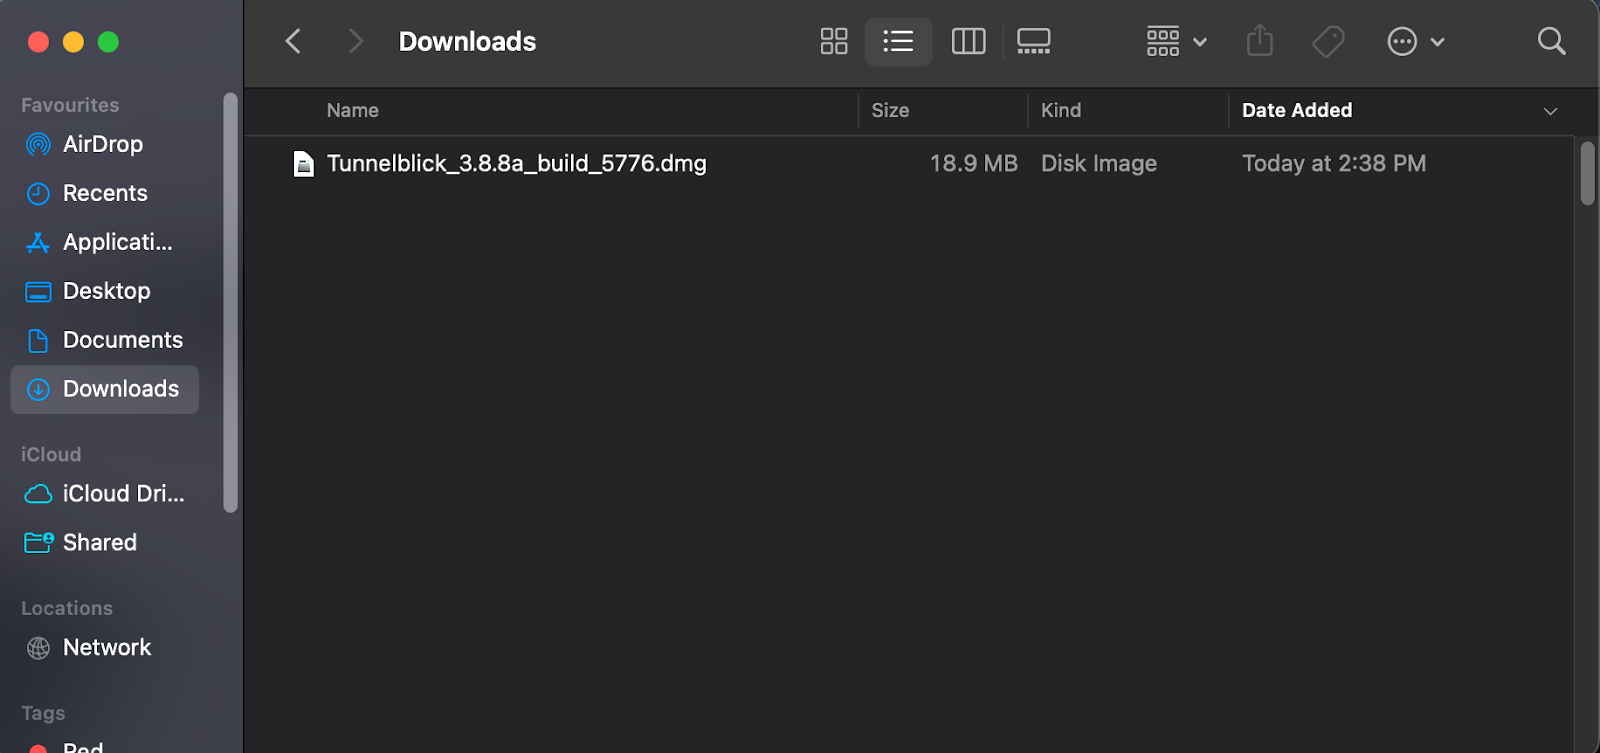
- Go to your Downloads folder and double-click the Tunnelblick installation file you have just downloaded.
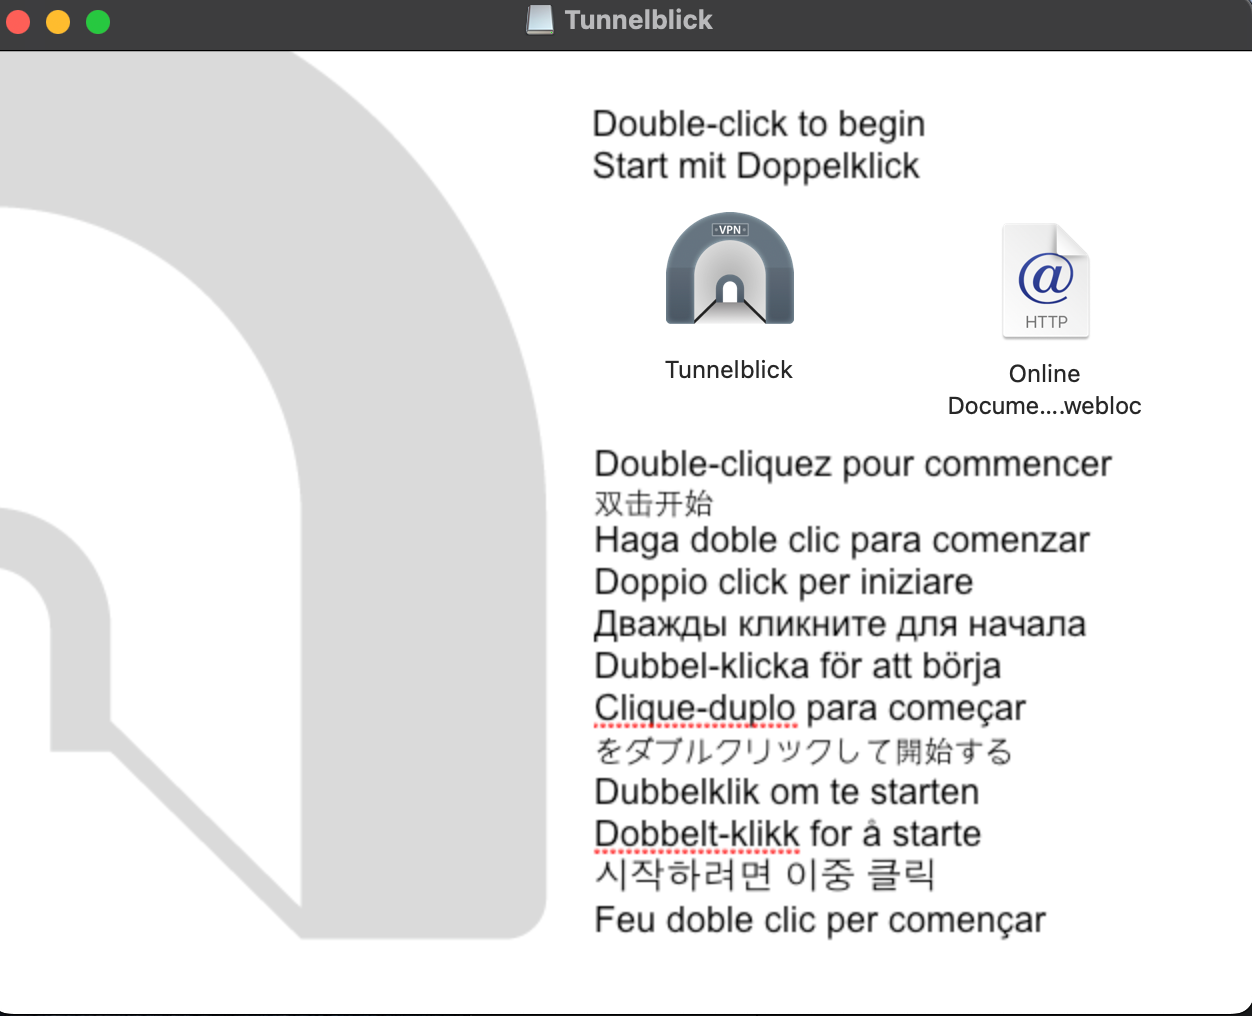
- In the window that opens, double-click Tunnelblick icon.
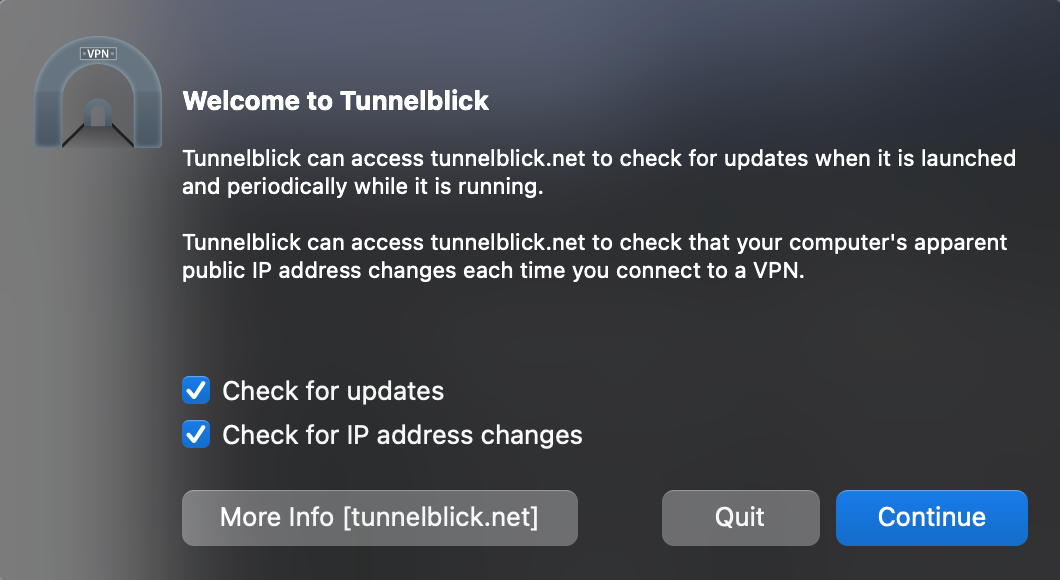
- A new dialogue box will pop up, asking you if you are sure you want to open the app. Click Continue.
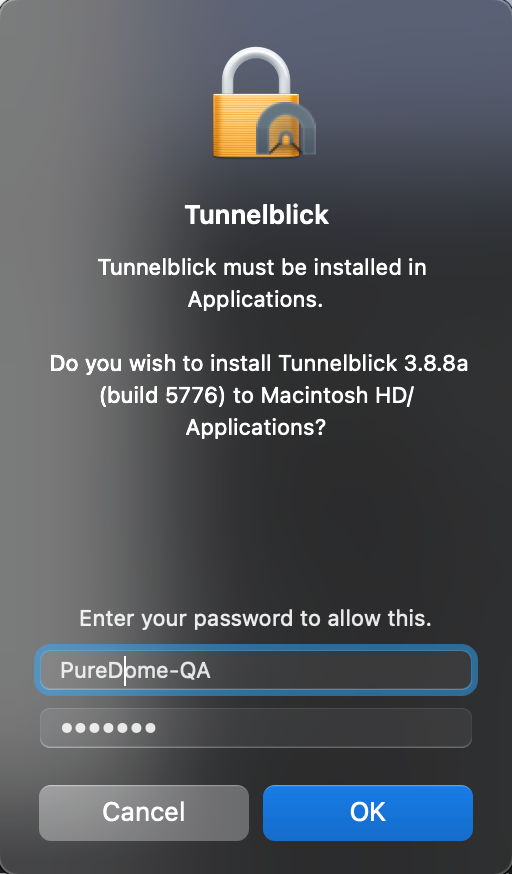
- Upon prompt, provide your macOS password and proceed by clicking the OK button.
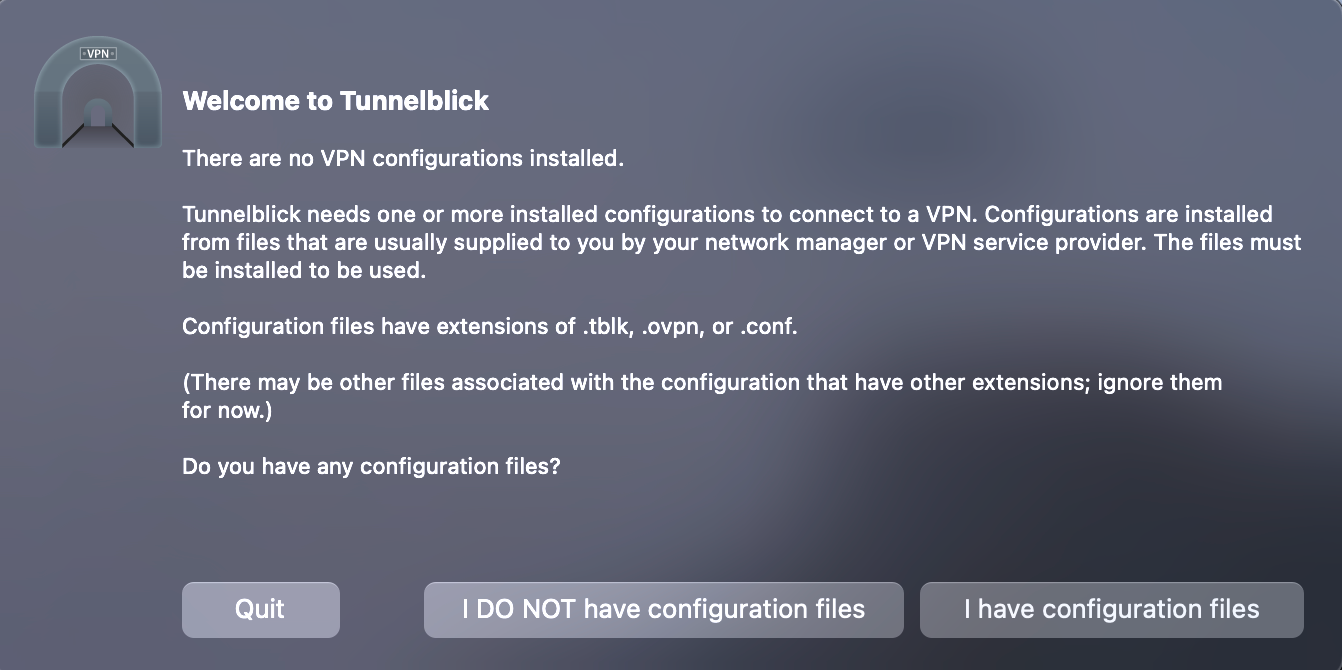
- You will encounter a pop-up that prompts you to confirm whether you have installed the OpenVPN configuration files. Please select the option I have configuration files (since you have already downloaded the OpenVPN configuration files in step #1)
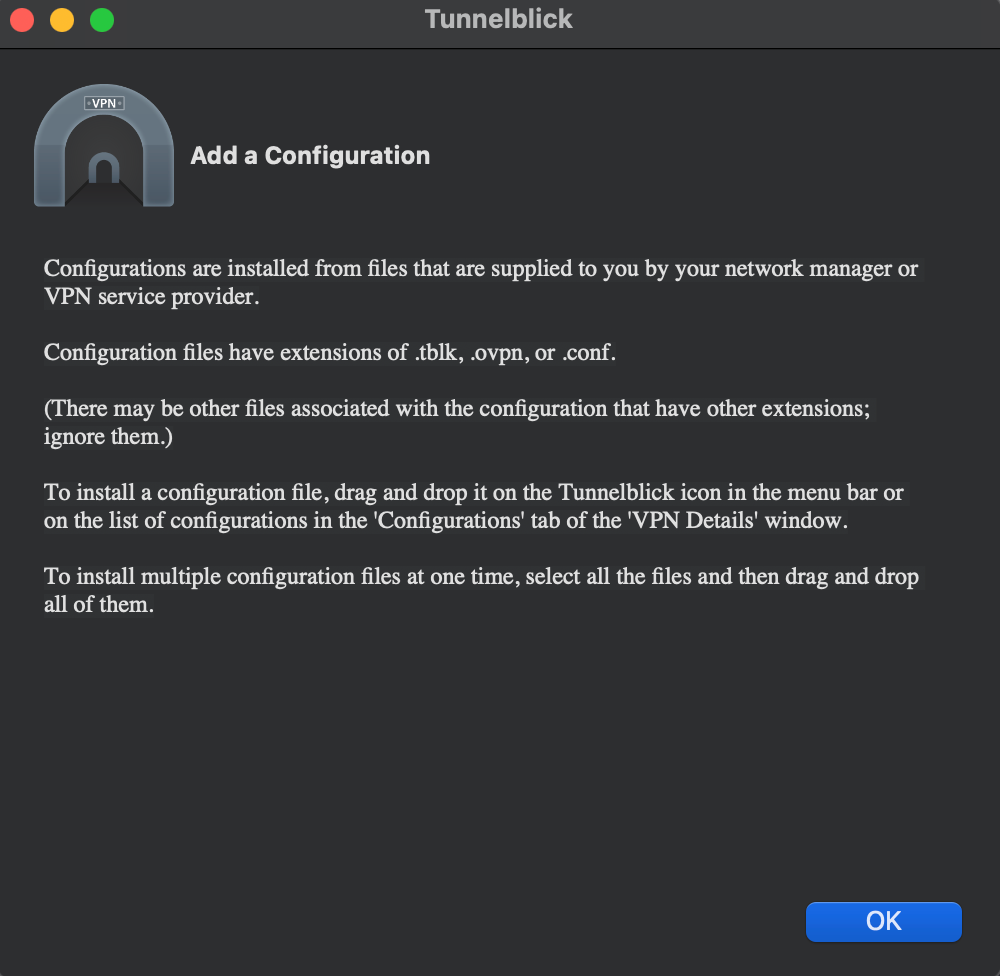
- Another notification will pop up, instructing you how to import configuration files. Click OK.
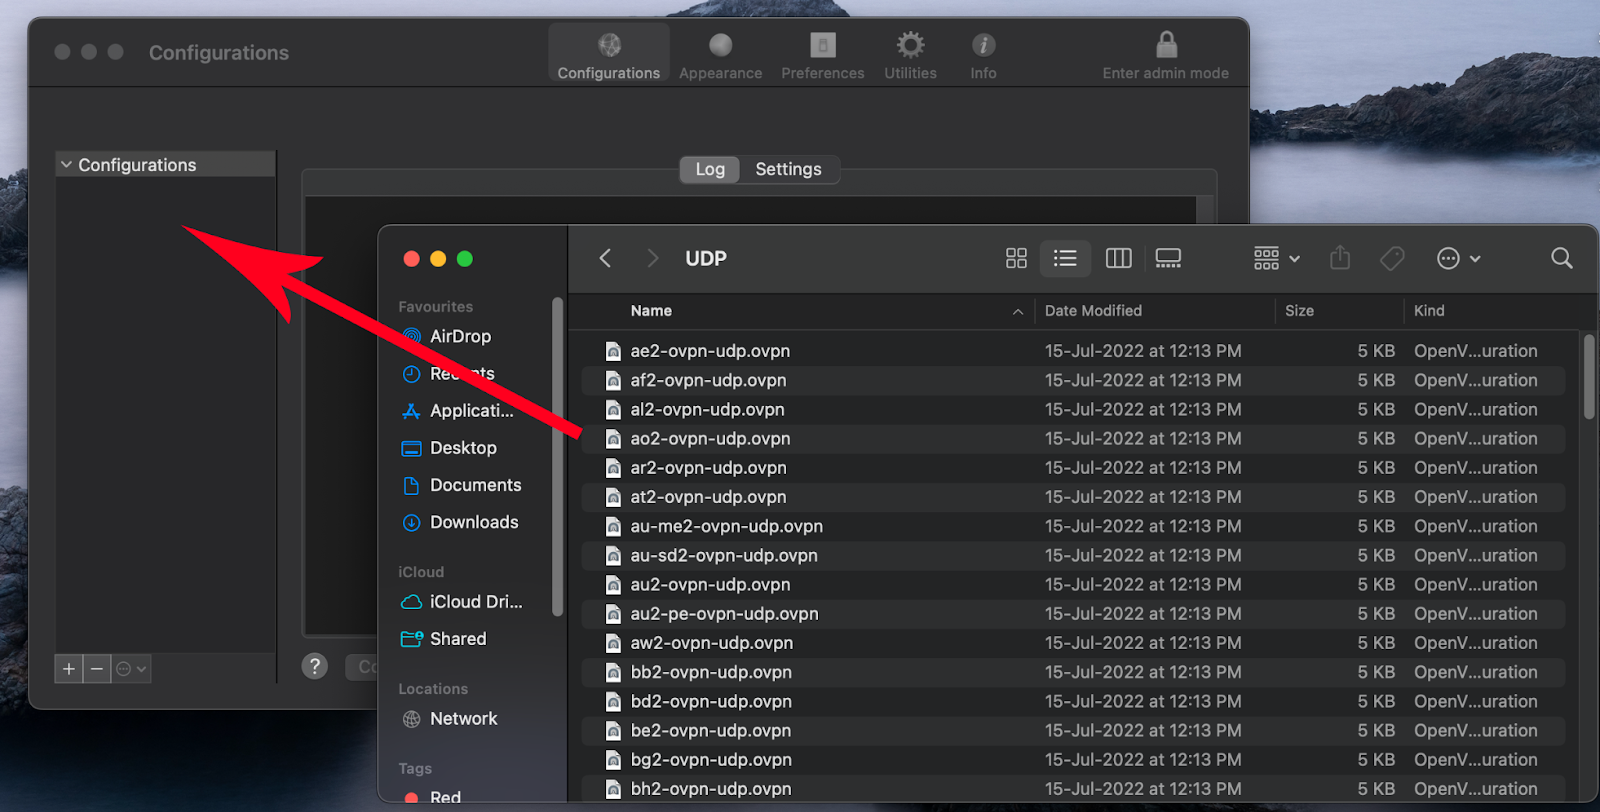
- Take the .ovpn file you downloaded earlier and move it by dragging and dropping it from your Downloads folder to the Configurations tab within Tunnelblick.
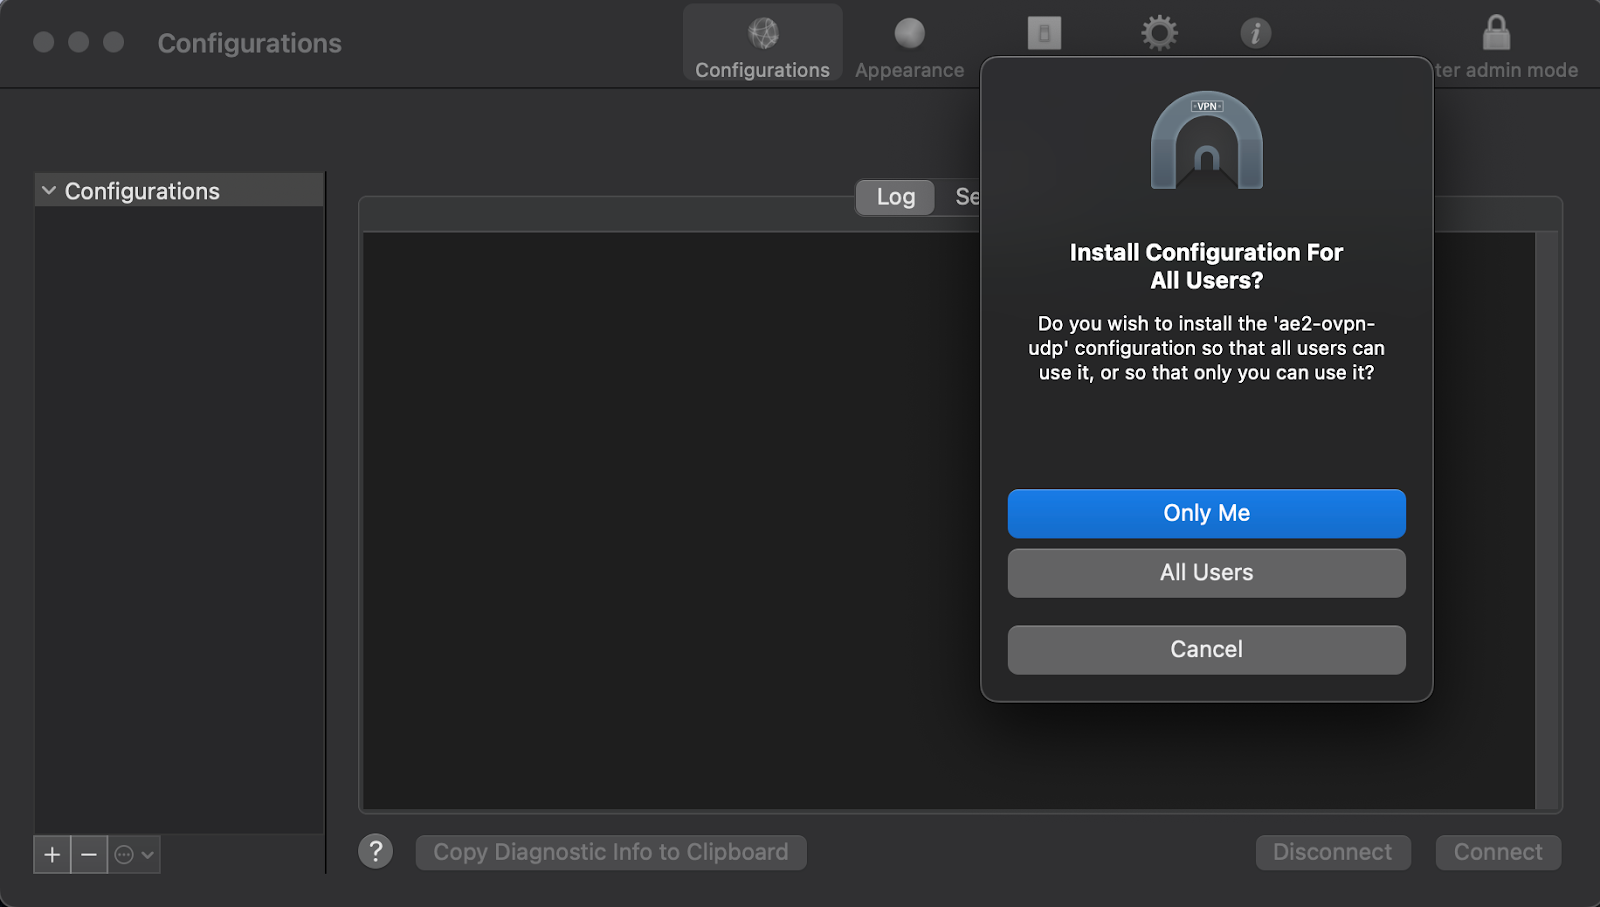
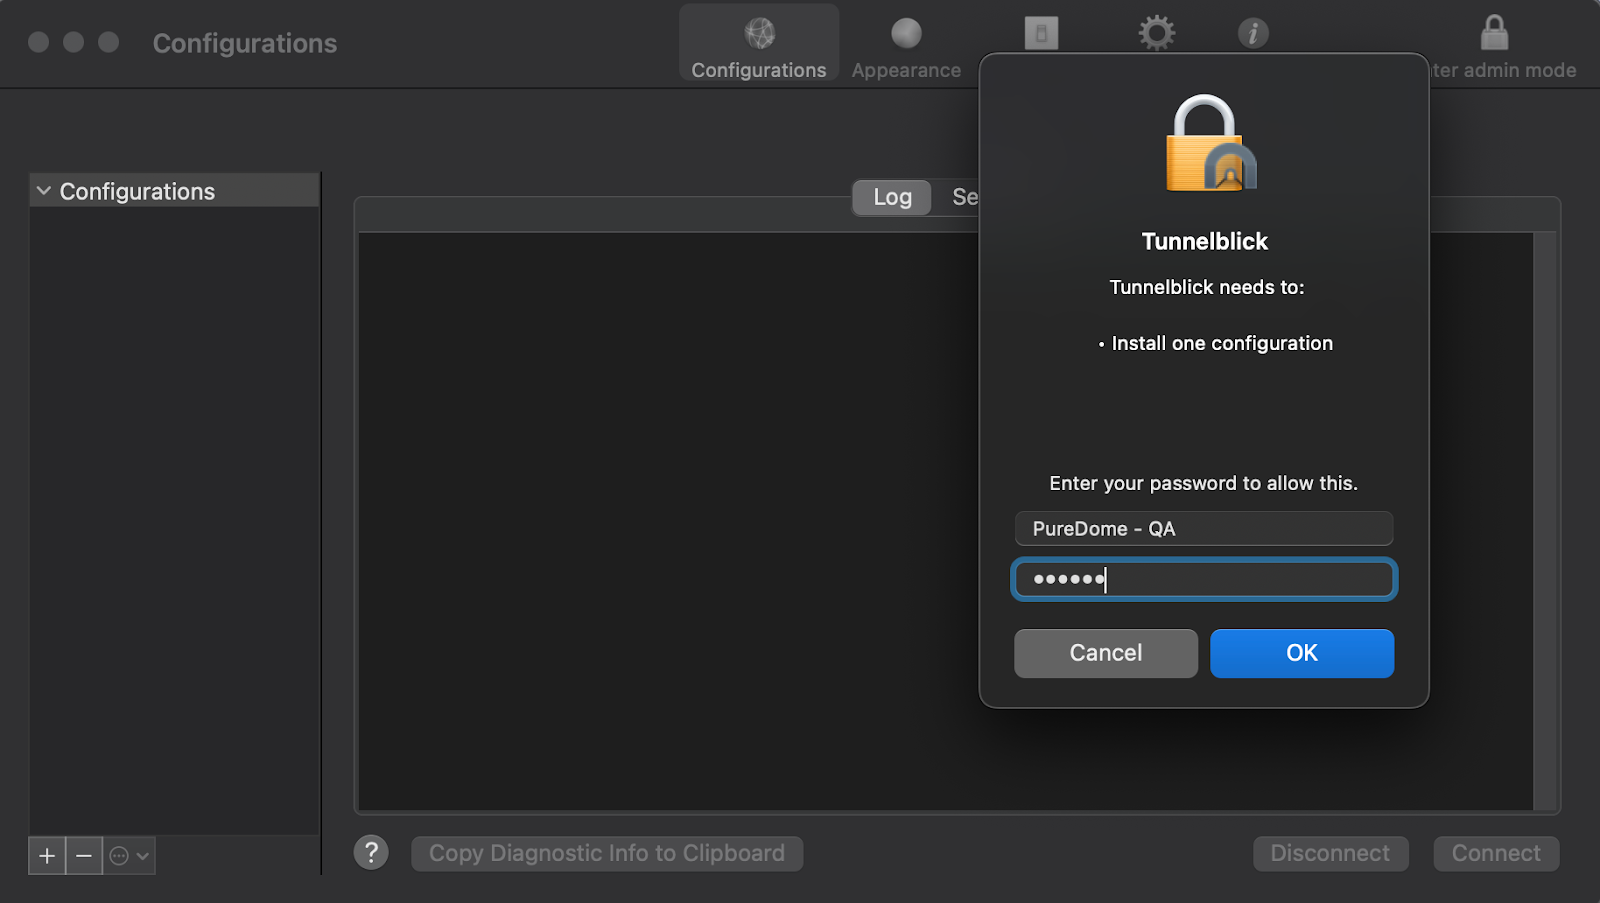
- A pop-up will appear, asking you if you want to install the configuration profile for just your user or for all users on your macOS. Choose the option you prefer.
- You will be asked to enter your macOS password.
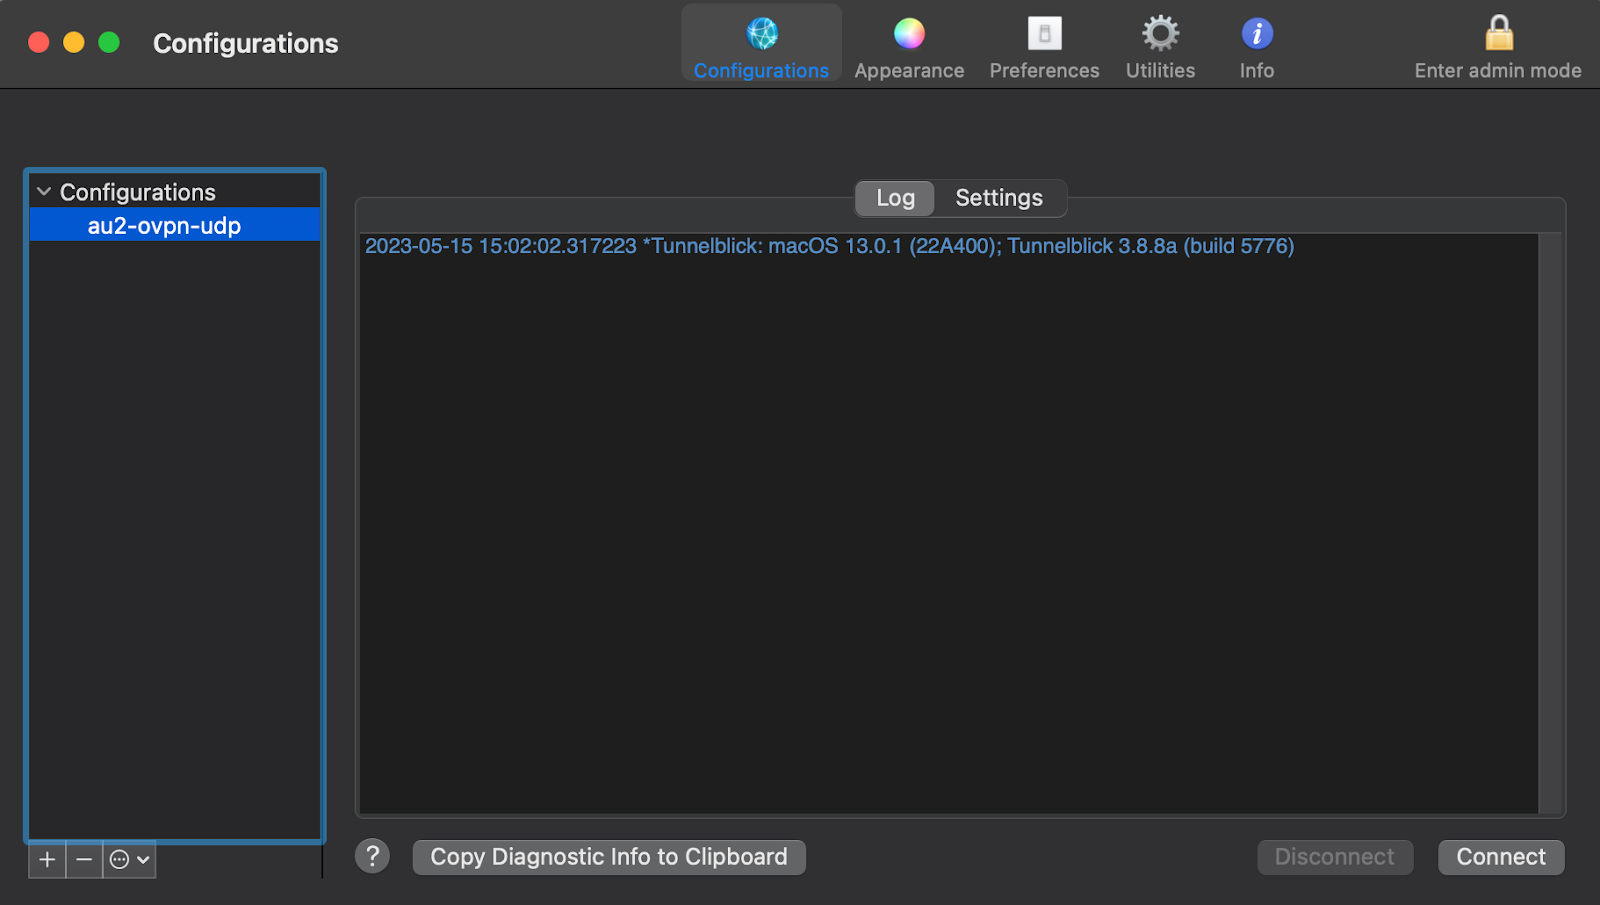
- Click Connect.
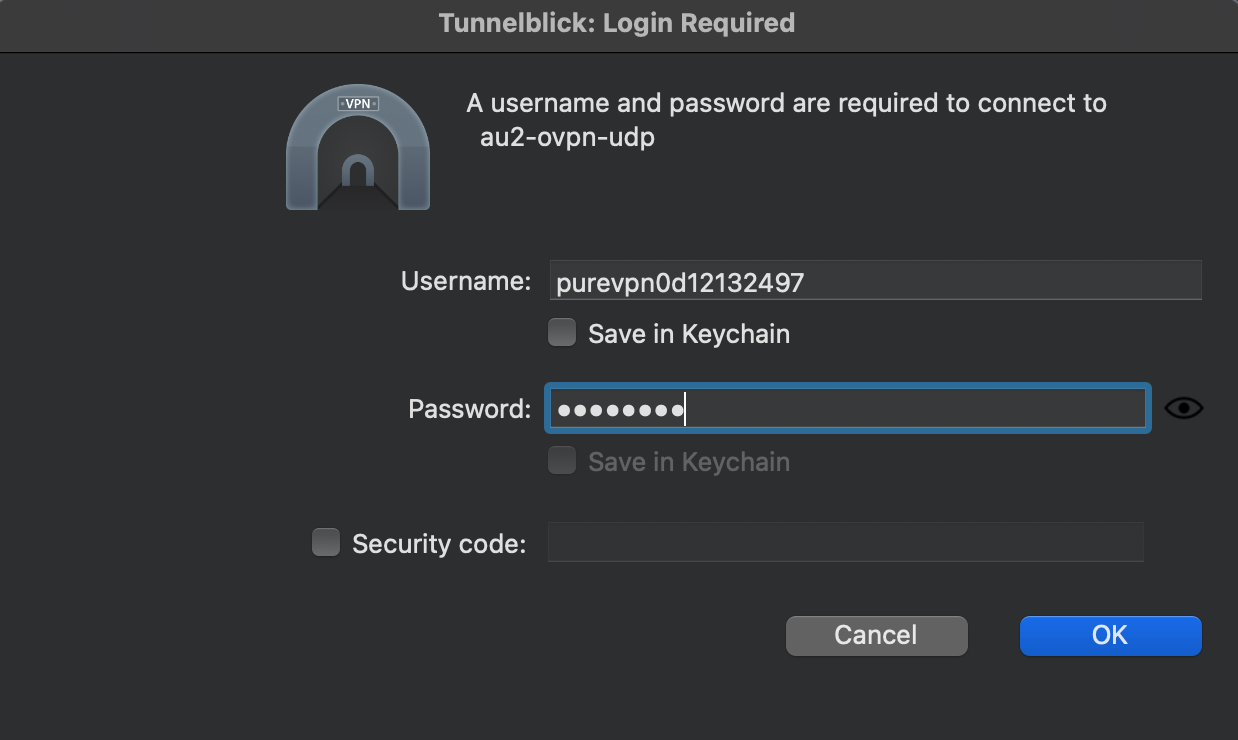
- Enter your PureDome credentials, mark the box Save in Keychain, and click OK.
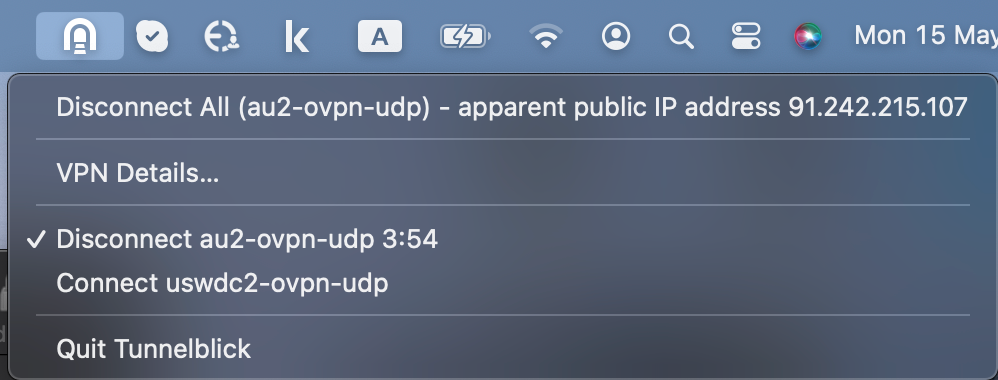
- Once you see the Initialization Sequence Completed in the logs, it indicates that you are now successfully connected to the PureDome’s server. You can also see the status of your VPN connection from the Tunnelblick icon in your status bar. To disconnect, click Tunnelblick icon in your status bar and select Disconnect in the drop-down menu.
Note: In order to connect with your dedicated IP/ gateway account through OpenVPN, please contact the administrator of your PureDome account. They will be able to log into the console at app.puredome.com and provide you with the server name for your dedicated IP/ gateway account.
Once you have the server name, open any OpenVPN file via text editor such as notepad and replace the server address in the file with the server address for your dedicated IP/ gateway account. Save the file and upload it into OpenVPN GUI to make a connection.
If you have any questions or are experiencing any issues, please don't hesitate to contact our 24/7 customer support team via live chat or email at support@puredome.com. We're always happy to help!