
To access PureDome applications, users have the option to verify their identity using Azure AD Single Sign-On (SSO).
How to enable Azure AD SSO?
Below are the steps to configure Azure AD SSO integration:
Step 1 - Setting up SSO Application on Microsoft 365/ Azure AD
- You will first need to login to the Azure Portal. Once logged in, navigate to Azure Active Directory > App Registrations > New Registration to create a new Azure Active Directory Application.

- Enter Name, and select Accounts in any organizational directory (Any Microsoft Entra ID tenant - Multitenant). Then in Redirect URI (optional), select Web and enter the following URL:
https://login.puredome.com/oauth2/callback
Step 2 - Configuring the Client ID and Client Secret
- Under the Overview > Essentials section, note the Application (client) ID and the Directory (tenant) ID. These will be used respectively as the Client ID value and to construct the Issuer URL value in your PureDome Identity provider configuration.

- Now, you need to create a new Azure AD application secret. Navigate to Azure Active Directory > App Registrations > {Your Application - in our case PureDome} > Certificates & secrets > New client secret to create a new Azure AD application client secret. Copy this Value ID into a text file for later use.

Step 3 - Configuring the Issuer URL
- The Microsoft URL may diff across national clouds, so you will need to review the Microsoft documentation to ensure you have the correct URL for your region. For the Microsoft global Azure AD service, the URL is as follows, where {tenantId} is the Directory (tenant) ID previously noted while creating our Azure AD Application.
https://login.microsoftonline.com/{tenantId}/v2.0Step 4 - Managing user access
- In the application, go to Users and groups, and click + Add user/group. Choose who should have access, and click Assign.
Step 5 - Adding a new identity provider
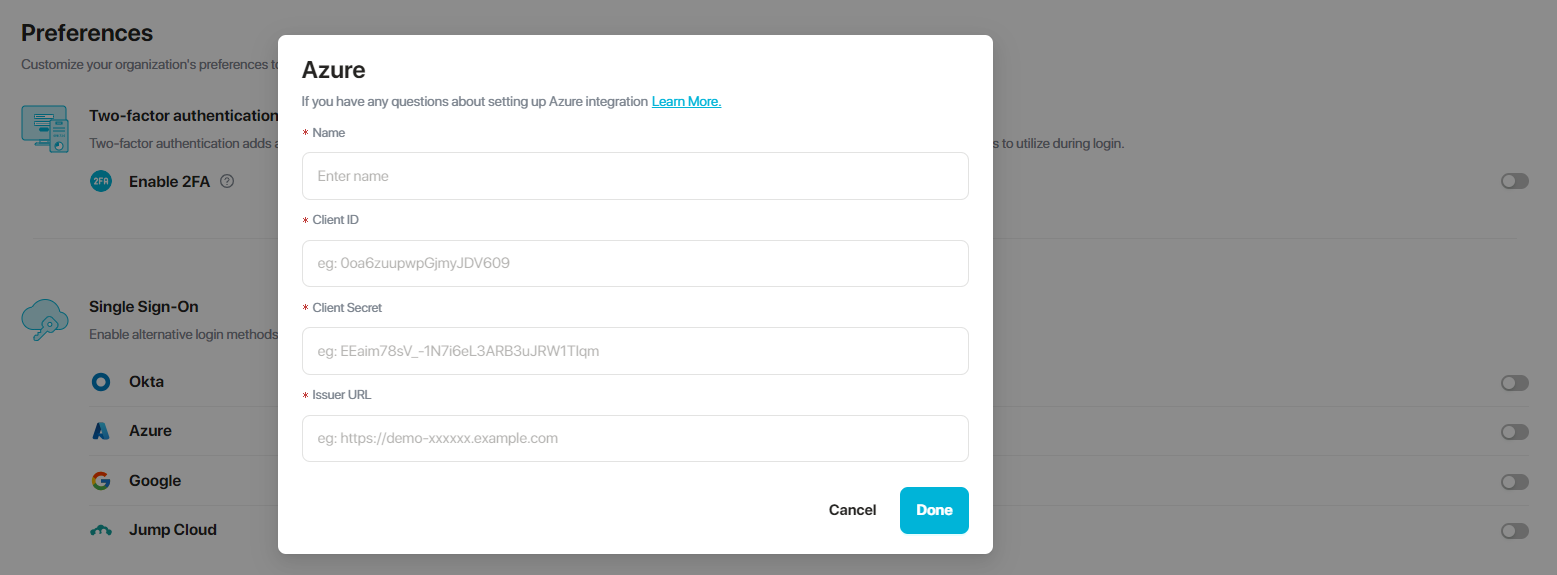
- Now, you can head to the PureDome console on your browser, and navigate to Integrations and Single Sign-On. By choosing Azure you will be asked to enter four values as follows:
- IDP Name: Any name you want
- Client ID: Value copied from Microsoft Azure dashboard
- IDP Client Secret: Value copied from Microsoft Azure dashboard (Value ID)
- Issuer URL: URL created in Step 3 (Configuring the Issuer URL)
- After completing all the steps above, you have successfully set up an OIDC application on your Microsoft 365/ Azure Active Directory (Azure AD) with SSO enabled for PureDome.
How to enable Azure SCIM?
Below are the steps to configure Azure SCIM integration:
Step 1 - Setting Up SCIM in the PureDome Console
- After enabling SCIM, you will find the SCIM Base URL and OAuth Bearer Token values in their respective tabs. Be sure to copy these values for future use.

- In the SCIM section, you’ll also see options for auto-assigning and auto-purchasing licenses. If you’d like, go ahead and enable those features!
Step 2 - Setting up Secure Web Authentication (SWA) Application on Azure
- Start by logging into the Azure Portal. Then, go to Applications > Enterprise applications and select New application.

- On the next screen, click Create your own application.

- Give your application a name, and then select Integrate any other application you don't find in the gallery (Non-gallery).

Step 3 - SCIM Integration Setup Process
- Once the application is set up, go to the Provisioning section.

- Under Provisioning, select Get started.

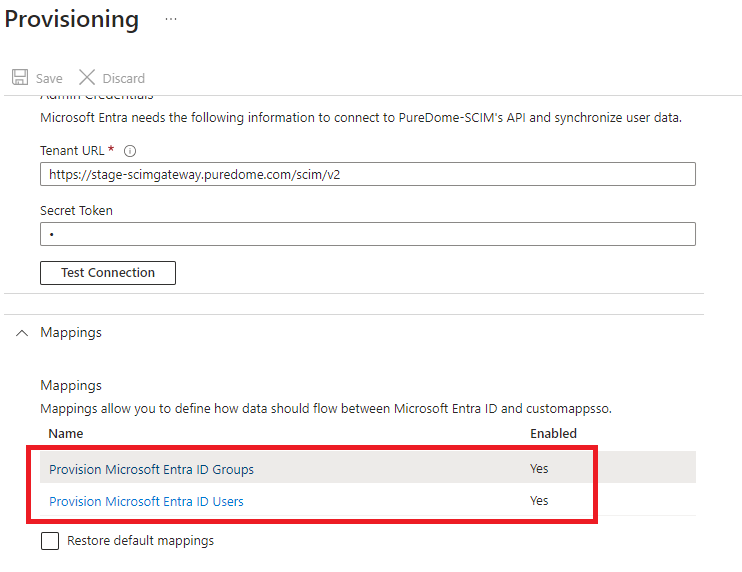
- Set Provisioning Mode to Automatic. Then, under Admin Credentials > Tenant URL and Secret Token, enter the values you can find in the PureDome console once you activate SCIM integration under the SCIM Base URL and OAuth Bearer Token tab. Enter the value from the PureDome SCIM Base URL in the Tenant URL field and the value from the PureDome OAuth Bearer Token in the Secret Token field. Finally, click Test Connection.


- You'll see a message saying the connection is successful. After that, click Save. Your SCIM integration is now set up. Next, you need to assign the SCIM application to users and groups

Step 4 - Managing user access
- Go to Groups > All groups and create a New group. Give your group a name and add users to it.

- Once you've created a group, go to the provisioning page of your application and click Edit provisioning.

- In the mappings section, select Provision Microsoft Entra ID Group and Provision Microsoft Entra ID Users.
- Set Enabled to No and click Save.

- The final step is to assign the SCIM application to the group you just created. To do this, return to Applications > Enterprise applications, select your application, and click Assign users and groups. Once you've linked the application from Azure to either specific users or groups, return to the PureDome console. You'll see a list of users with the status "Inactive." Choose the users you want to give licenses to. Then, click Assign License to apply for the licenses.

- Or if you aim to sync an entire Azure group to PureDome as a team, remember to add it under the Users and Groups tab as well.
Note:
- Single-Sign-On (SSO) will be enabled for the PureDome console and apps.
- Only users/groups assigned in your organization to this application will be able to log in subject to being invited to the PureDome console via their registered email address on their Microsoft 365/ Azure Active Directory (Azure AD) account.
Note:
Supported app versions for SSO:
Windows: v2.1.6.8 and above
macOS: v2.1.3 and above
iOS: v2.1.2 and above
Android: v2.4.34 and above
If you have any questions or are experiencing any issues, please don't hesitate to contact our 24/7 customer support team via live chat or email at support@puredome.com. We're always happy to help!