Starting June 15th, 2021, PureVPN will discontinue offering support for PPTP, L2TP, and SSTP protocols on the majority of VPN locations. However, at the popular request of our users, we will continue to support the following locations for users to connect using PPTP, L2TP, and SSTP protocols: 👇
Open Embedded Linux Entertainment Center (OpenELEC) is a Linux-based operating system built as a platform to turn your computer into a Kodi media center. Follow this guide to set up PureVPN on OpenElec.
Learn how you can set up PureVPN on OpenELEC via OpenVPN and PPTP protocol to make the most of it.
How to Configure PPTP
OpenELEC supports OpenVPN and PPTP VPN protocols. Let's check out the configuration for PPTP protocol.
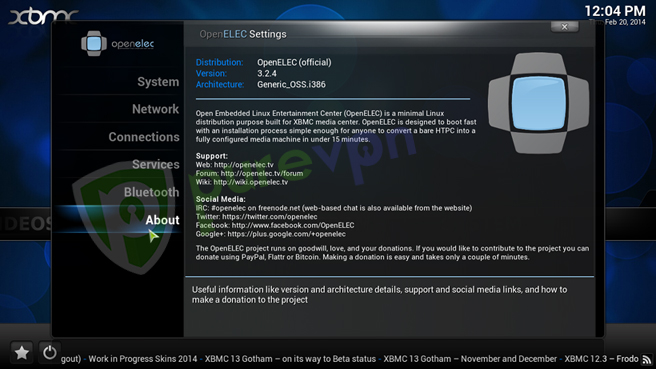
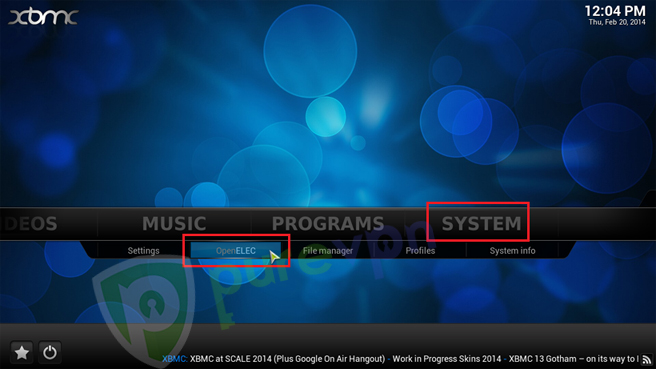
From System, click OpenELEC.
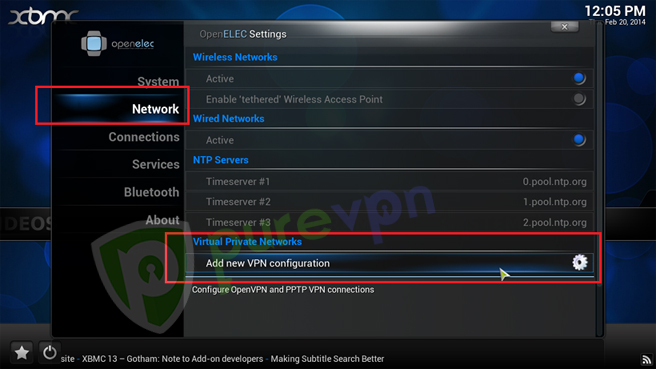
Click Network then click Add new VPN configuration.
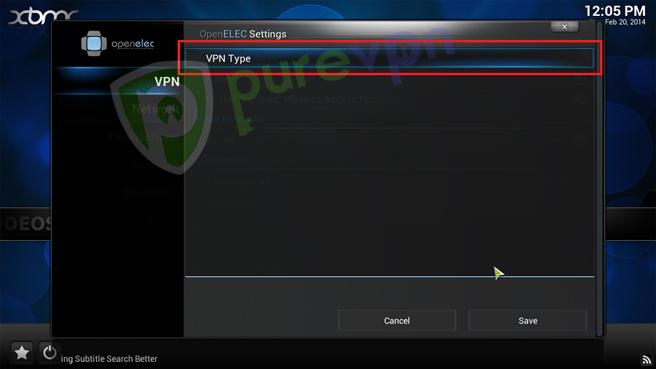
Click VPN Type.
Select PPTP.
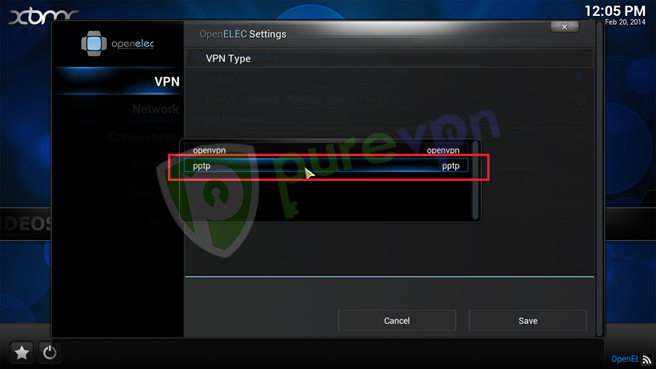
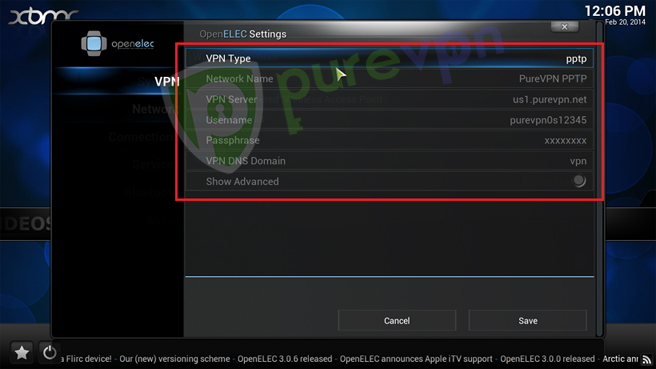
- Insert the following info:
- In Network Name as PureVPN PPTP etc.
- Enter your PureVPN credentials. Click 👉 here to know how to find your VPN credentials.
- Leave VPN DNS Domain as default.
- Click Show Advanced.
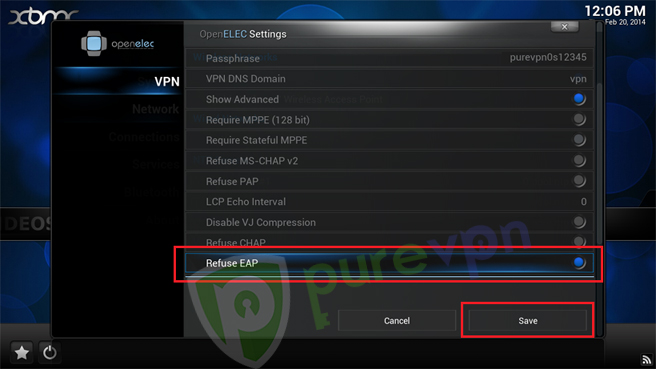
Select Refuse EAP and hit Save.
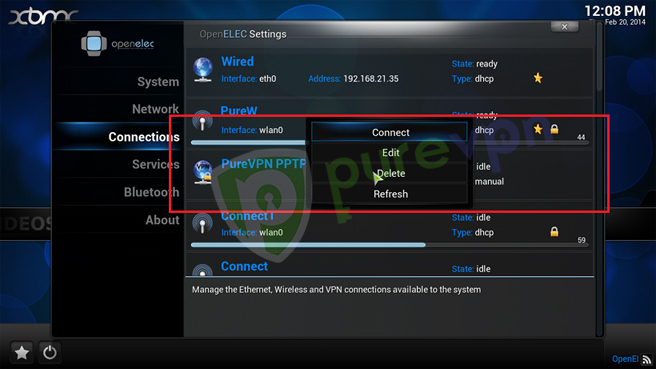
Click newly created VPN connection PureVPN PPTP and hit Connect.
At the bottom right, you'll see a Working icon.
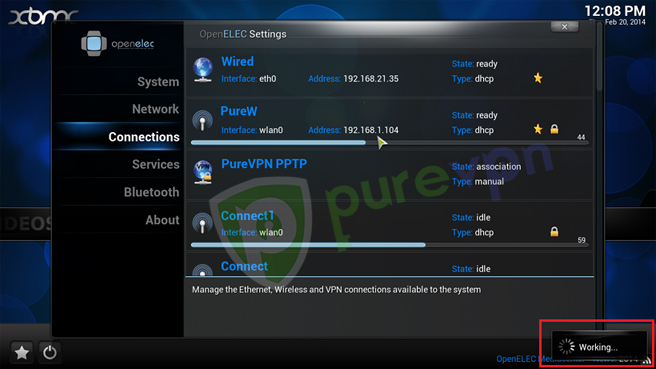
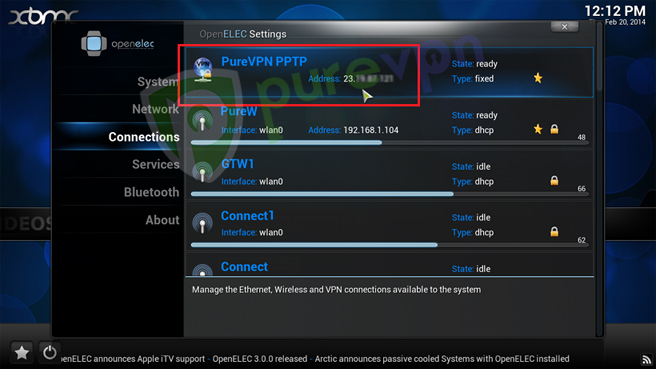
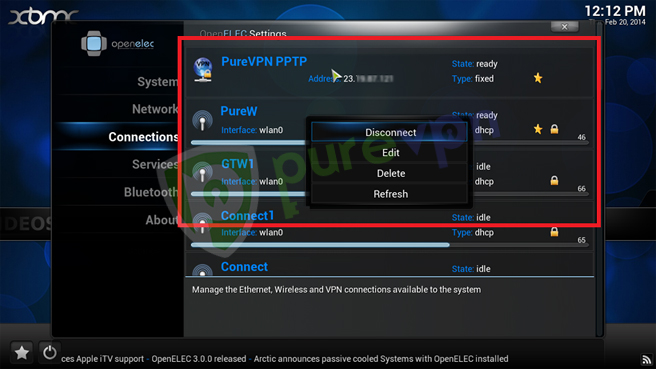
A lock icon will appear to show VPN connection has been established.
How to Configure OpenVPN
OpenELEC / XMBC / KODI doesn't offer any option to change the OpenVPN port and works on default OpenVPN port 1194. In order to configure OpenVPN on OpenELEC / XMBC / KODI you need to modify .ovpn file and use WinSCP.
First download the following:
Download WinSCP from 👉 here
Download OpenVPN files from 👉 here
Now create a new text file pass.txton your dekstop and insert VPN Username and password. Username in first line and password in second line.

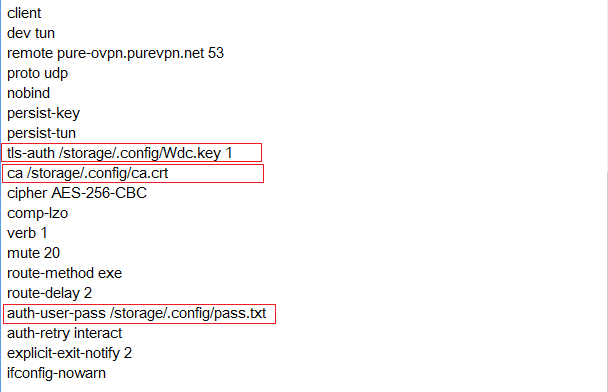
- Now open downloaded OVPN File and edit the following lines.
- tls-auth totls-auth /storage/.config/Wdc.key 1
- ca ca.crt toca /storage/.config/ca.crt
- auth-user-pass toauth-user-pass /storage/.config/pass.txt
Your OVPN files should look like this, save it.
- Start WinSCP and transfer Ca.crt, WDC.KEY, OVPNFILE and Pass.txt to. config folder Default User is root and Password is openelec
- Start WinSCP Open Terminal from commands menu or press Ctrl+T
Insert below command: (replace Your-OVPN-Filename.ovpn with the .ovpn file you use) openvpn /storage/.config/Your-OVPN-Filename.ovpn in my case it is Chicago-IL.ovpn openvpn /storage/.config/Chicago-IL.ovpn Click Execute and wait for few seconds and you will be connected. You may verify your IP by using the following command: curl ifconfig.me or you may install any browser from the Program repo Note: If you face any disconnection issue, then we recommend you to delete the auth-nocache parameter from .ovpn configuration file and then re-connect VPN, hopefully this will resolve disconnection issue.
Delete