To take advantage of PureVPN across all your devices via your D-Link router, follow this guide. We used the D-Link DIR 842 (Firmware Version L 2.x) for this tutorial. There are many models of D-Link routers, and while not all of them can be covered here, this should give you a general idea of the setup process. Here's what you need to do to set up a VPN on your D-Link router:
Find your VPN credentials for manual configuration
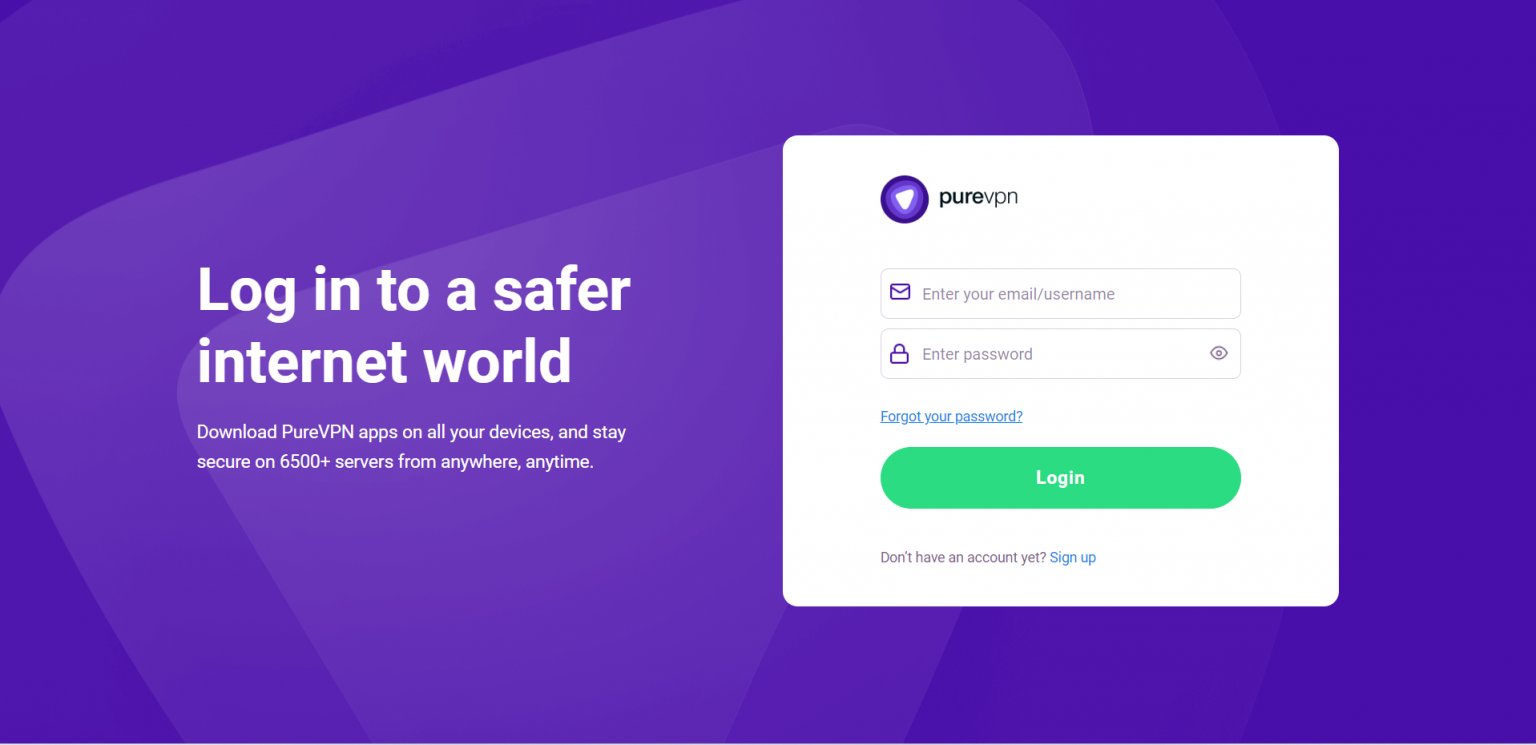
To find your VPN credentials log into the PureVPN Member Area. Click 👉 here to visit Member Area.
Login to the Member Area using your PureVPN registered email address and password.
On Subscription tab scroll down to be able to view your VPN credentials.
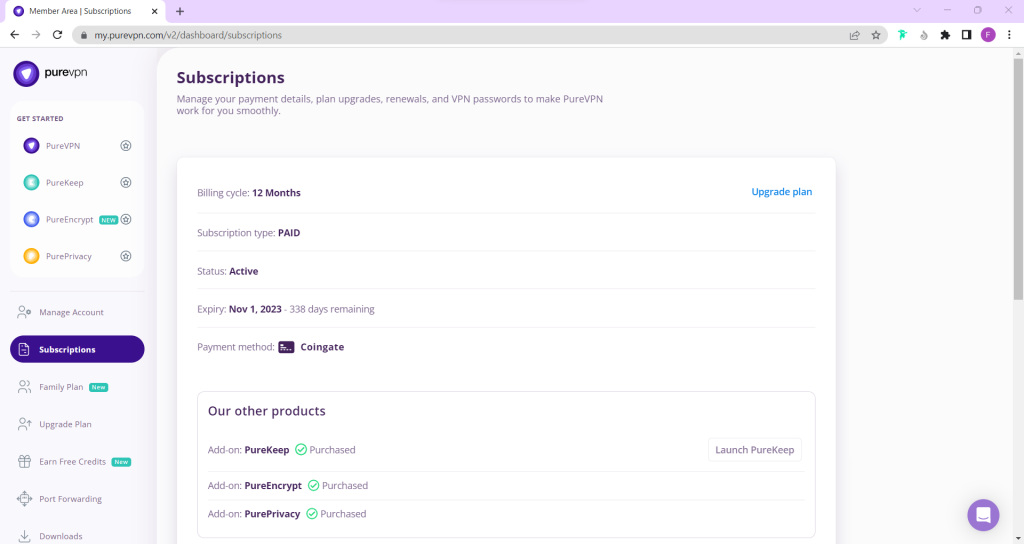
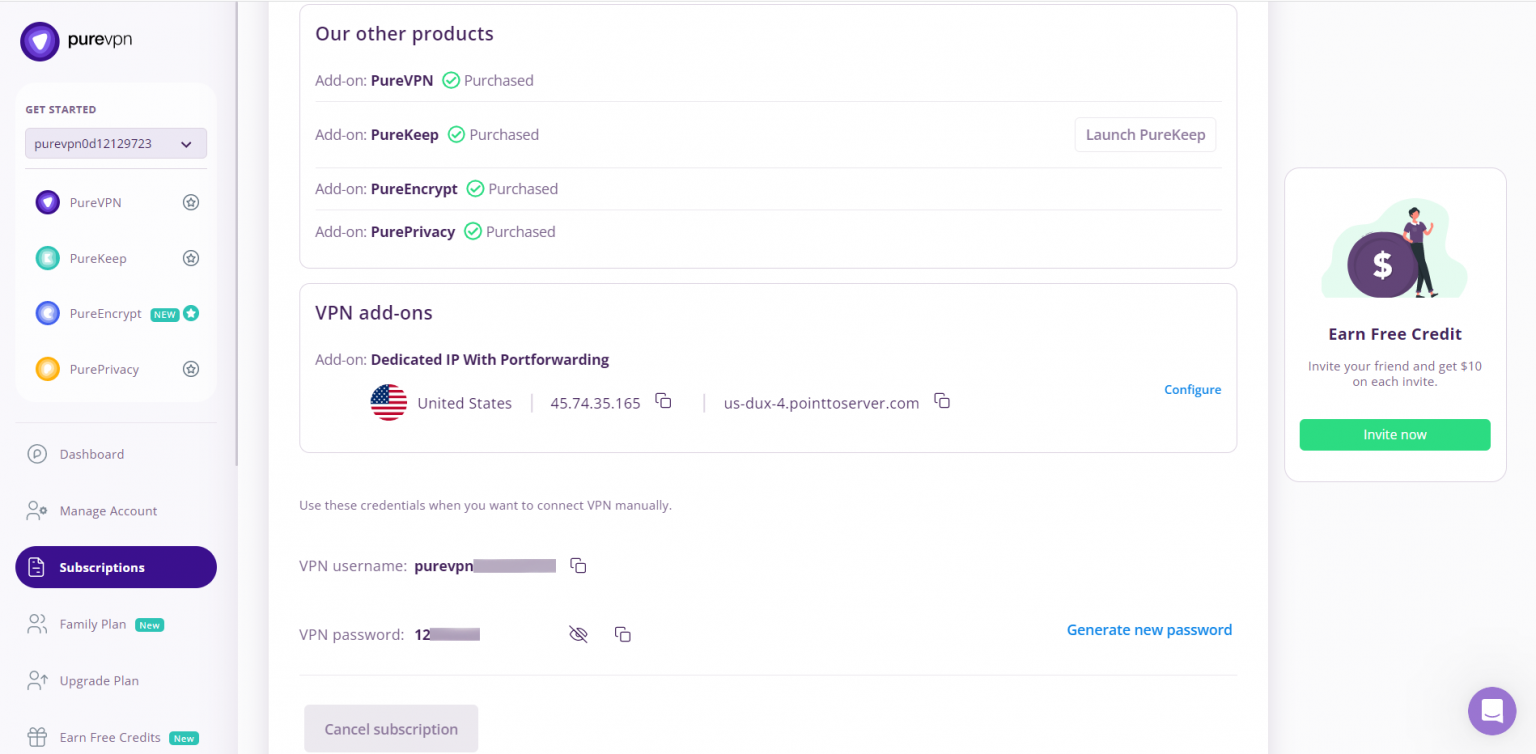
- You will be able to see and copy your VPN credentials.
- Note down your PureVPN username and click the Eye icon to make your password visible and use it in the manual configuration.
How to download DD-WRT firmware on D-Link router
- To download the DD-WRT firmware files according to your D-link router, please visit 👉 this link to download your router files for DD-WRT firmware.
How to install DD-WRT firmware
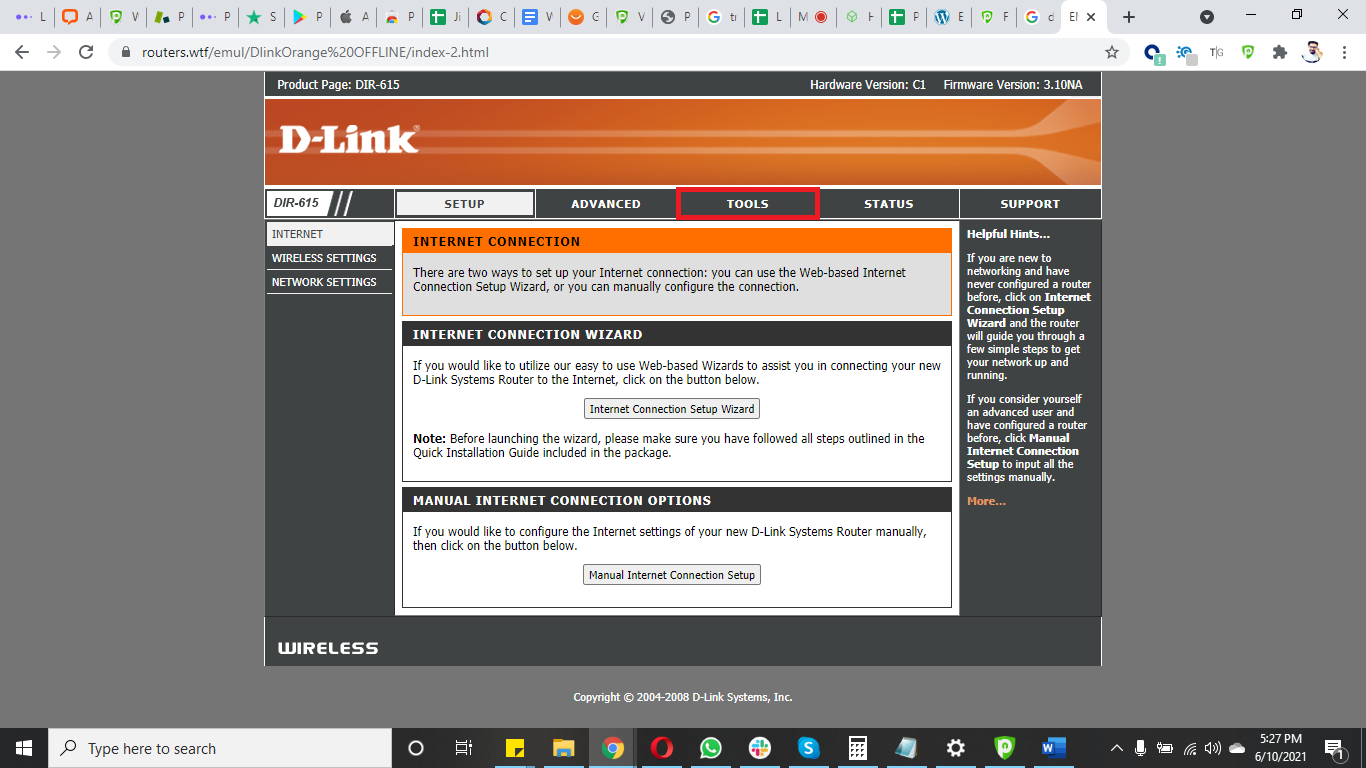
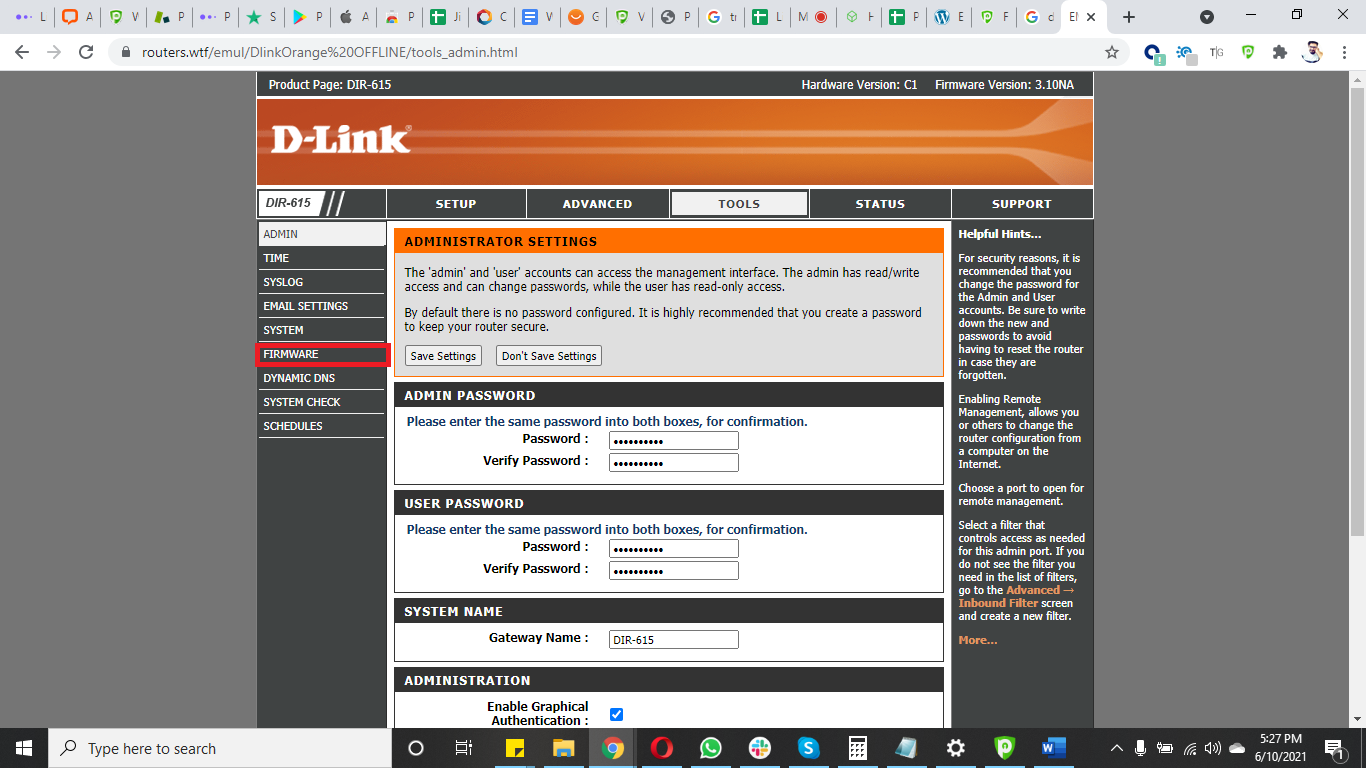
- Login to your D-link router and click Tools.
- Click Firmware from the left.
- Click Browse and select the downloaded DD-WRT firmware file.
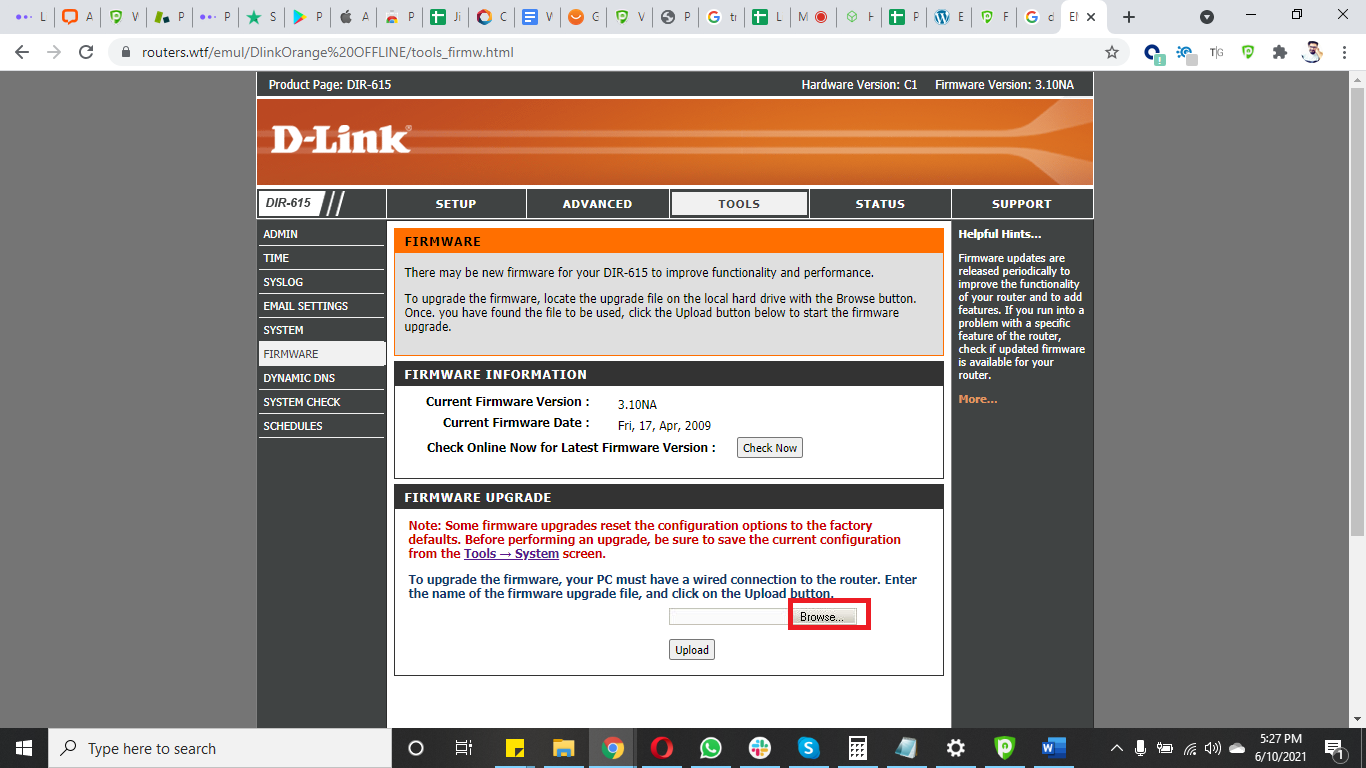
- Click Upload.

Congratulations! Firmware upgraded to DD-WRT.
How to set up OpenVPN on DD-WRT firmware
First, you need to👉 download all OpenVPN files. Once downloaded, extract the files.
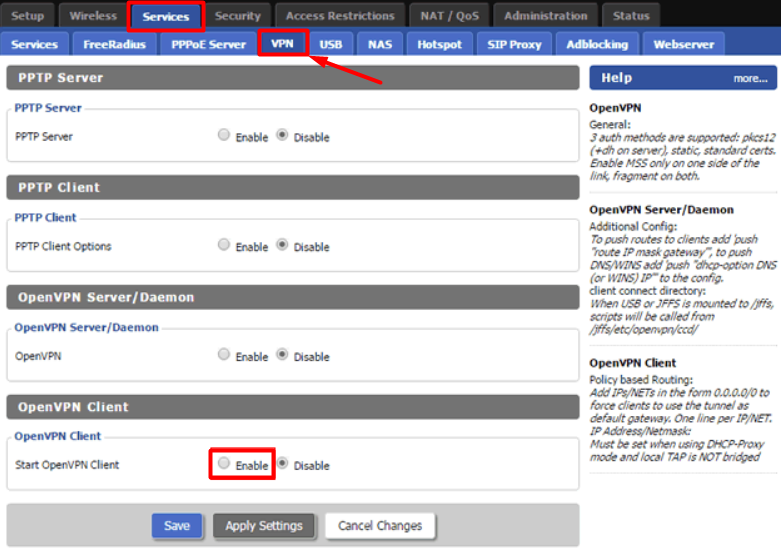
- Open your DDWRT Control Panel and select Services then go to VPN tab and Enable OpenVPN Client.
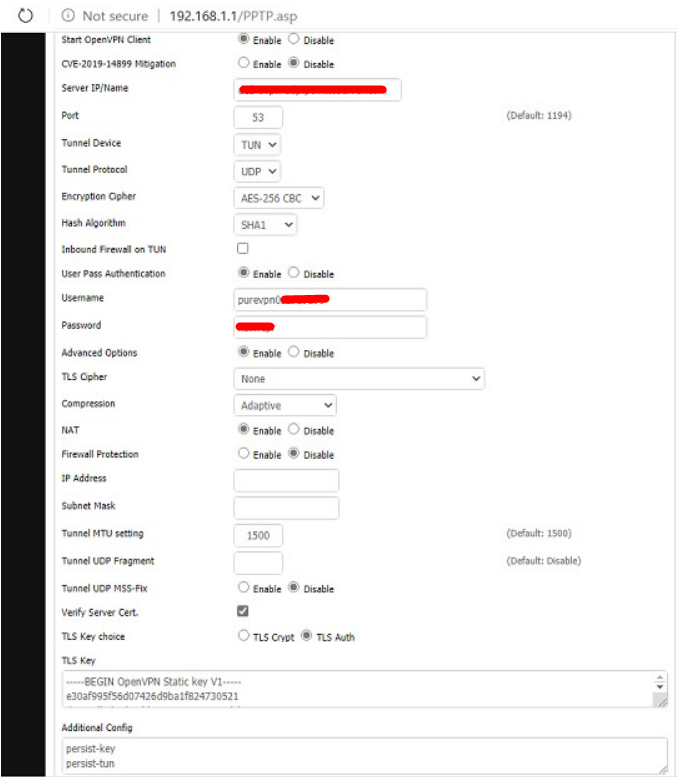
Now configure your OpenVPN client as shown below:
- OpenVPN Client: Enable
- CVE Mitigation: Disable
- Server IP/Name: Enter your desired location’s TCP/UDP server address here. Server list can be accessed from👉 here
- Port: 80 (For TCP)/ 53 (For UDP)
- Tunnel Device: TUN
- Tunnel Protocol: TCP/UDP
- Encryption Cipher: AES-256-CBC
- Hash Algorithm: SHA-1
- Inbound Firewall on TUN: Uncheck
- User Pass Authentication: Checked
- Username and Password: Enter your PureVPN credentials. Here is how you can 👉find your VPN credentials.
- Advanced Options: Enabled
- TLS Cipher: None
- Compression: Adaptive
- NAT: Enable
- Firewall Protection: Disable
- Tunnel UDP MSS-Fix: Disable
- Verify Server Cert.: Checked
- TLS Key Choice: TLS Auth
- TLS Key: Copy and paste all the content from the key file you have downloaded with the OpenVPN configuration files.
- Additional Config:
- persist-key
- persist-tun
- CA Cert: Copy and paste all the content from the crt file you have downloaded with the OpenVPN configuration files.
- Click Save and then Apply Settings button.
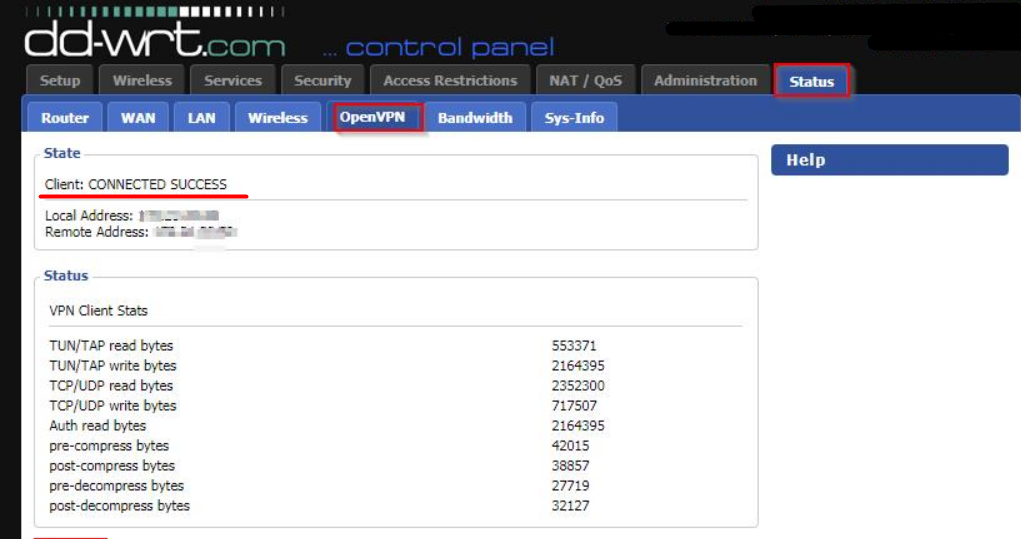
- Now navigate to the Status tab then OpenVPN to check the connection Status.