
Learn how to set up OpenVPN on your TP-Link Omada router with this comprehensive step-by-step tutorial. Enhance your network security and privacy by configuring OpenVPN, allowing secure remote access to your local network from anywhere.
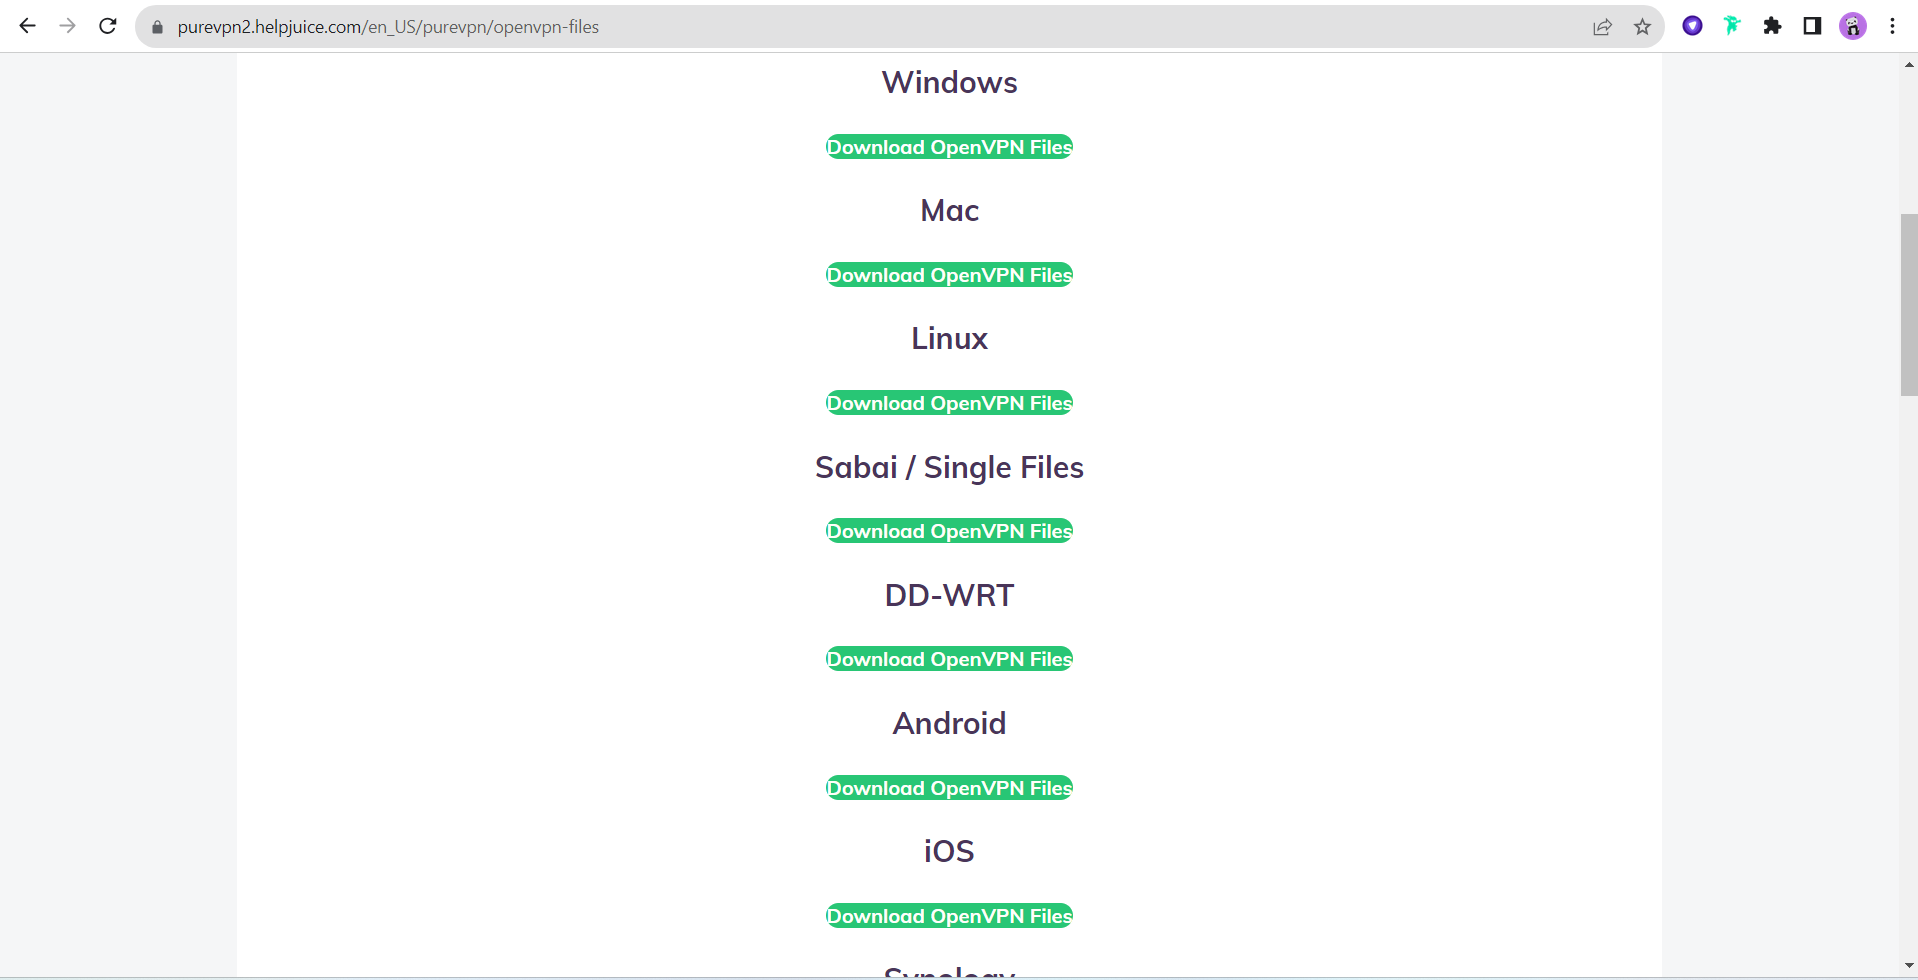
- Start by visiting the PureVPN support center to download the PureVPN OpenVPN Configuration files for your router. Extract the files after downloading from this link.
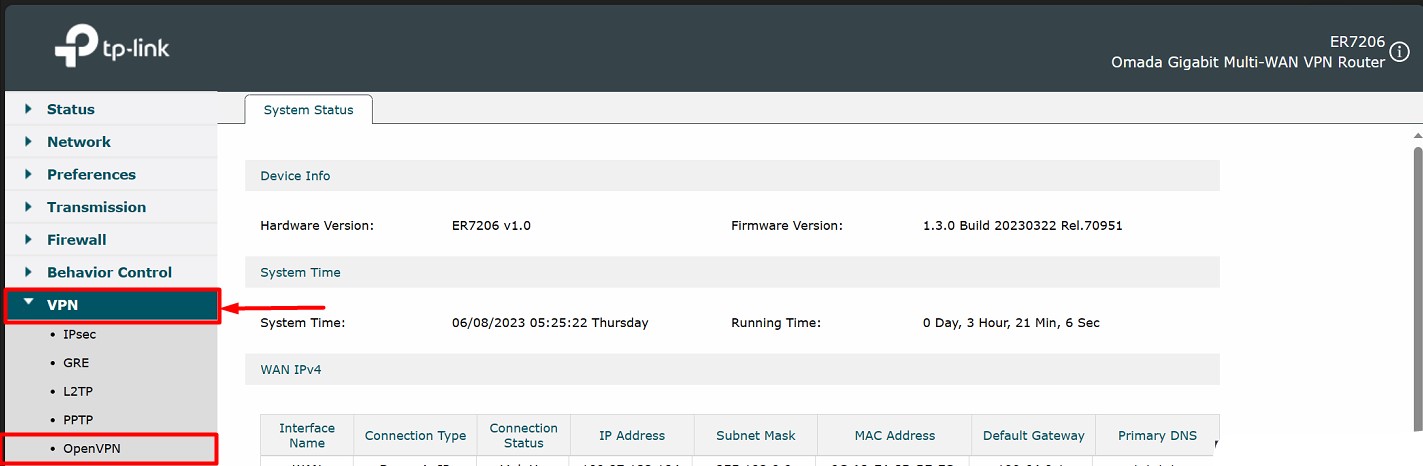
- Next, log in to your router's control panel. Look for the VPN section and select the OpenVPN tab.
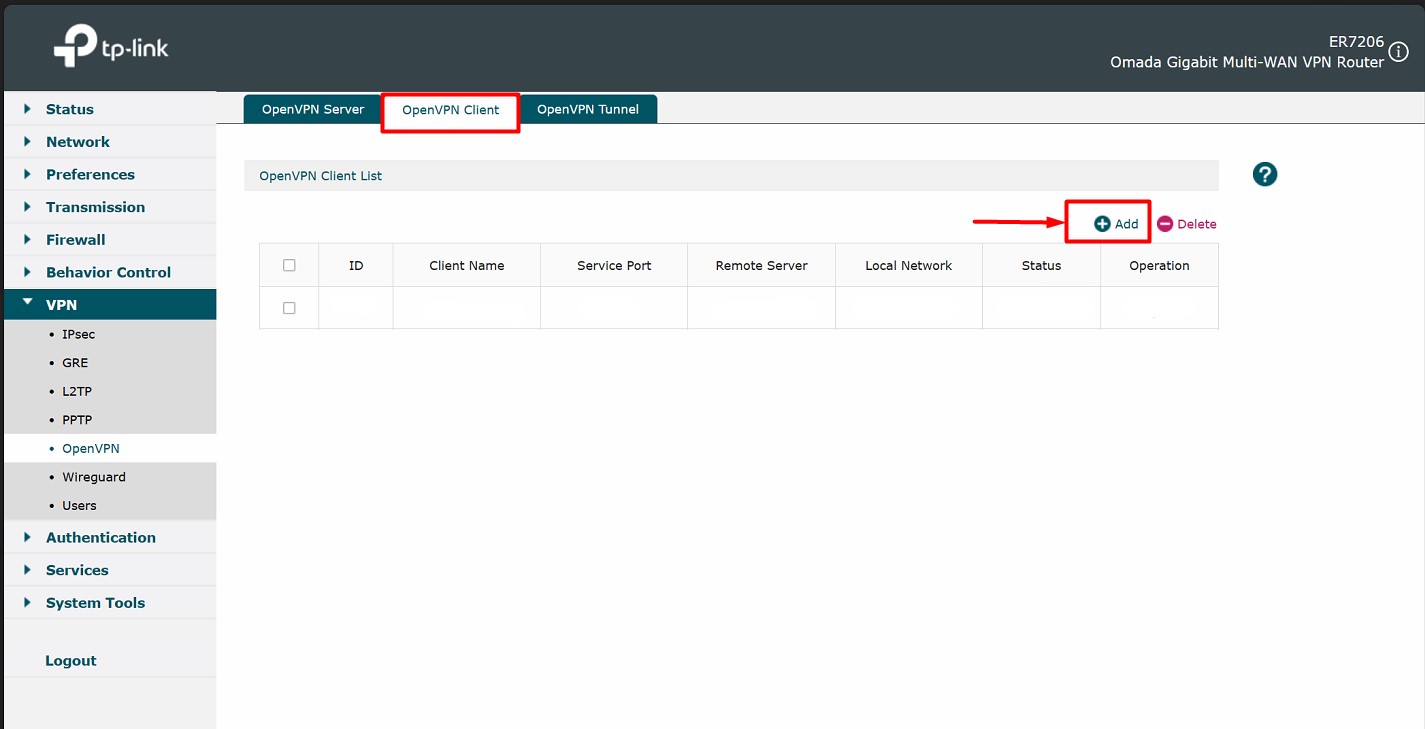
- Within the OpenVPN tab, locate and click on the 'OpenVPN Client' option. Then, click on the '+ Add' button to create a new OpenVPN profile.
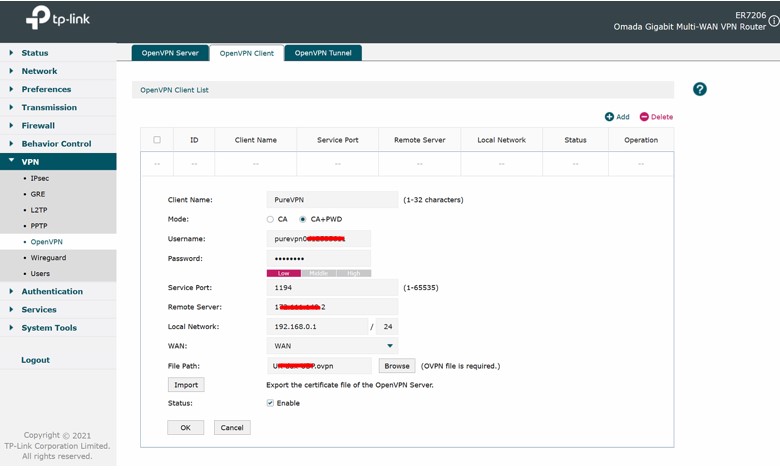
Fill in the profile details as instructed below:
- Client Name: PureVPN
- Mode: CA+PWD
- Enter your PureVPN credentials. Here is how you can find your VPN credentials.
- Service Port: Use 80 for TCP or 1194 for UDP
- Remote Server: Choose your desired OpenVPN server from the server list
- provided by PureVPN. Convert the server name into an IP address. You can find the server list here.
- Local Network: Enter your local Network IP or Gateway IP
- WAN: WAN
- File Path: Upload the OpenVPN file you downloaded in Step 1
- Status: Enabled
- Click OK to save the profile
- Congratulations! The PureVPN OpenVPN connection is now activated on your TP-Link Omada router.
