
安装 OpenVPN 图形用户界面:
- 从👉这里下载 PureVPN OpenVPN 安装程序并将其解压到您的桌面上。
- 从👉这里下载 PureVPN OpenVPN 文件并将其解压到您的桌面上。
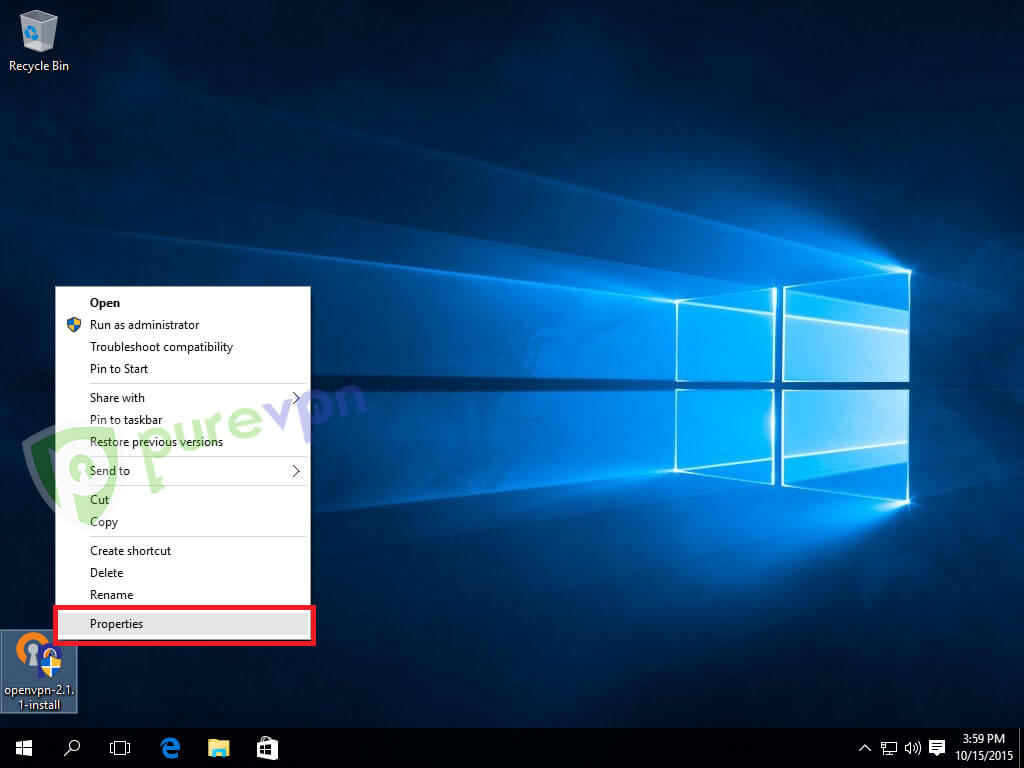
- 右键单击 OpenVPN 安装程序并选择属性。
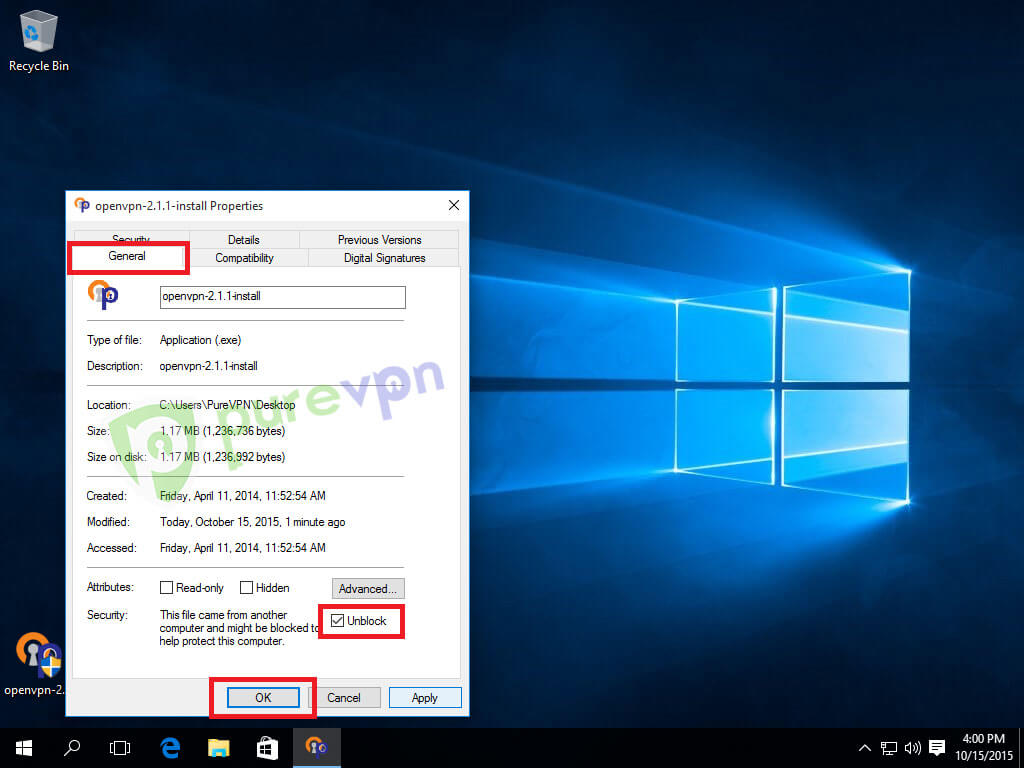
- 在常规选项卡中,选中取消阻止、应用并确定
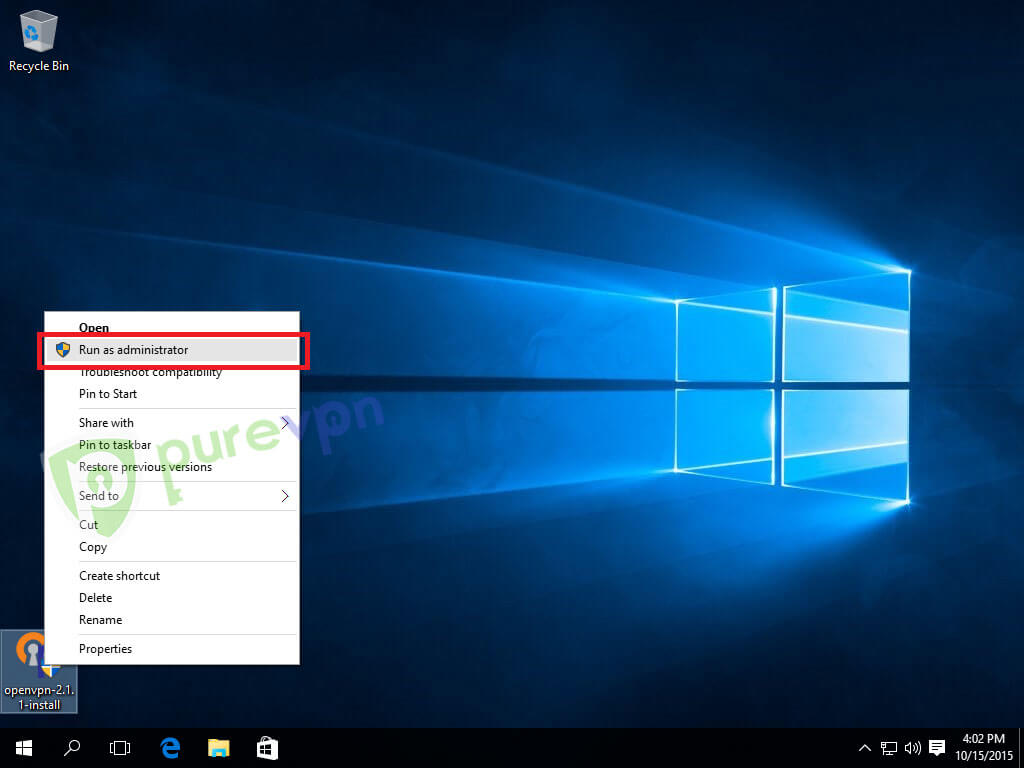
- 右键单击 OpenVPN 安装程序并选择以管理员身份运行
- 单击“是”以允许安装
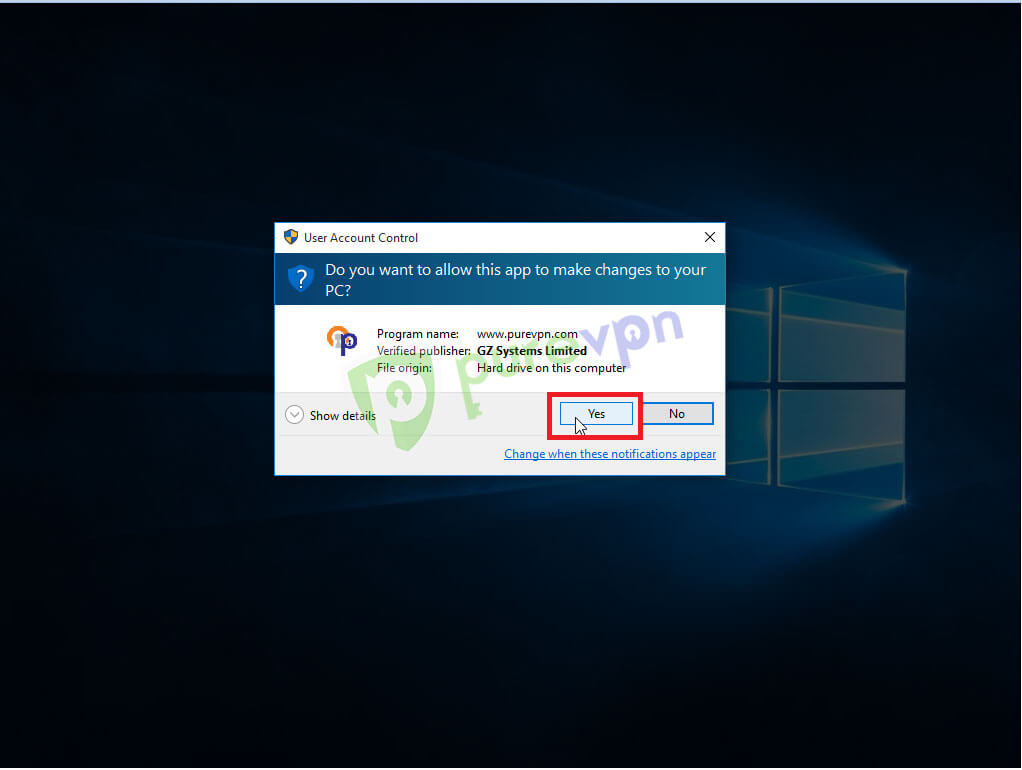
- 单击“是”以允许安装

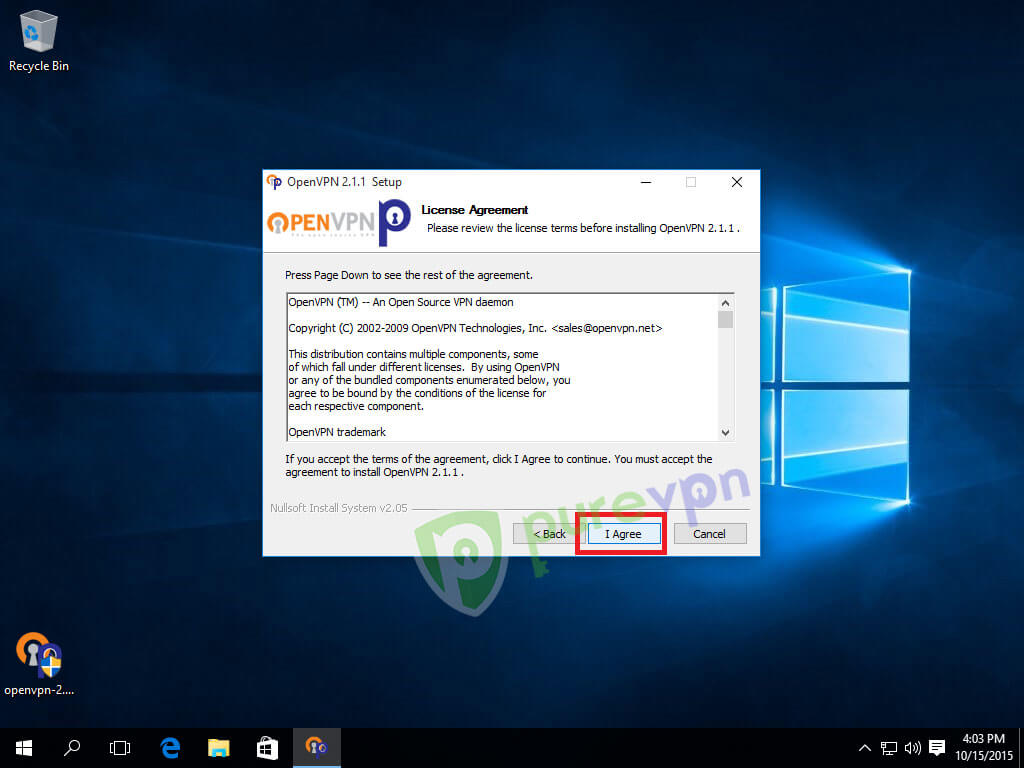
- 点击我同意
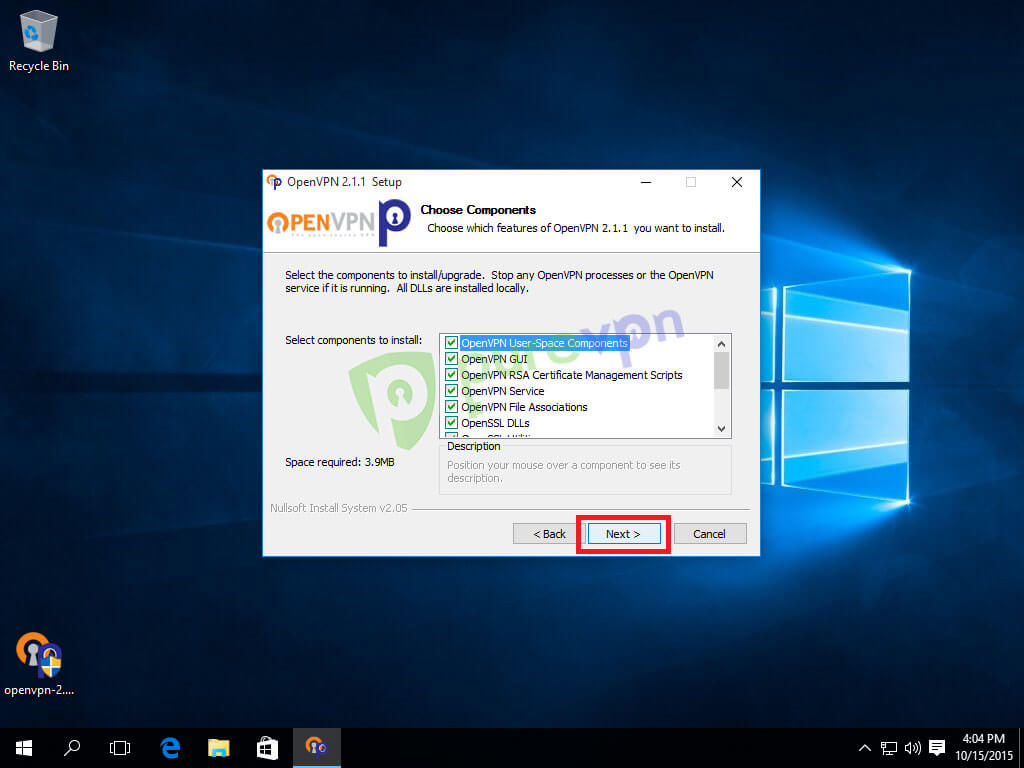
- 点击下一步
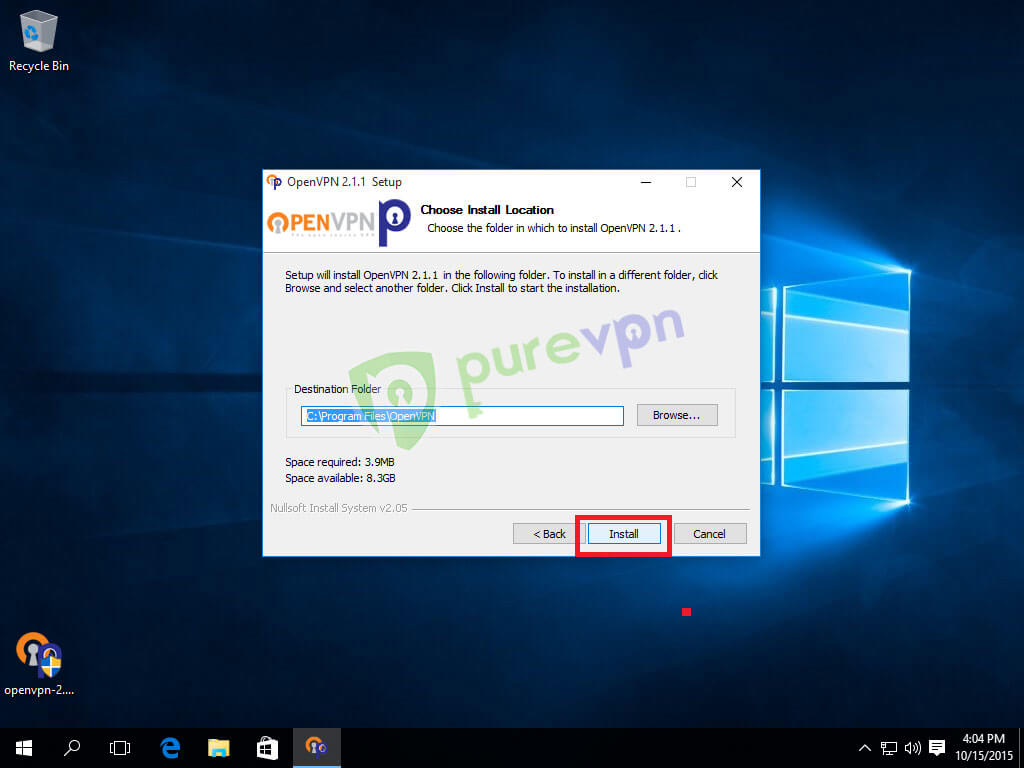
- 单击安装开始安装
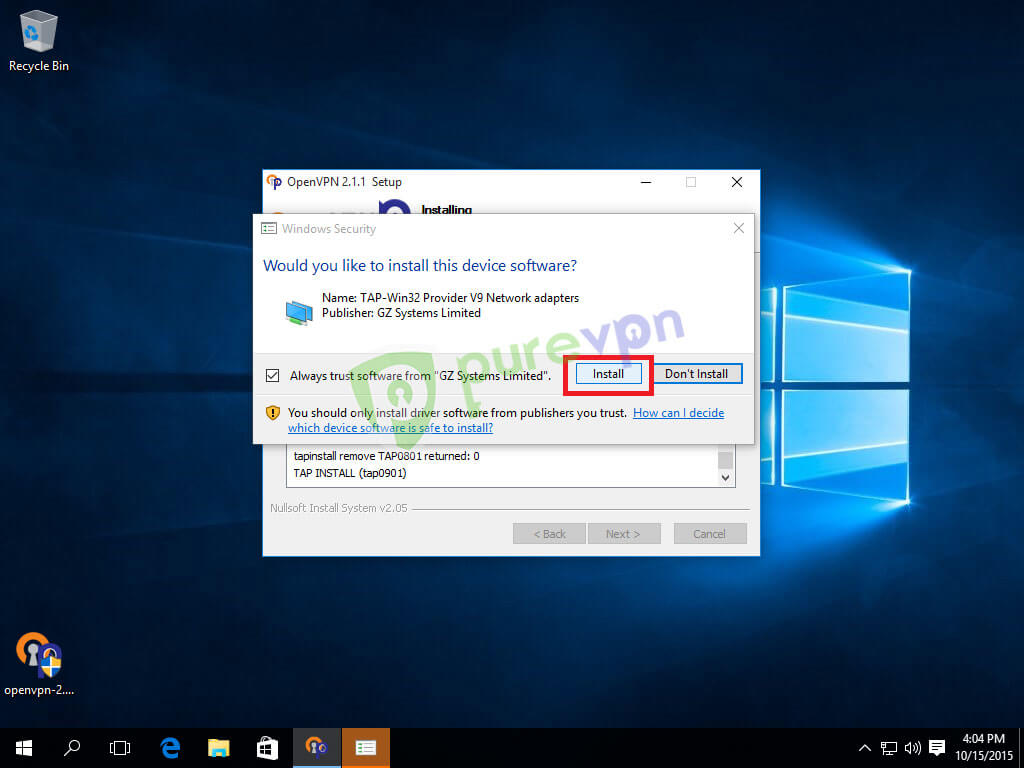
- 选中始终信任来自 GZ Systems Limited 的软件,然后单击安装
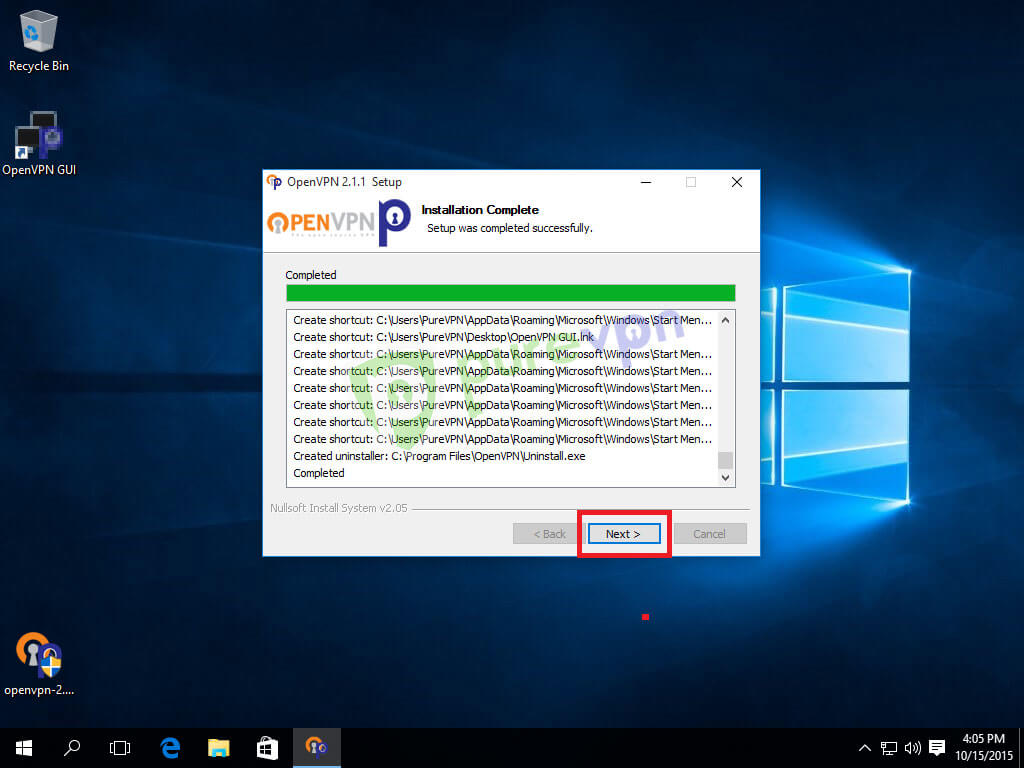
- 安装完成后单击下一步
- 取消选中显示自述文件并单击完成

连接 OpenVPN GUI:
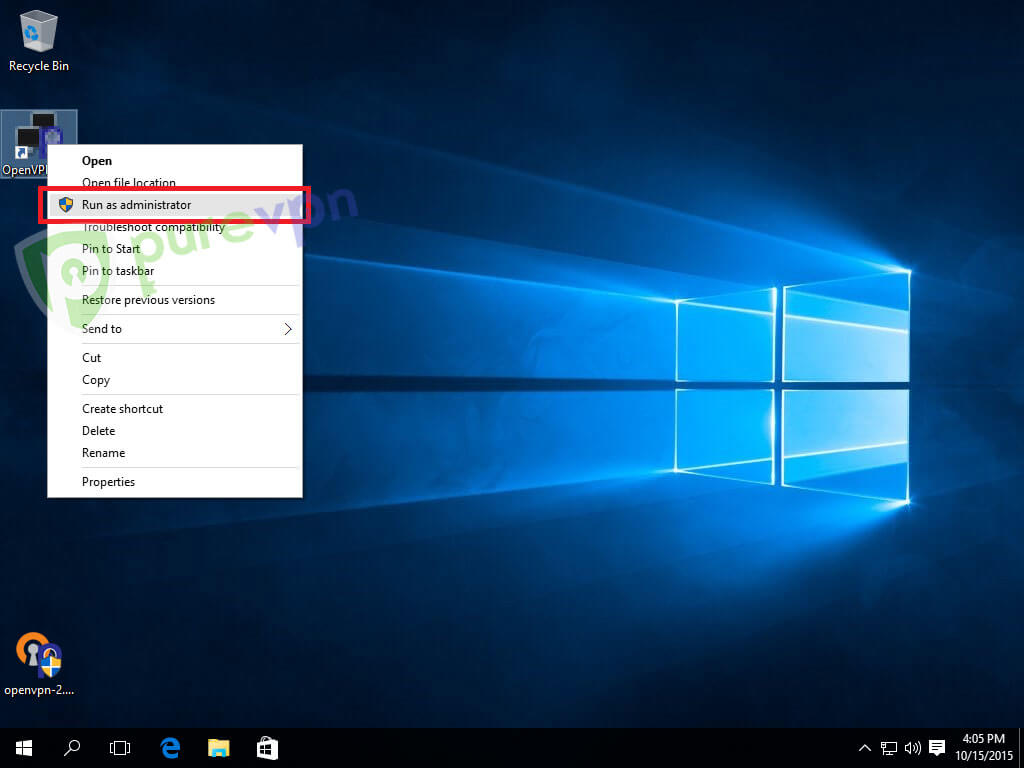
- 右键单击 OpenVPN GUI 图标并以管理员身份运行
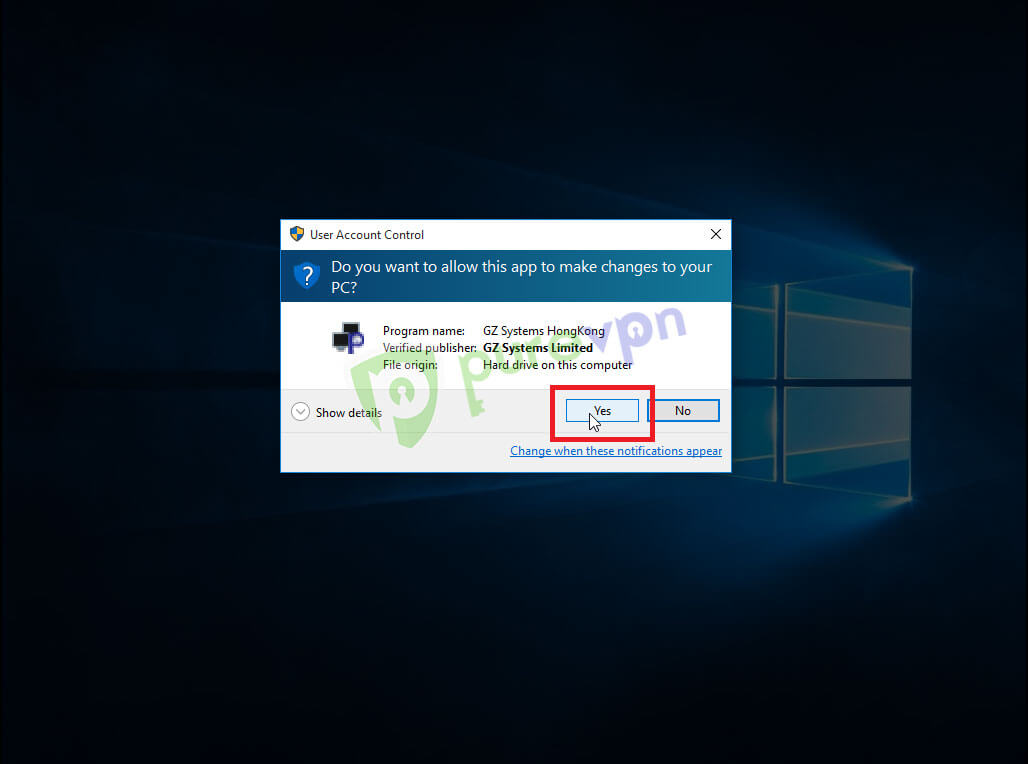
- 单击“是”以允许应用程序运行
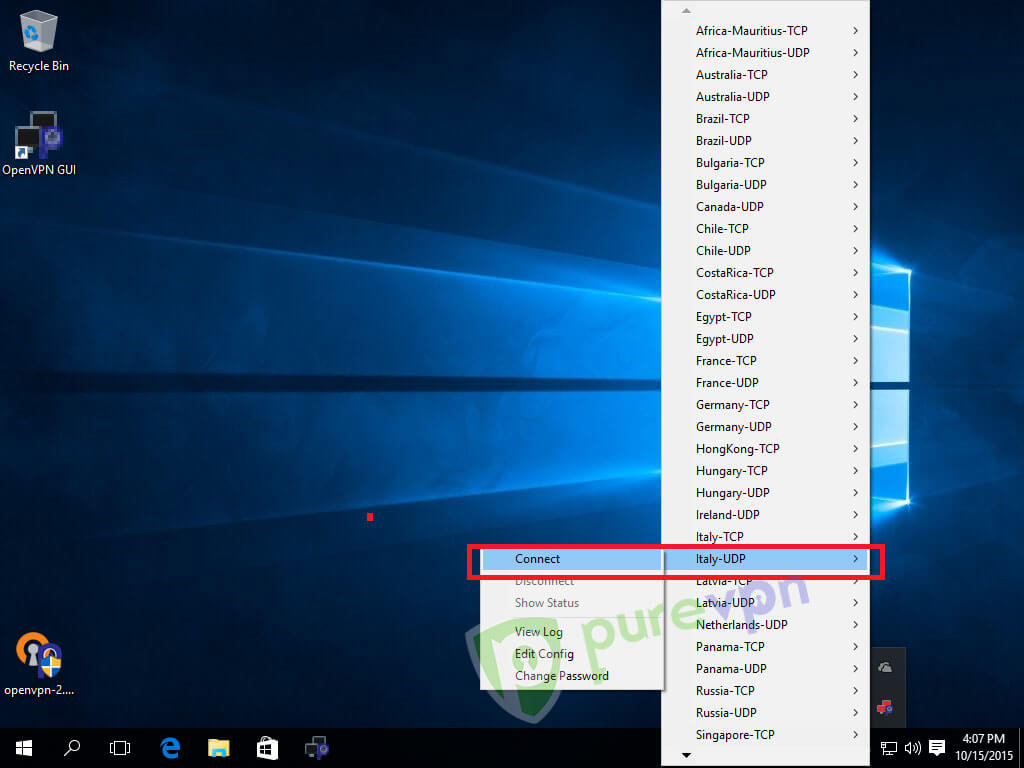
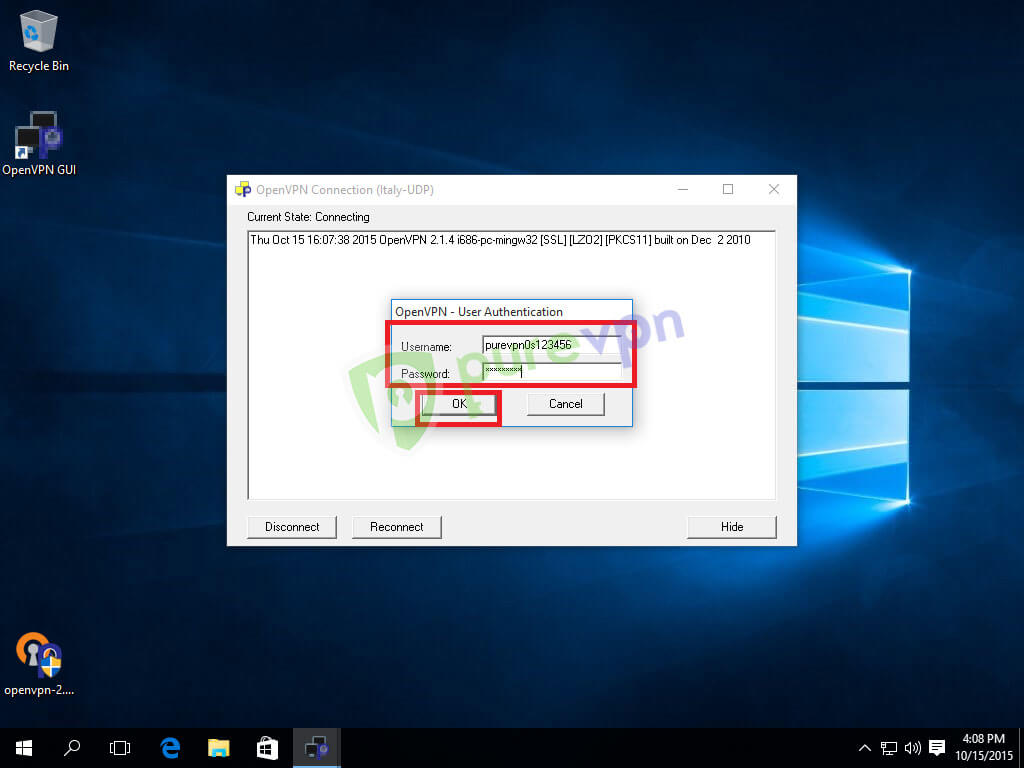
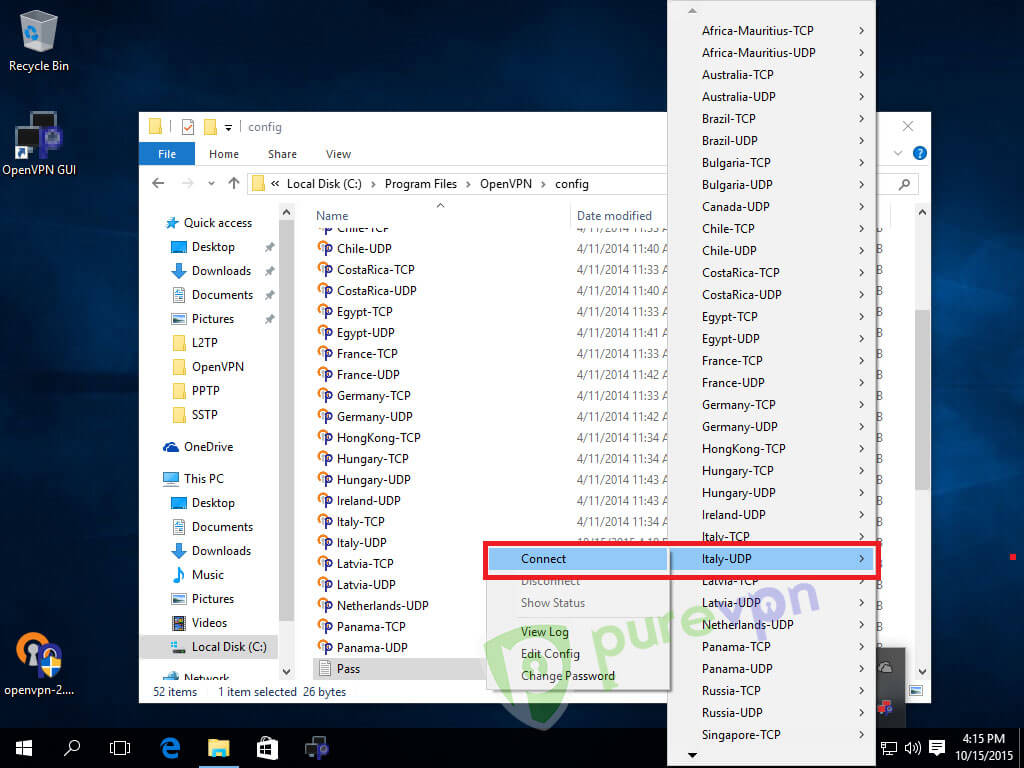
- 右键单击系统托盘中的 OpenVPN 图标,转到所需的服务器并选择连接
- 输入您的 PureVPN 凭据。您可以通过以下方式👉查找您的 VPN 凭据。然后单击“确定”
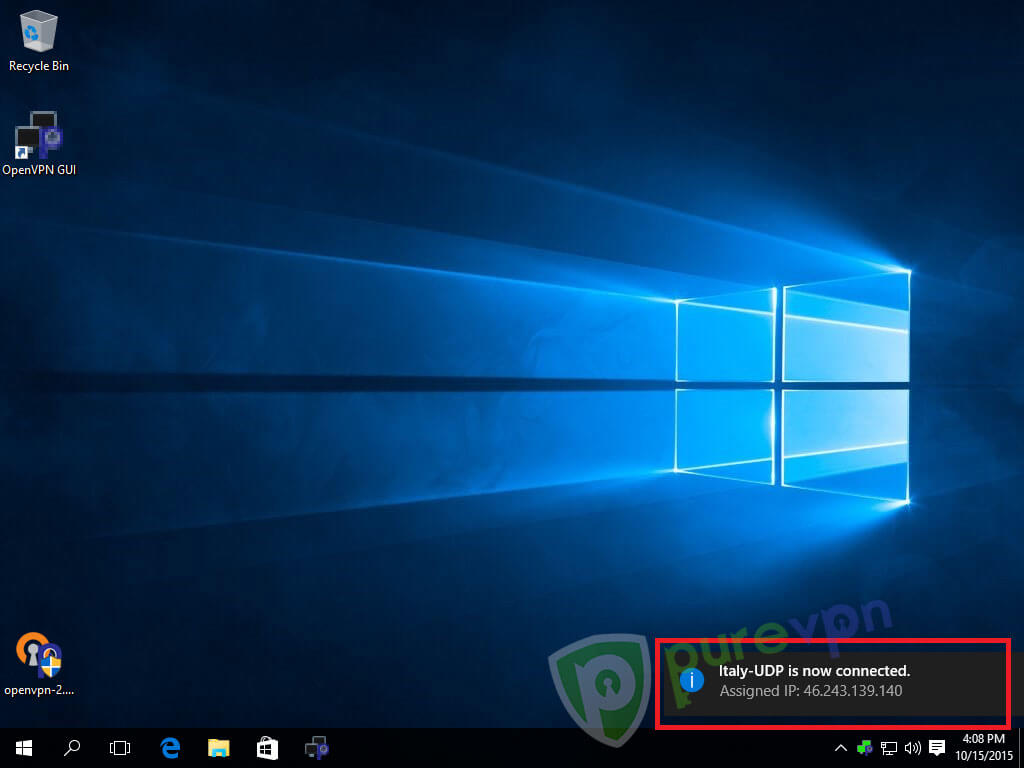
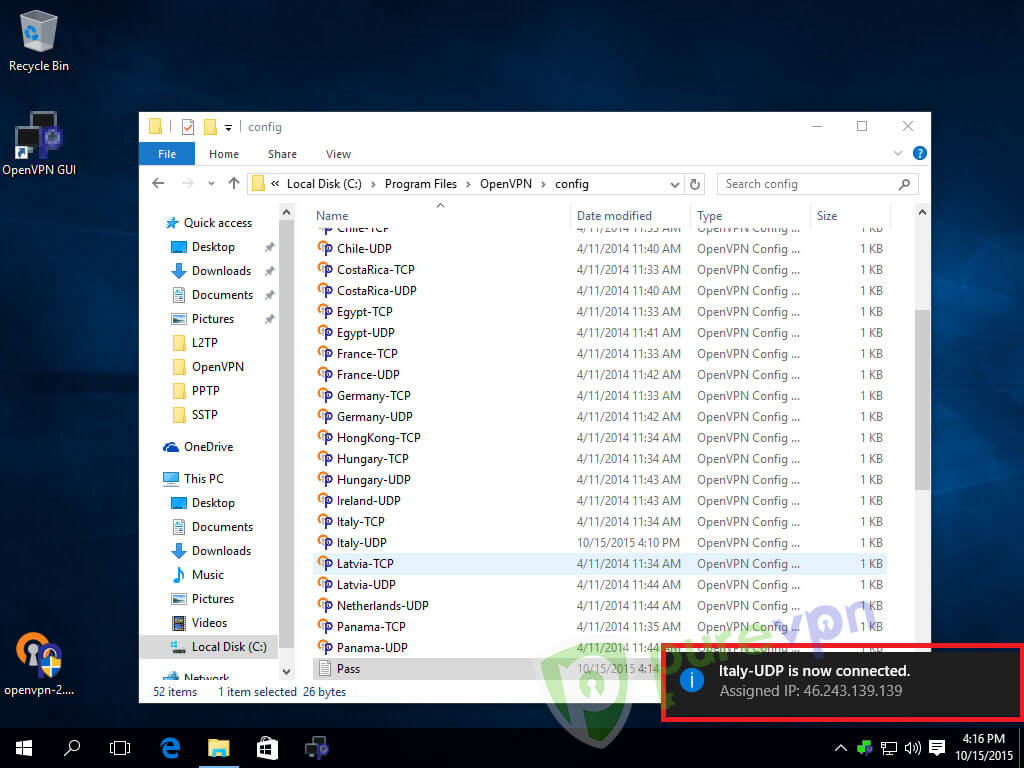
- 您现在已连接。享受自由!
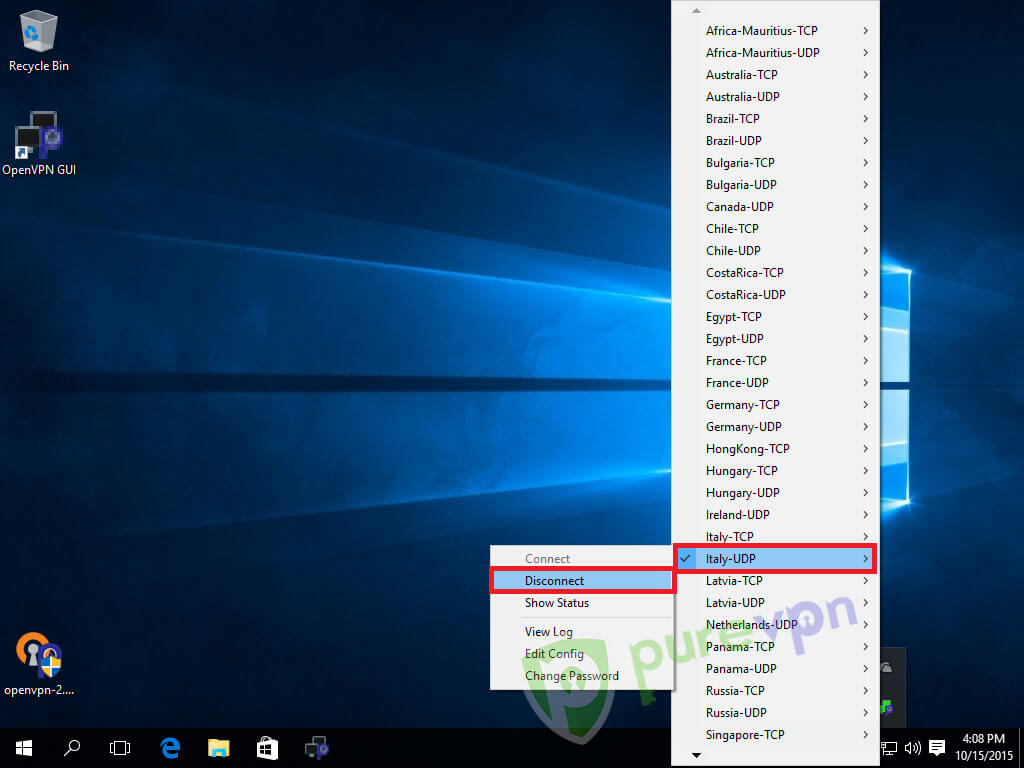
- 断开 OpenVPN。右键单击系统托盘中的 OpenVPN 图标,转到连接的服务器并选择断开连接
- 保存帐户详细信息:
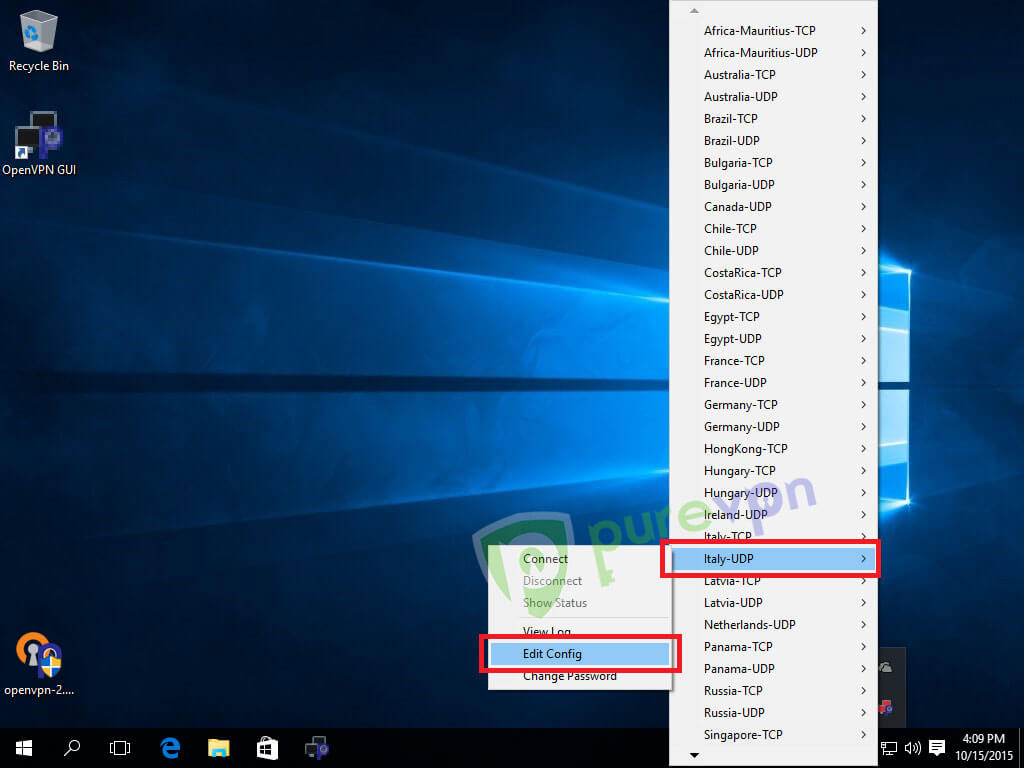
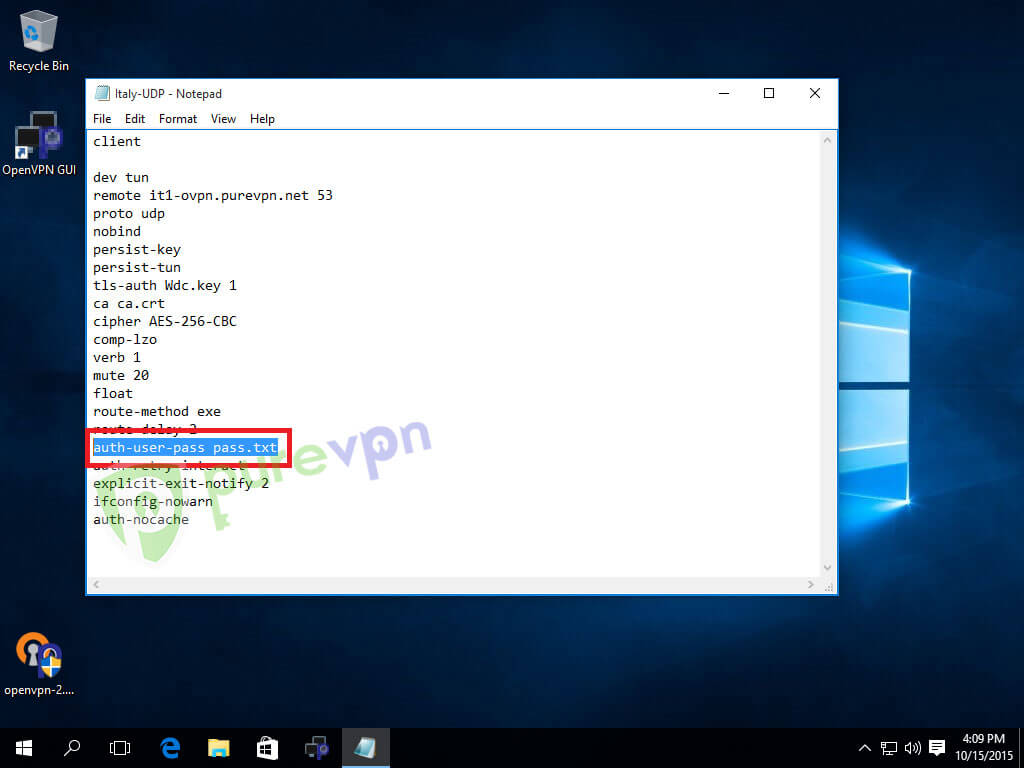
- 右键单击系统托盘中的 OpenVPN 图标,转到所需的服务器并选择编辑配置
- 在 auth-user-pass 参数后添加 pass.txt 并保存
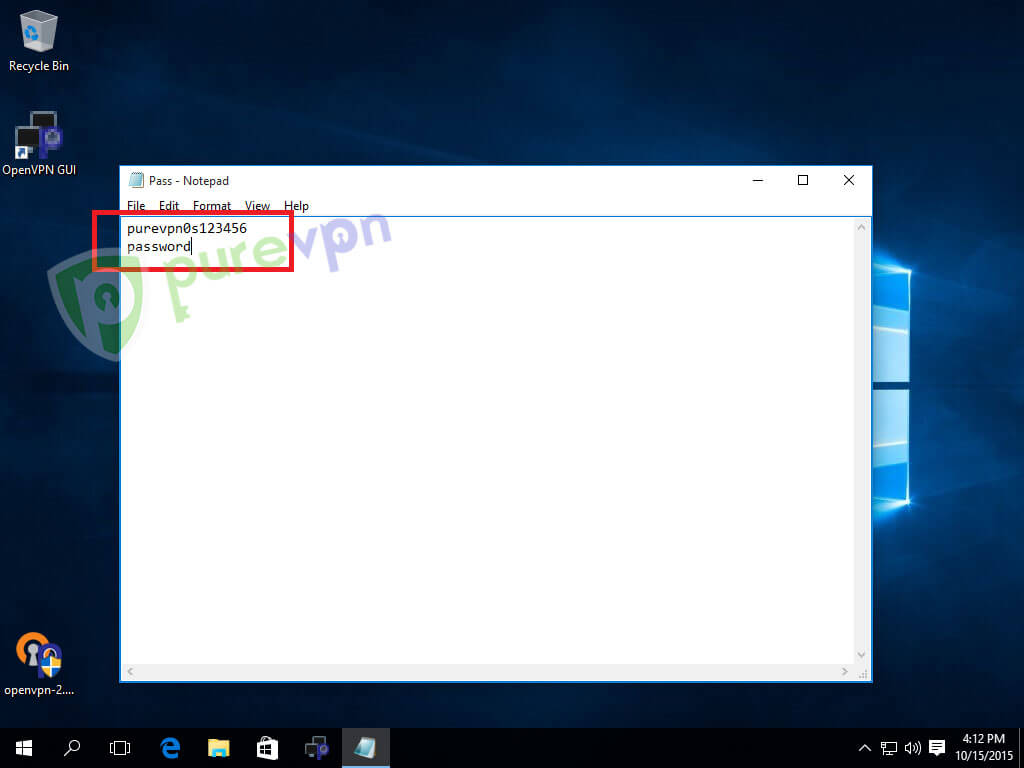
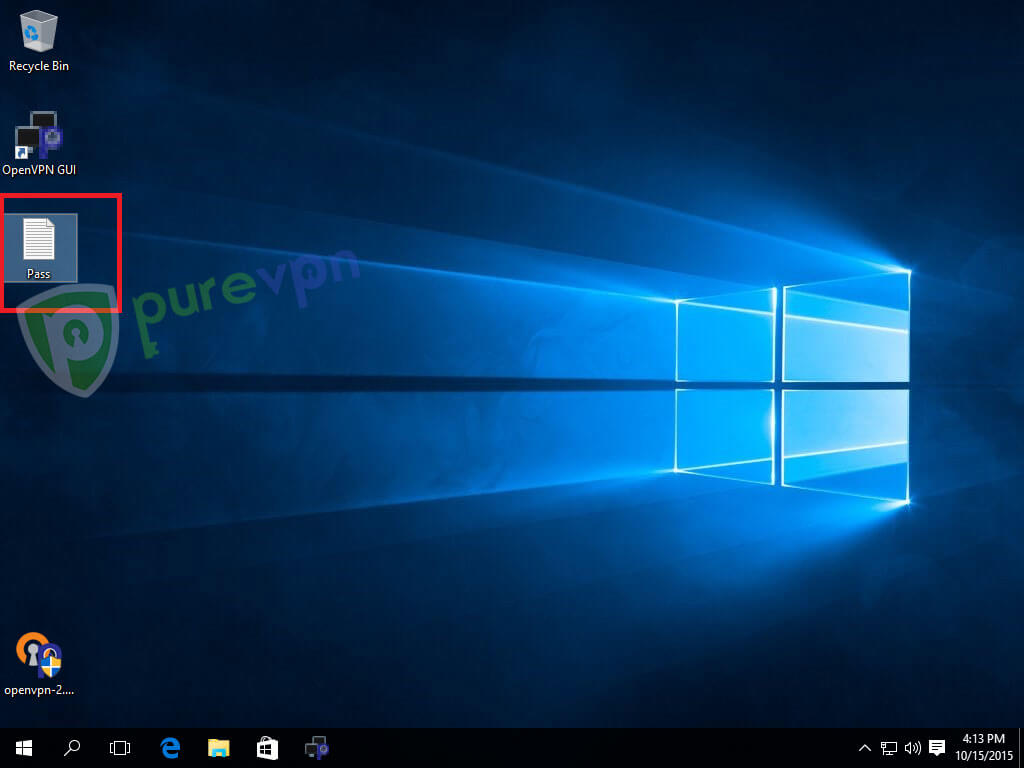
- 打开记事本,在第一行输入您的用户名,在第二行输入密码,然后将其另存为桌面上的 pass
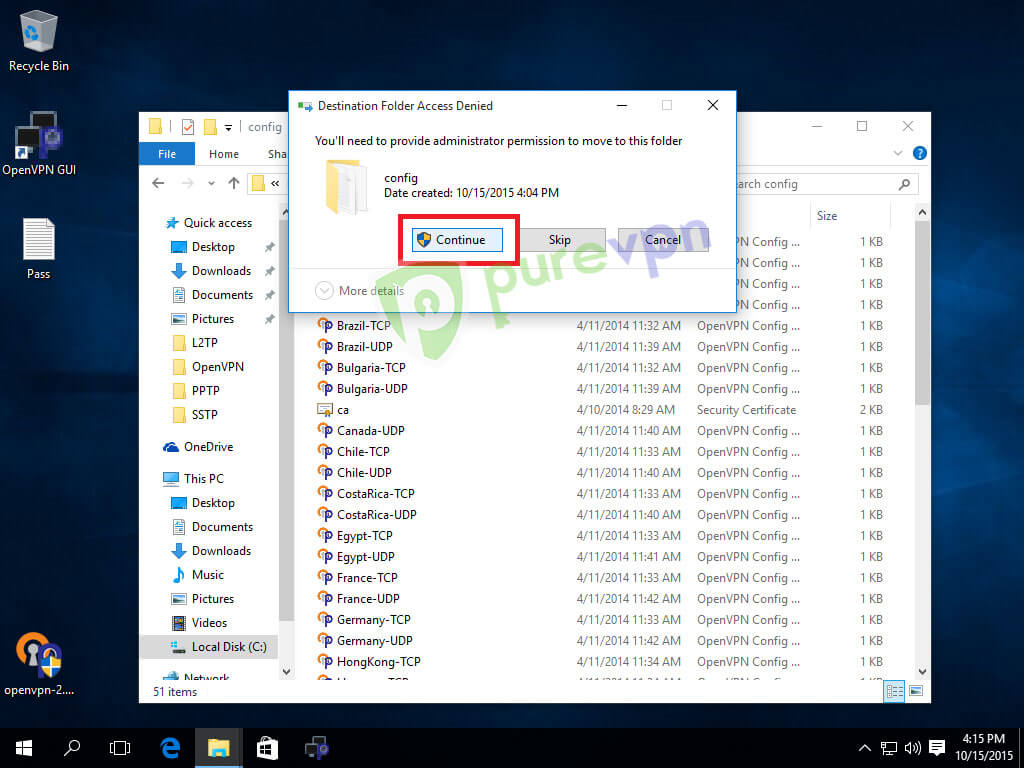
- 导航到 OpenVPN 安装文件夹 (C:\Program Files\OpenVPN\config) 并将 pass 文件拖放到 config 文件夹中

- 单击继续复制文件
- 右键单击系统托盘中的 OpenVPN 图标,转到服务器并选择连接
- 它将连接 VPN,无需询问凭据。
注意:重复以下步骤编辑所有服务器 步骤:右键单击系统托盘中的 OpenVPN 图标,转到所需的服务器并选择编辑配置 步骤:在auth-user-pass参数后面添加pass.txt并保存。