
OpenVPN on OpenWRT Router immediately protects your internet privacy and security while giving you full internet freedom and instant access to content streaming. The steps below were tested on OpenWrt 21.02 running set on a Linksys E900 router that has the luci app OpenVPN plugin on-site, so it might not be the same on your firmware:
The steps below were tested on OpenWRT 21.02 running on a Linksys E900 router with the luci app OpenVPN plugin installed. Note that the process might differ slightly depending on your firmware version. Here is how to set up a VPN on an OpenWRT 21.02 router:
Find your VPN credentials for manual configuration
To find your VPN credentials log into the PureVPN Member Area. Click 👉 here to visit Member Area.
Login to the Member Area using your PureVPN registered email address and password.

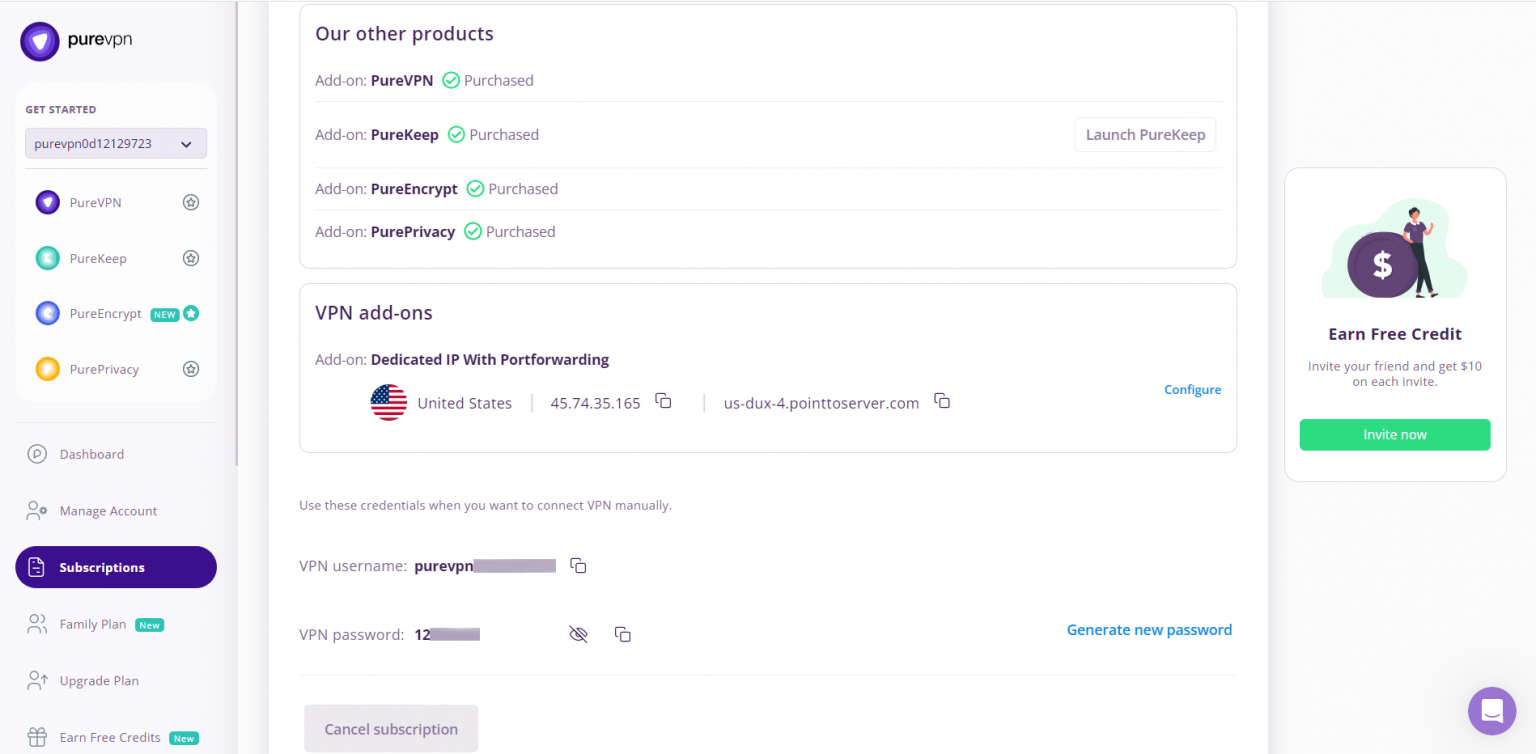
On the Subscription tab scroll down to be able to view your VPN credentials.

- You will be able to see and copy your VPN credentials.
- Note down your PureVPN username and click the Eye icon to make your password visible and use it in the manual configuration.
How to set up OpenVPN on OpenWRT 21.02 router
This is an advanced tutorial on how to connect a router with OpenWRT firmware version 21.02 to PureVPN.
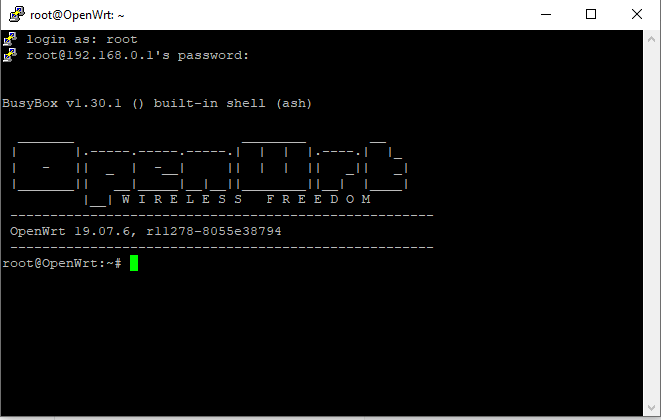
- First, you need a router with OpenWRT firmware (tested with version 21.02) and an enabled OpenVPN client. The router will accept SSH connection open it with PuTTY . The OpenVPN package isn't included in the firmware image by default, so you need to install it:
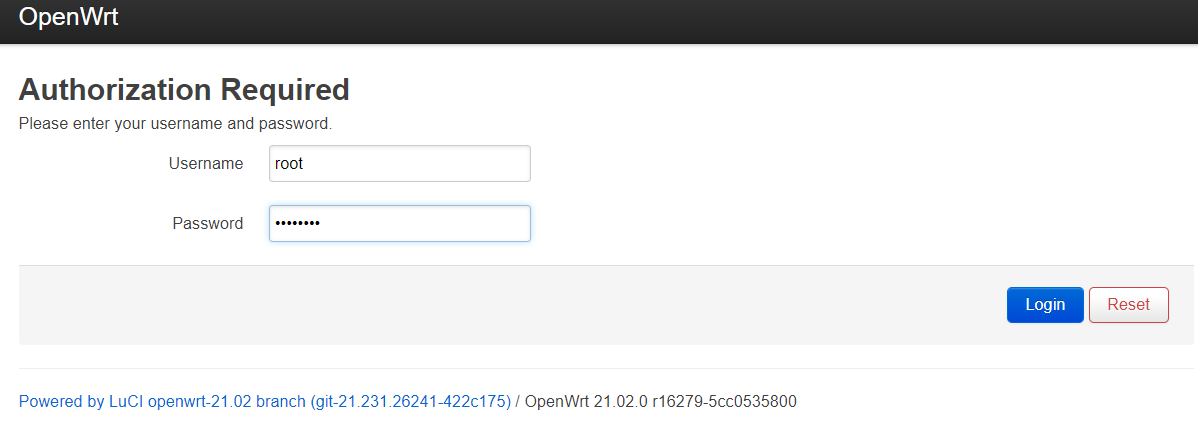
Install PuTTY and access router IP in my case 192.168.0.1

- Enter the Root and password of router.
- opkg update
- opkg install luci-app-openvpn
- opkg install openvpn-openssl opkg install ip-full
- Next, you will need to download the configuration files. I suggest using configuration files, which can be found here.
- After downloading the file “OVPN Version 2.0.zip”, unzip files to a known location and go to either TCP or UDP folder which contains ovpn files per We will use as an example Spanish server with the file “es2-ovpn.ovpn”.
We will need to copy some files from the computer to the router, for that we need to activate SFTP on the router. To do this run SSH commands.
- opkg update
- opkg install openssh-sftp-server
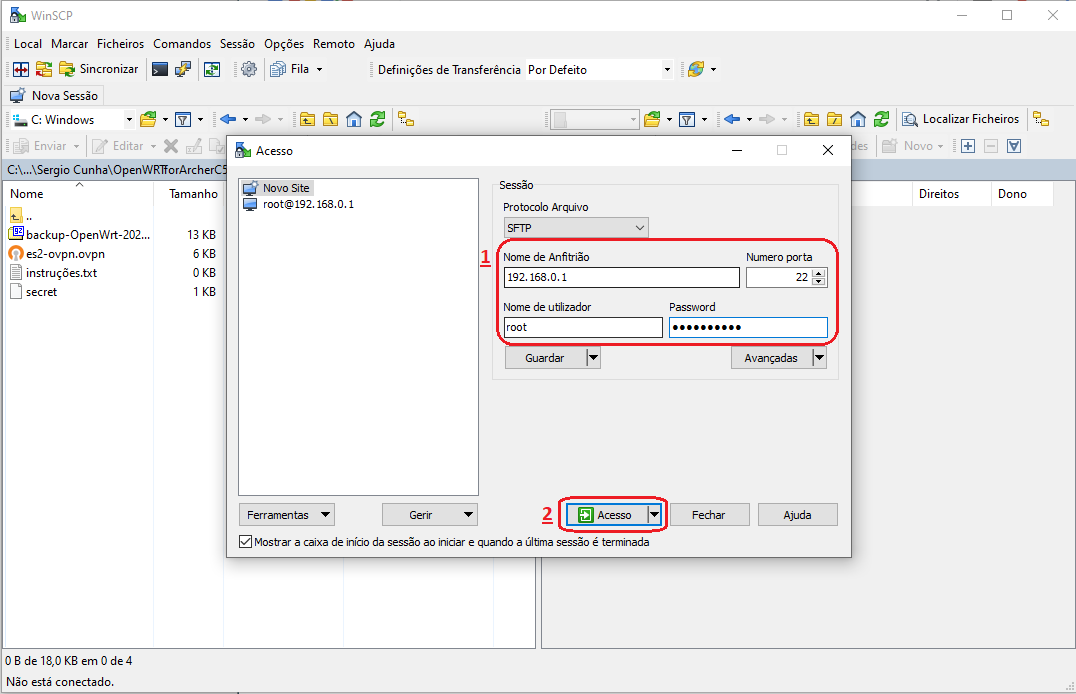
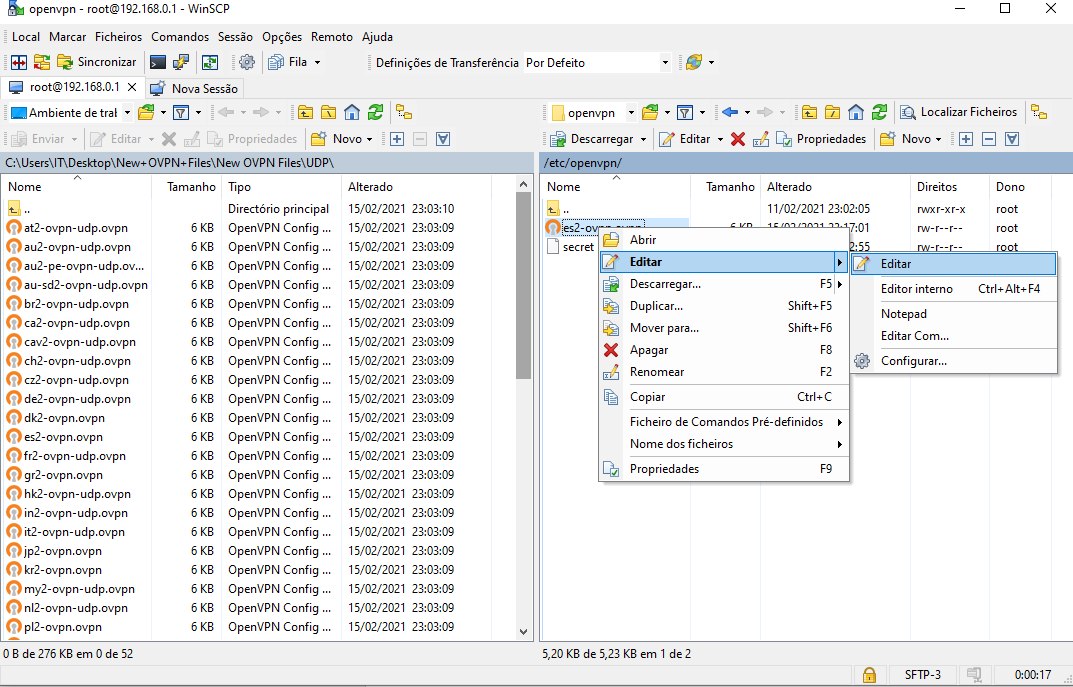
- Now copy the desired file " es2-ovpn.ovpn " using the WinSCP on Windows to the /etc/openvpn/ folder of the router’s
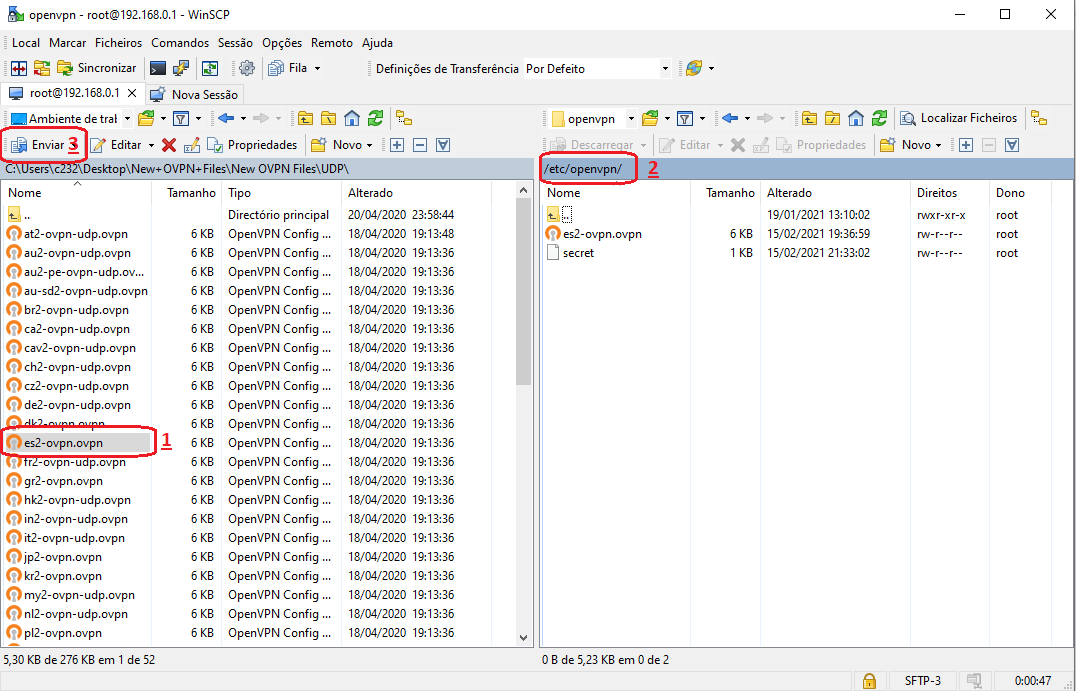
- Right click the Right side (router side) and select a new File with name secret (without file extension), put the VPN credentials. Here is how you can find your VPN credentials. (This data is available under the ‘Account & Billing’ tab in the PureVPN Member Area).
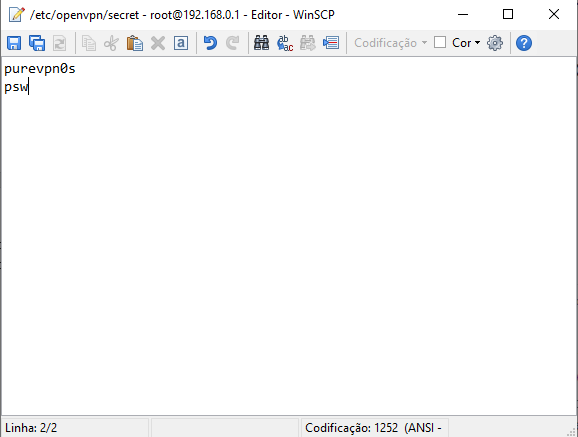
- Save and close the File in the end.
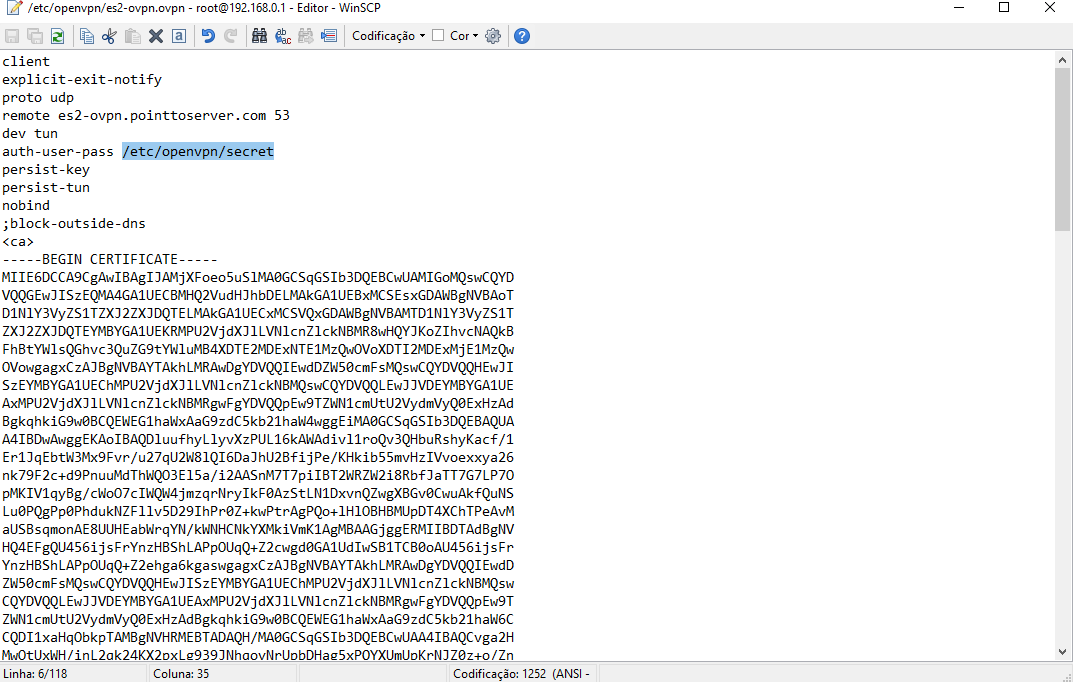
- Edit “es2-ovpn.ovpn” and put path to “secret” file, which contain PureVPN credentials (as shown in the picture below)
- Save and close the File in the end.
- Configuring OpenVPN (Continuing using SSH with PuTTY) Specify the file name in /etc/config/openvpn.
- uci set openvpn.purevpn=openvpn
- uci set openvpn.purevpn.enabled='1'
- uci set openvpn.purevpn.config='/etc/openvpn/es2-ovpn.ovpn'
- uci commit openvpn
#(es2-ovpn.ovpn is the openvpn file we used in this setup, you will have to use/enter your desired file’s complete name here)
- Create a new network interface.
- uci set network.purevpntun=interface
- uci set network.purevpntun.proto='none'
- uci set network.purevpntun.ifname='tun0'
- uci commit network
- Create a new firewall zone and add a forwarding rule from LAN to VPN:
- uci add firewall zone
- uci set firewall.@zone[-1].name='vpnfirewall'
- uci set firewall.@zone[-1].input='REJECT'
- uci set firewall.@zone[-1].output='ACCEPT'
- uci set firewall.@zone[-1].forward='REJECT'
- uci set firewall.@zone[-1].masq='1'
- uci set firewall.@zone[-1].mtu_fix='1'
- uci add list firewall.@zone[-1].network='purevpntun'
- uci add firewall forwarding
- uci set firewall.@forwarding[-1].src='lan'
- uci set firewall.@forwarding[-1].dest='vpnfirewall'
- uci commit firewall
- Now you need to configure the DNS The simplest approach is to use Google DNS for the WAN interface of the router and to set the router DNS:
- uci set network.wan.peerdns='0'
- uci del network.wan.dns
- uci add_list network.wan.dns='8.8.8.8'
- uci add_list network.wan.dns='8.8.4.4'
- uci commit
- reboot
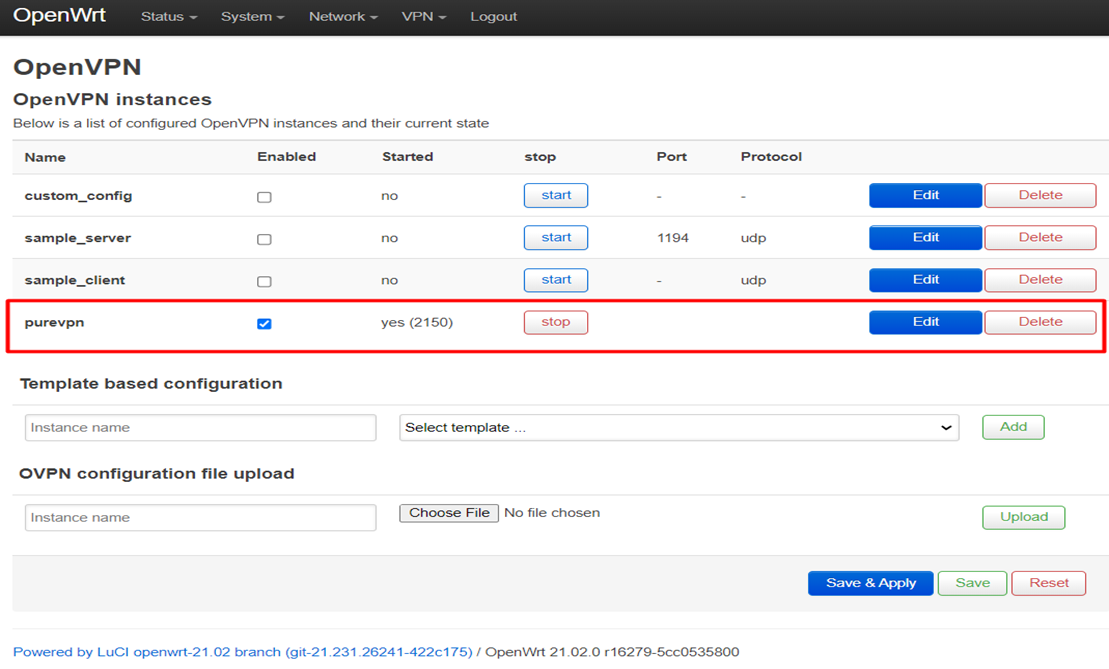
- Please wait for atleast 1-2 mins after the router is rebooted and then relogin and go to OpenVPN tab under VPN to check the connection status

- Your PureVPN profile is activated and you are connected to VPN.
How to set up OpenVPN on OpenWRT 18.06 router
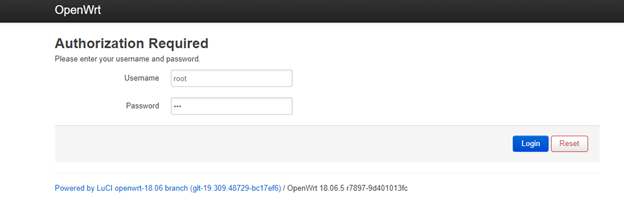
- Log in as Root to the router via SSH using Terminal, or a client of your choice i.e PuTTY
- By default, the address is 192.168.1.1 but it might differ from yours. If you do not know the address of your router, consult the router’s vendor support.
- The default username and password are both set as root but it may differ if you have changed it from your end.
- Ensure your package is up to date on your system. Run the command below:
- opkg update
- Install OpenVPN client package:
- opkg install openvpn-openssl luci-app-openvpn
- Now head to /etc/openvpn/
- Create a file called tls-auth.key
- vi tls-auth.key

- Open the Wdc.key file from the Open VPN files folder (you just downloaded), copy and paste its content in the text editor, and save it.
- Next, create a file called userpass.txt
- vi userpass.txt
- Enter your PureVPN Username and Password on the first line and the second line respectively and save it.
- Purevpn0sxxxx
- VPN Password
- Create OpenVPN configuration.
- Login to the Router’s Luci Web panel from your browser.
- Navigate to Services > OpenVPN

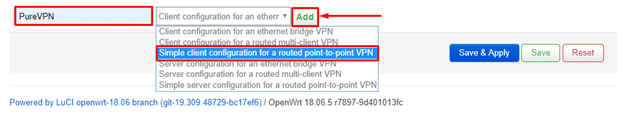
- Create a new instance named PureVPN and select the 3rd option from the drop-down: Simple client configuration for a routed point-to-point VPN.
- Click Add.
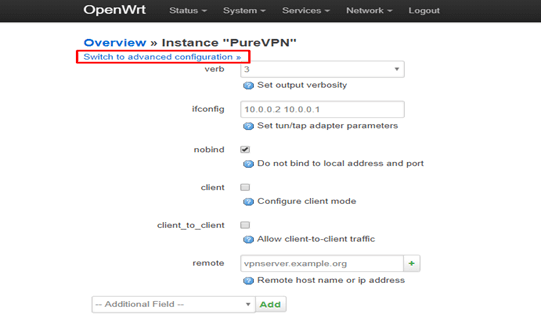
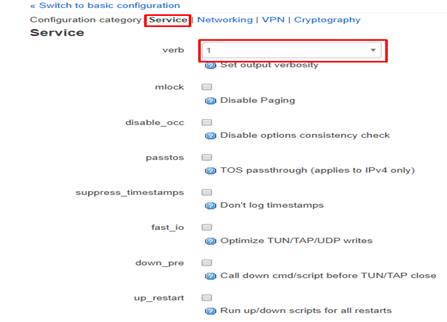
- Click the Switch to the advanced configuration at the top right corner of the page to start configuring the OpenVPN connection.
- Under the Services tab, just ensure the verb is set to 1
- Click Save.
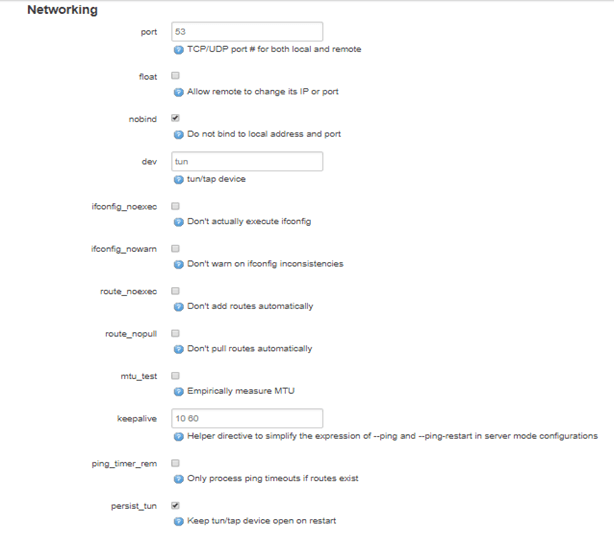
- Next, click on the Networking tab
- Ensure these details are as below, leave others as it is.
- port: 53
- nobind: Checked
- persist_tun : Checked
- Note: If the stated field is not there, scroll down and select it from the Additional Field drop-down and click Add
- Click Save.
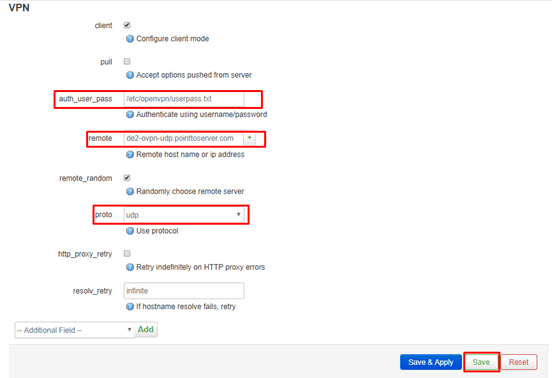
- Next, click on the VPN tab.
- Ensure these details are as below, leave others as it is.
- client : Checked
- auth_user_pass: /etc/openvpn/userpass.txt
- remote: de2-ovpn-udp.pointtoserver.com
- roto: udpresolv_retry: infinite
- The example above is set to connect to our German server i.e. de2-ovpn-udp.pointtoserver.com. If you wish to connect to another country, please refer to the full list of server names that you can connect by clicking here.
- Click Save.
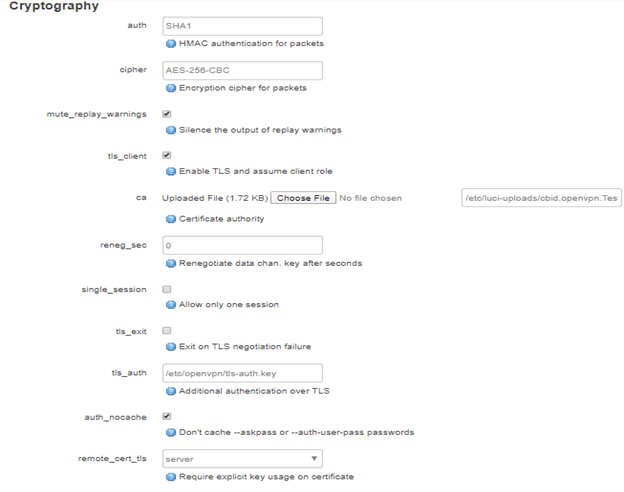
- Next, click the Cryptography tab.
- Ensure these details are as below, leave others as it is.
- auth: SHA1
- cipher: AES-256-CBC
- mute_replay_warnings: Checked
- tls_client: Checked
- ca: Upload the CA file that you downloaded earlier
- tls_auth: /etc/openvpn/tls-auth.key
- auth_nocache: Checked
- remote_cert_tls: server
- key_direction: 1
- Click on Save & Apply.
- Create VPN interface.
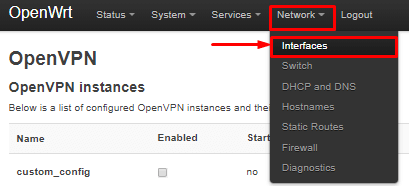
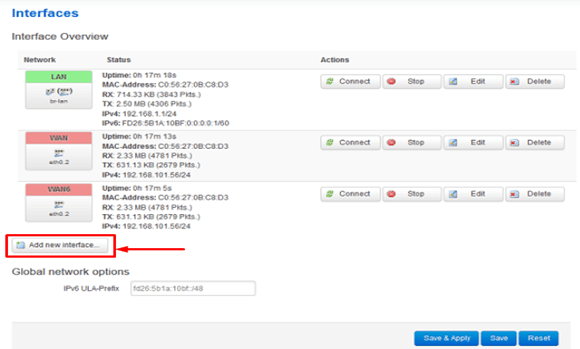
- Navigate to Network > Interfaces
- Click the Add New Interface.
- Enter the details as below:
- Name of the new interface: PureVPN
- The protocol of the new interface: select Unmanaged from the drop-down menu
- Cover the following interface: Custom Interface – tun0
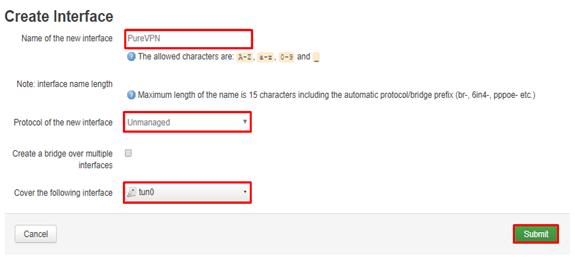
- Click Submit.
- Set Firewall Rule for VPN connection.
- Navigate to Network > Firewall
- Click Add.
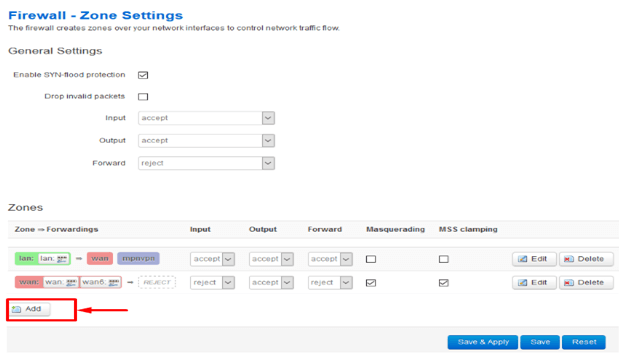
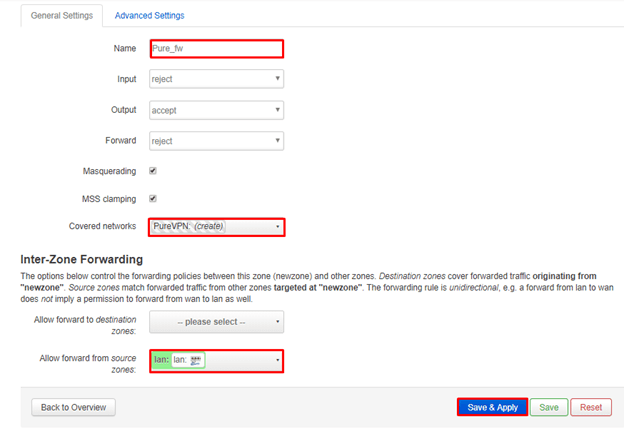
- Configure the firewall as below.
- Name: Pure_fw
- Input: reject
- Output: accept
- Forward: reject
- Masquerading: Checked
- MSS clamping: Checked
- Covered networks: Select PureVPN
- For Inter-Zone Forwarding:
- Select Allow forward from source zones
- lan: Checked
- wifi: Checked(if you have wifi interface configured)
- Once that is done, click on Save & Apply.
- Connection complete.
- Pure VPN is now configured in your OpenWRT router!
- Go to Services > OpenVPN, check the box for Enabled next to PureVPN, then click the Start button to initiate the connection.
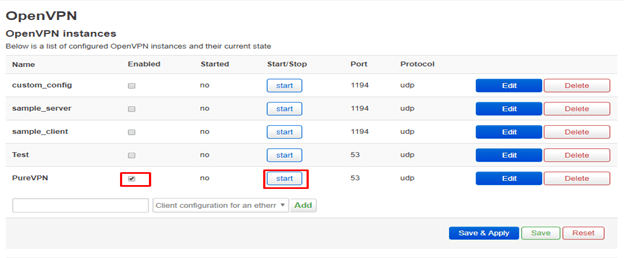
- The connection should be completed within seconds, once connected you can confirm this by checking from the website: www.ipaddress.com
- If the VPN connection doesn’t start then go to the /var/etc/client.conf directory, open the OpenVPN file and remove the line “secret shared-secret.key” save the file, and then recheck to connect.
- If you are unable to access the Internet when the VPN is connected, look through the Firewall settings again, and ensure it’s set correctly before trying again.
- If you are unable to connect to the VPN, navigate to Status > System Log and share it with us on your 24/7 support.