
If you're looking to change your DNS settings, we've got you covered. Here's a quick and easy guide on how to do it depending on the device you're using:
How to change DNS on Windows
- Click notification area and right click Network Icon.
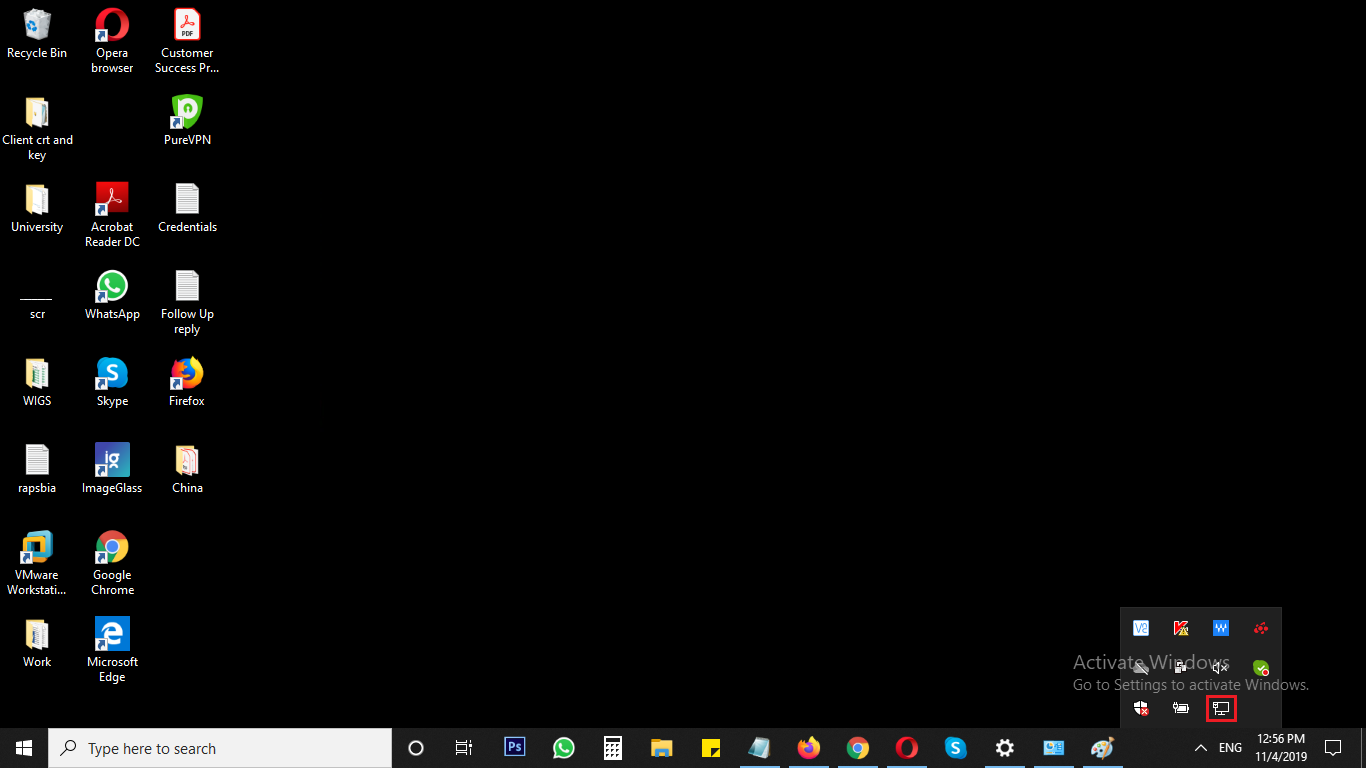
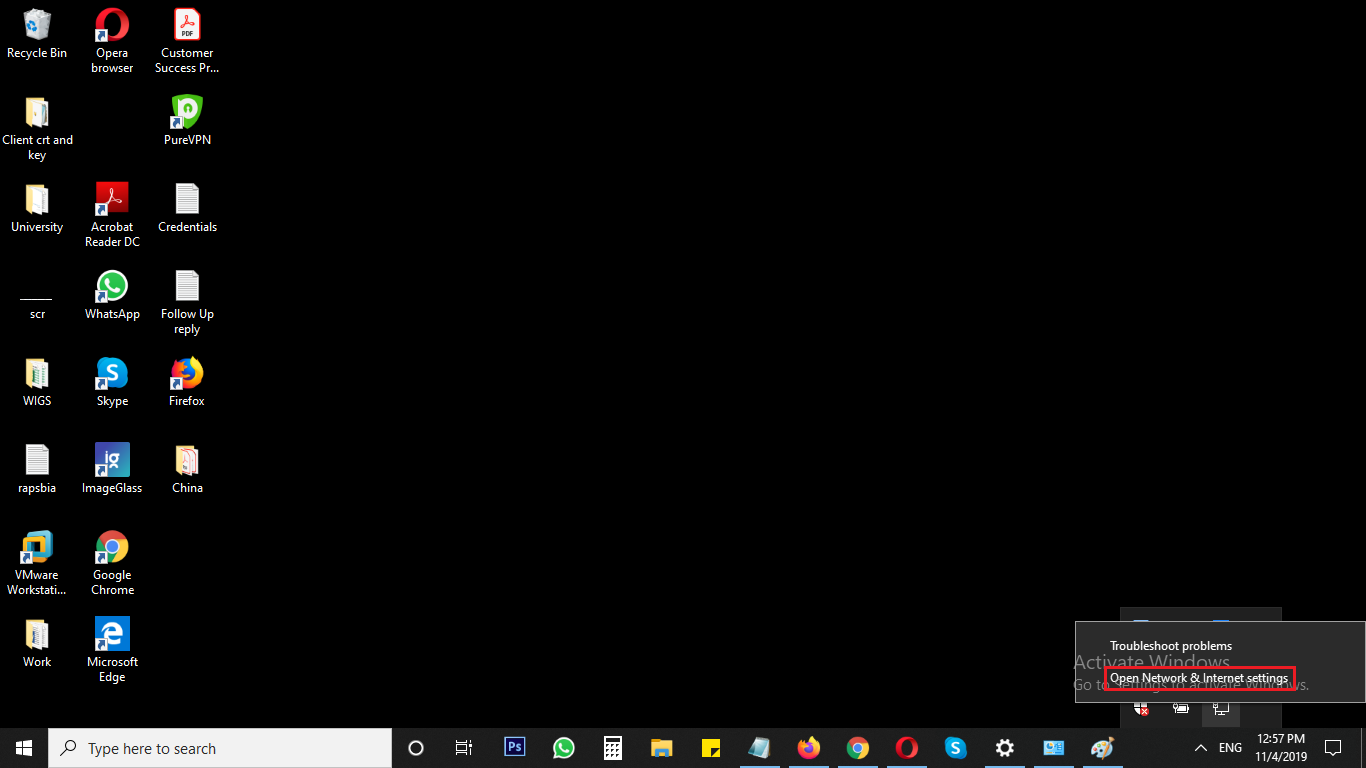
- Select Open Network and Internet settings.
- Select Ethernet or Wifi network that you are connected with.
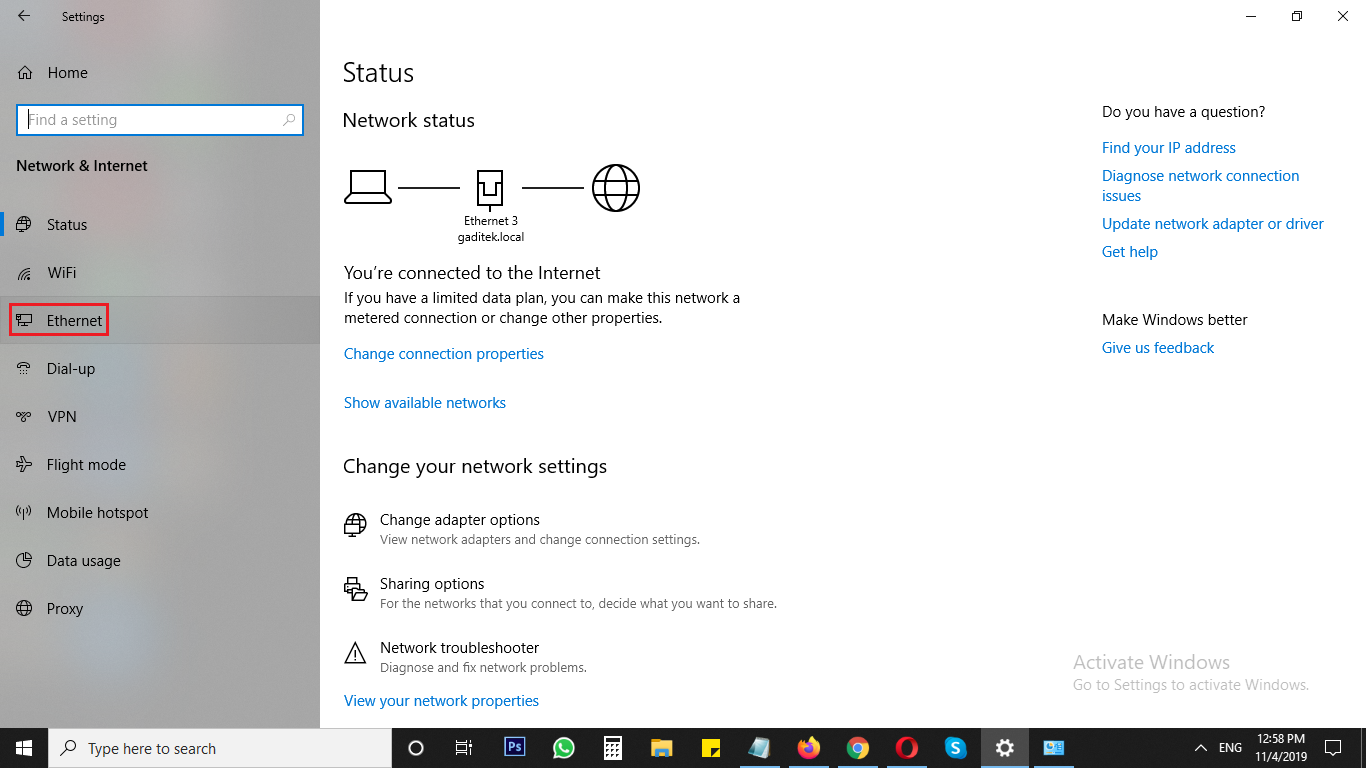
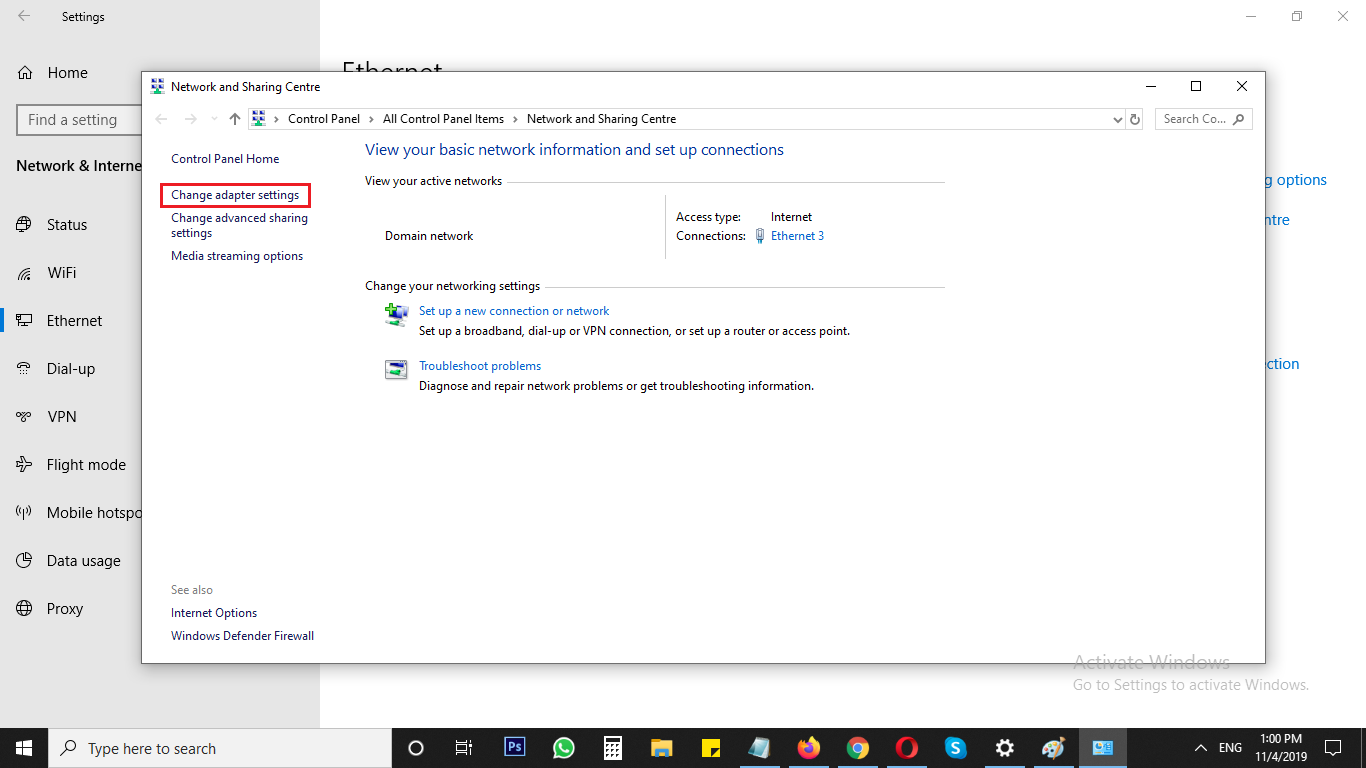
- Select Network and Sharing Center.
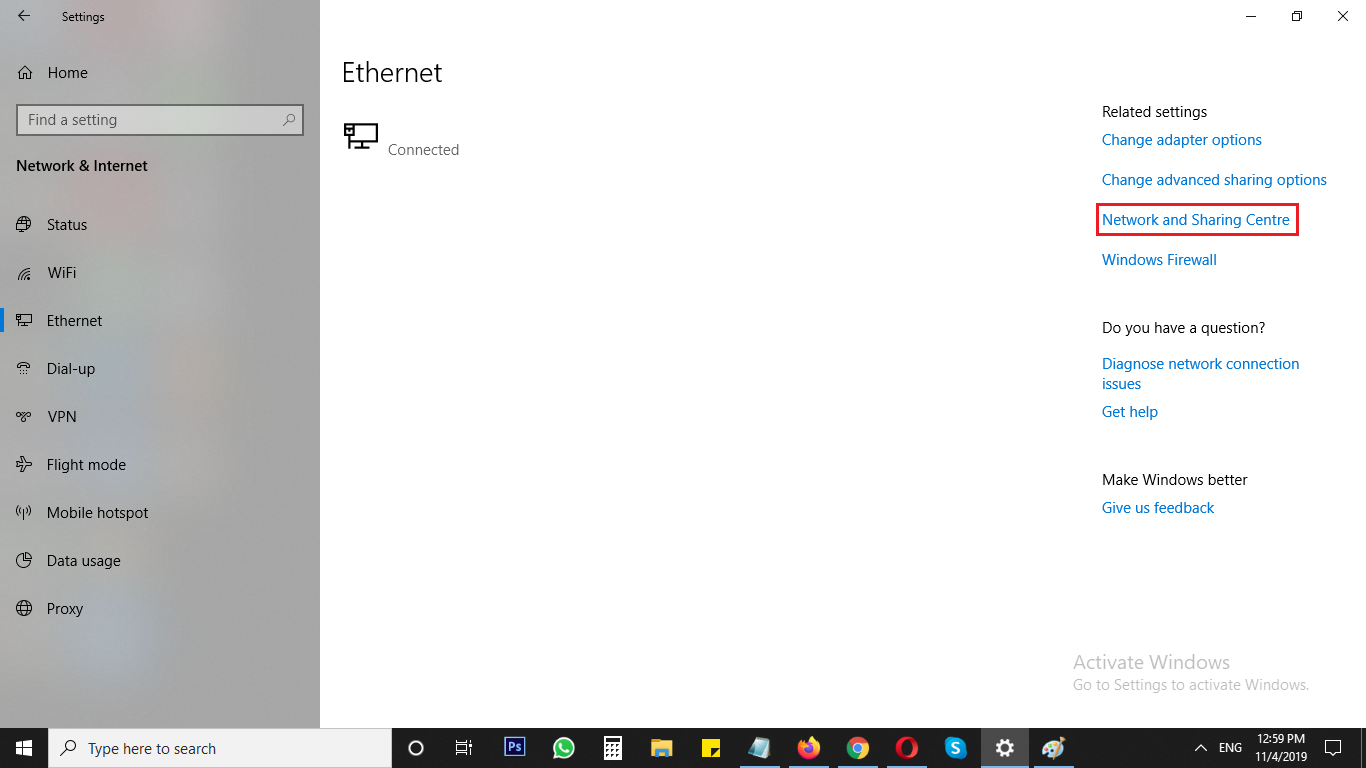
- Select Change adapter settings.
- Right click your connected network then select Properties.
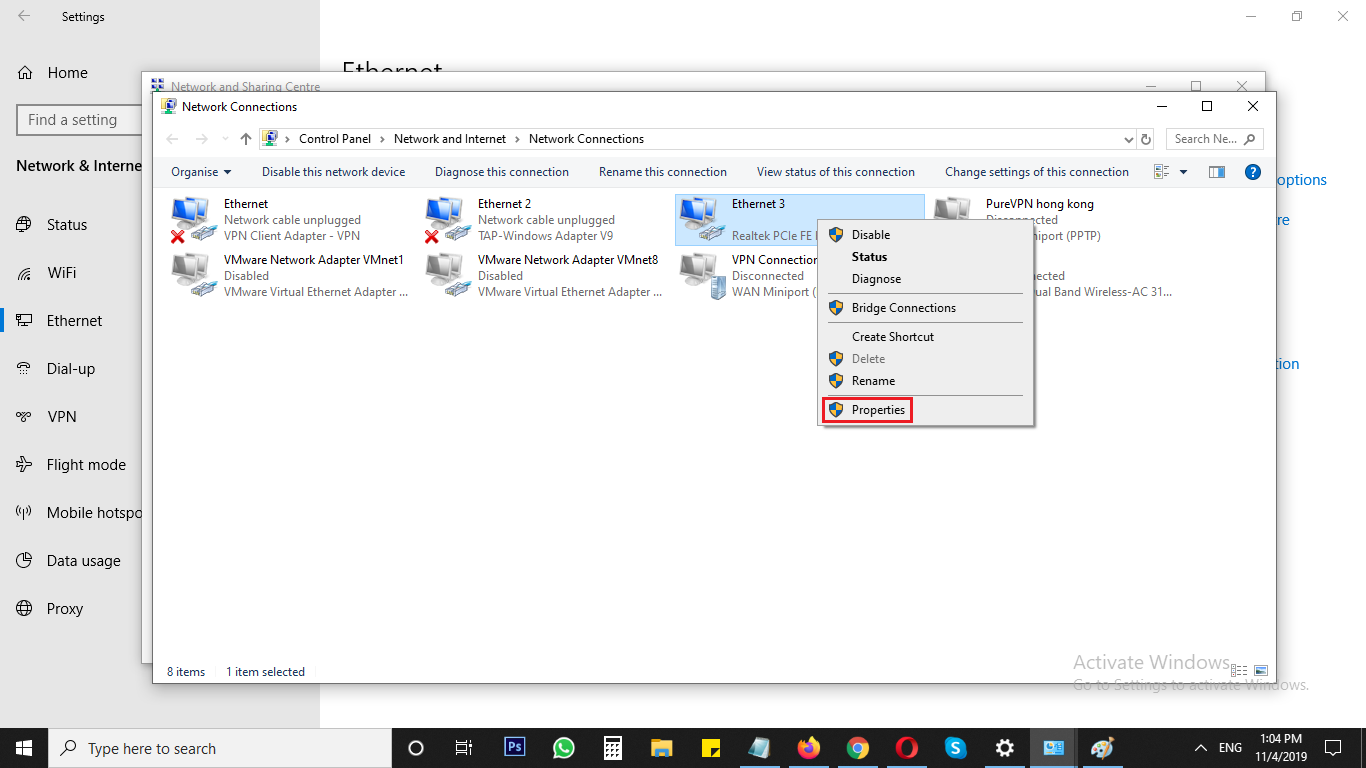
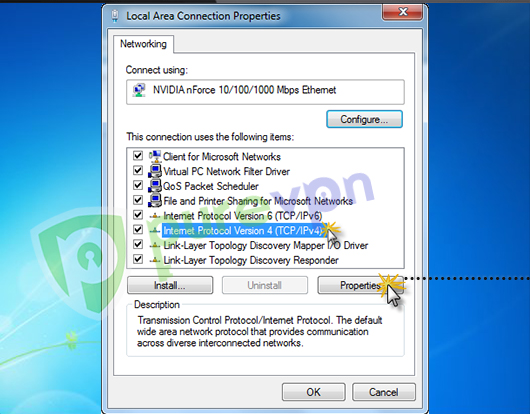
- In the following window, select Internet Protocol Version 4 (TCP/IPv4) and click Properties.
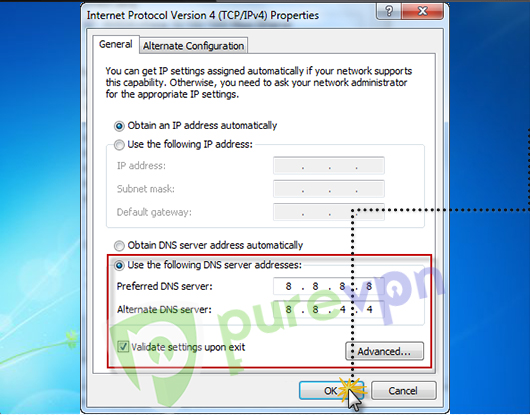
- Select Use the following DNS server addresses option, and insert 8.8.8.8 in Preferred and 8.8.4.4 in Alternate DNS Box then click OK.
Congratulations you have now configured DNS successfully on your device.
How to change DNS on Mac
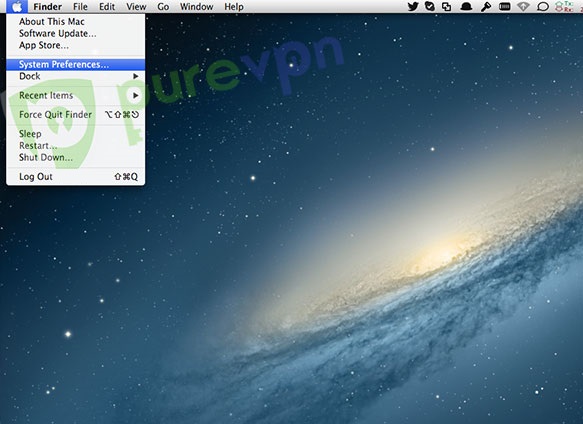
- Click Apple icon from the top left and select System preferences...
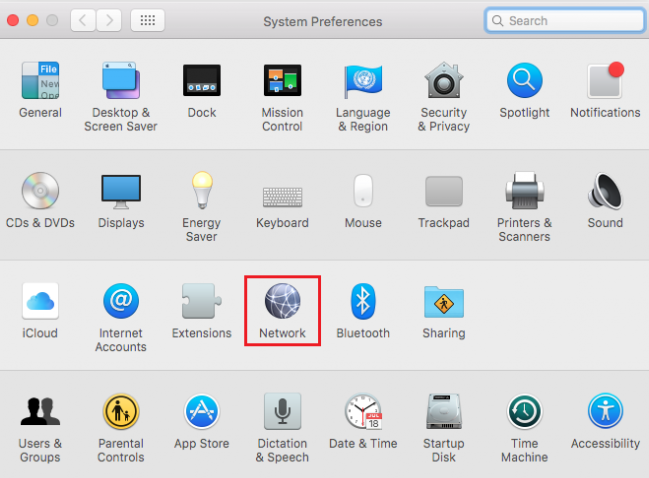
- Select Network.
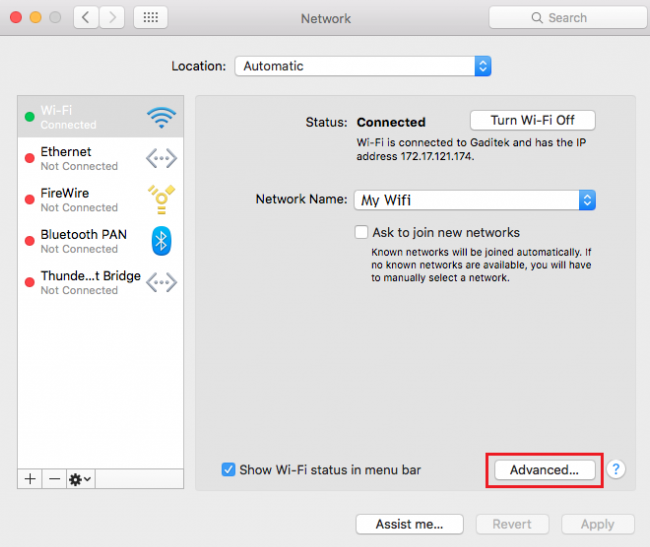
- Click Advanced...
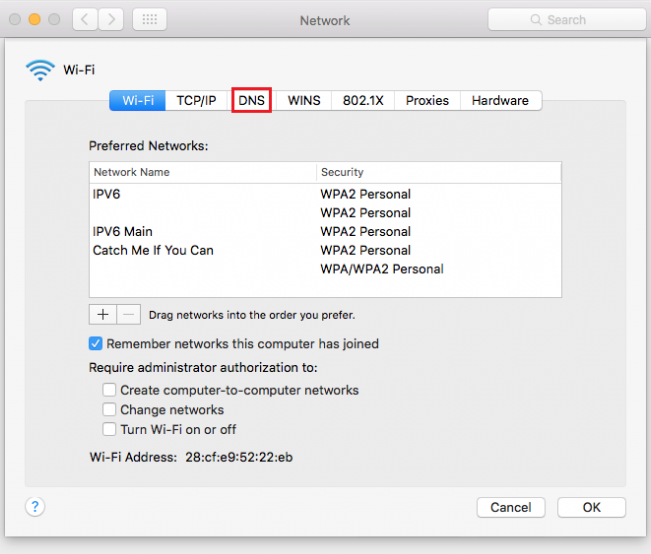
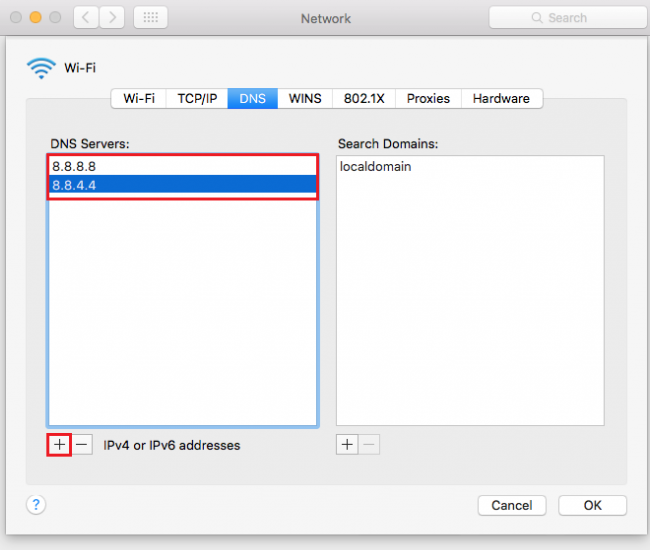
- Click DNS tab.
- Insert 8.8.8.8 and 8.8.4.4 by clicking + sign then click Ok.
- Click Apply.
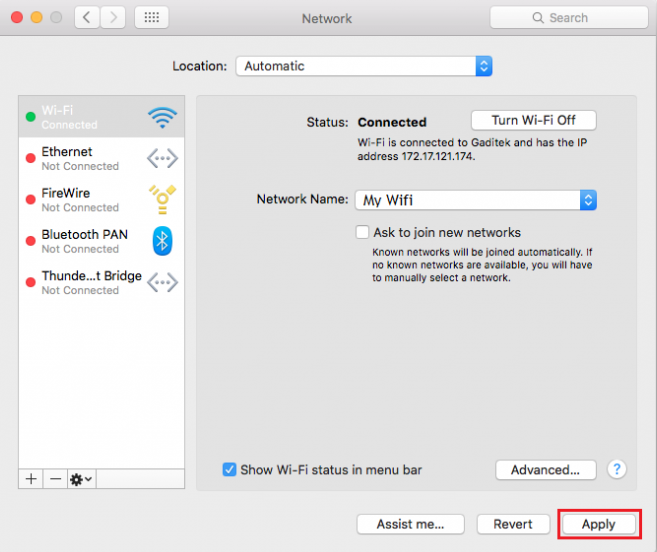
Congratulations you have now configured DNS successfully on your device.
How to change DNS on iOS
- Tap Settings.

- Tap Wifi.

- Select your connected Wifi.

- Tap Configure DNS.

- Tap Manual and then select Add Server.

- Insert 8.8.8.8 and 8.8.4.4 in DNS Server tab and tap Save.

Congratulations you have now configured DNS successfully on your device.
How to change DNS on Android
- Tap Settings.

- Tap Wifi.

- Select your connected Wifi.

- Tap IP Settings.

- Select Static.

- Insert 8.8.8.8 and 8.8.4.4 in DNS 1 and DNS 2 and tap Save.

Congratulations you have now configured DNS successfully on your device.
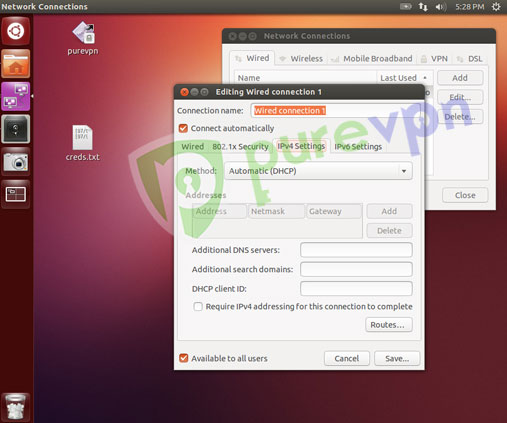
How to change DNS on Linux
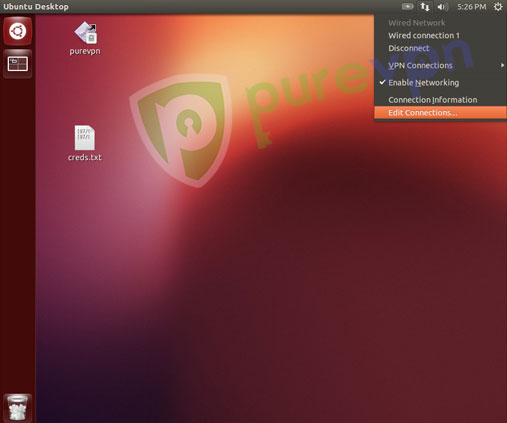
- Click the Arrow icon (Network connection) on the top right hand of your screen and click Edit Connections...
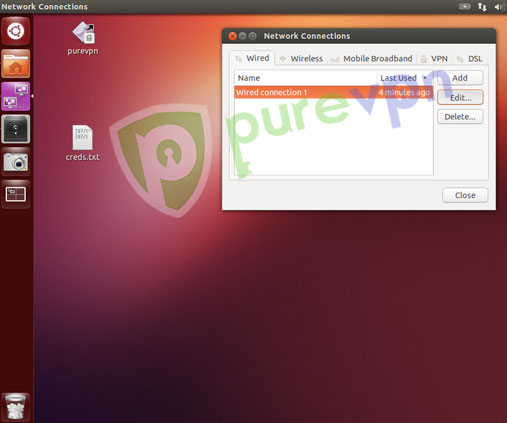
- Click the tab titled Wired and then click Edit....
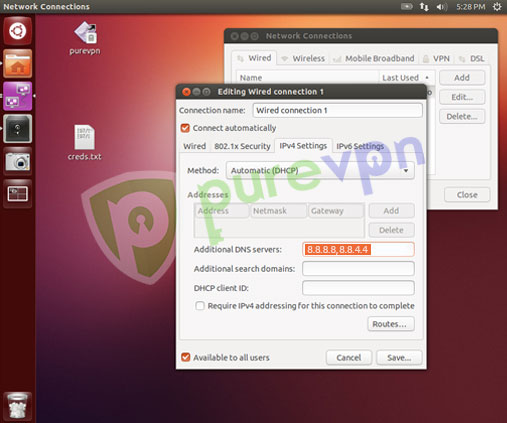
- Click the tab titled IPv4 Settings.
- Insert any DNS like 8.8.8.8, 8.8.4.4 into the field titled Additional DNS Servers. Make sure the two DNS addresses are separated by a comma. Click Save.
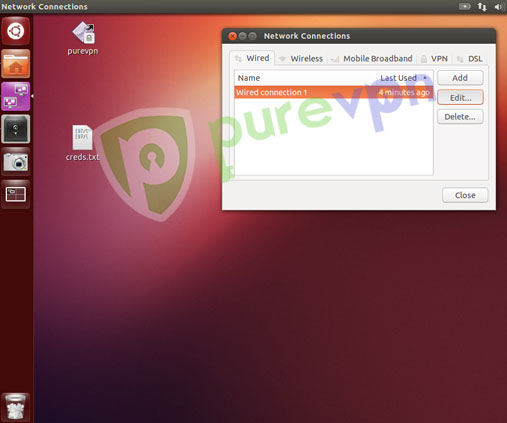
- Once you are done with the editing process for Wired Connections click Close.
Congratulations you have now configured DNS successfully on your device.
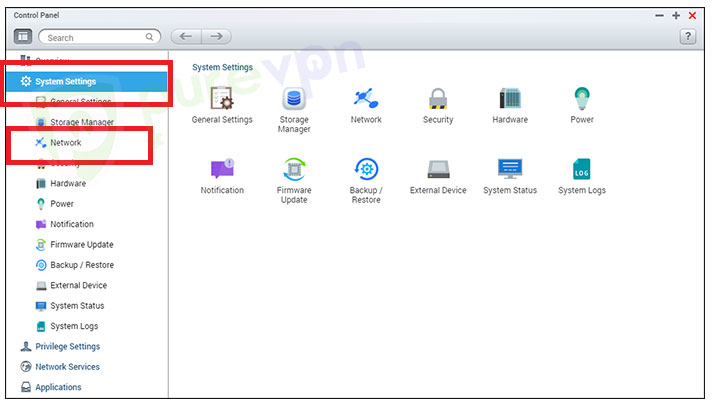
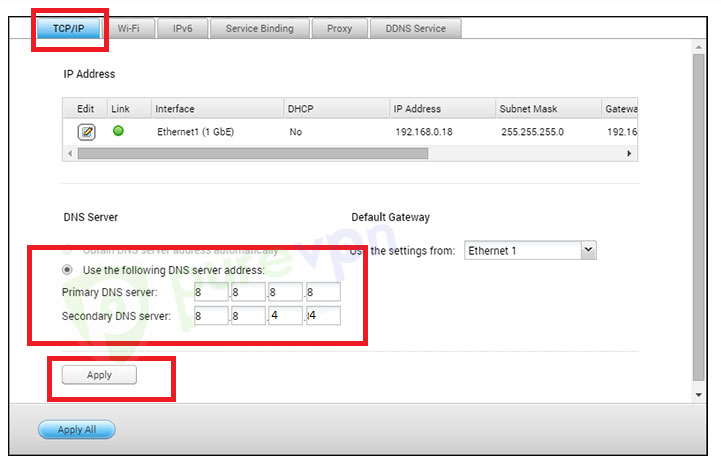
How to change DNS on QNAP
- Open Control Panel, click System Settings and choose Network.
- Click TCP/IP, select the option Use the following DNS server addresses and insert 8.8.8.8 in Primary and 8.8.4.4 in Secondary DNS Box. Click Apply to save settings.
Congratulations you have now configured DNS successfully on your device.
