
Learn how to set up PureVPN with OpenVPN on your QNAP NAS running QTS v4.3+ with our easy-to-follow guide. By following the step-by-step instructions, you can configure PureVPN using the OpenVPN protocol on your QNAP NAS, ensuring a secure and private internet connection.
Find your VPN credentials for manual configuration
To find your VPN credentials log into the PureVPN Member Area. Click 👉 here to visit Member Area.
- Login to the Member Area using your PureVPN registered email address and password.
- On subscriptions tab scroll down to be able to view your VPN credentials.

- You will be able to see and copy your VPN credentials.
- Note down your PureVPN username and click on Eye icon to make your password visible and use it in the manual configuration.

How to connect PureVPN manually on QNAP QTS v4.3+
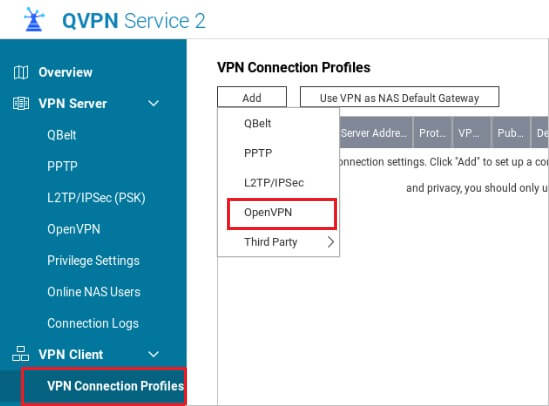
- Get the PureVPN Config Files for OpenVPN TCP and UDP by clicking on this link. Access the QNAP web interface, navigate to the App Center, and search for the QVPN Service app. Install the app once found. In the QVPN Service, choose VPN Connection Profiles in the VPN Client section, and then opt for OpenVPN.
- This will open a file picker dialogue box. Go to those .ovpn files which you have downloaded in step 1 and select your desired server location file, for example, Australia-UDP
- Enter your PureVPN Username and PureVPN Password. Click Apply.

- Your VPN profile has been created. Click the Connect button. Wait for a few seconds, and the status indicator will turn to green once connected successfully.
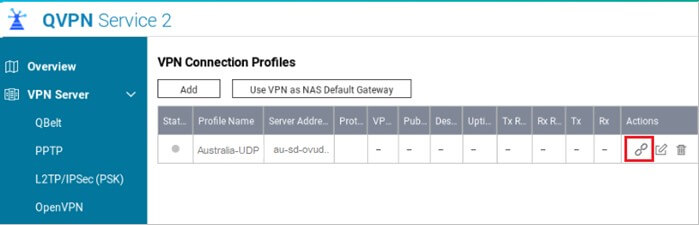
Upon successful connection, the Status tab will turn green as shown in the image below.
