pfSense is an open-source firewall and router that is available completely free of cost. It offers load balancing, unified threat management along multi-WAN amongst other features for those particularly concerned about their online security.
Fortunately, users can further enhance its capabilities via Pfsense VPN, which can be set up on the latest pfSense (2.5.2) by following the given steps:
Find your VPN credentials for manual configuration
To find your VPN credentials log into the PureVPN Member Area. Click 👉 here to visit Member Area.
- Login to the Member Area using your PureVPN registered email address and password.
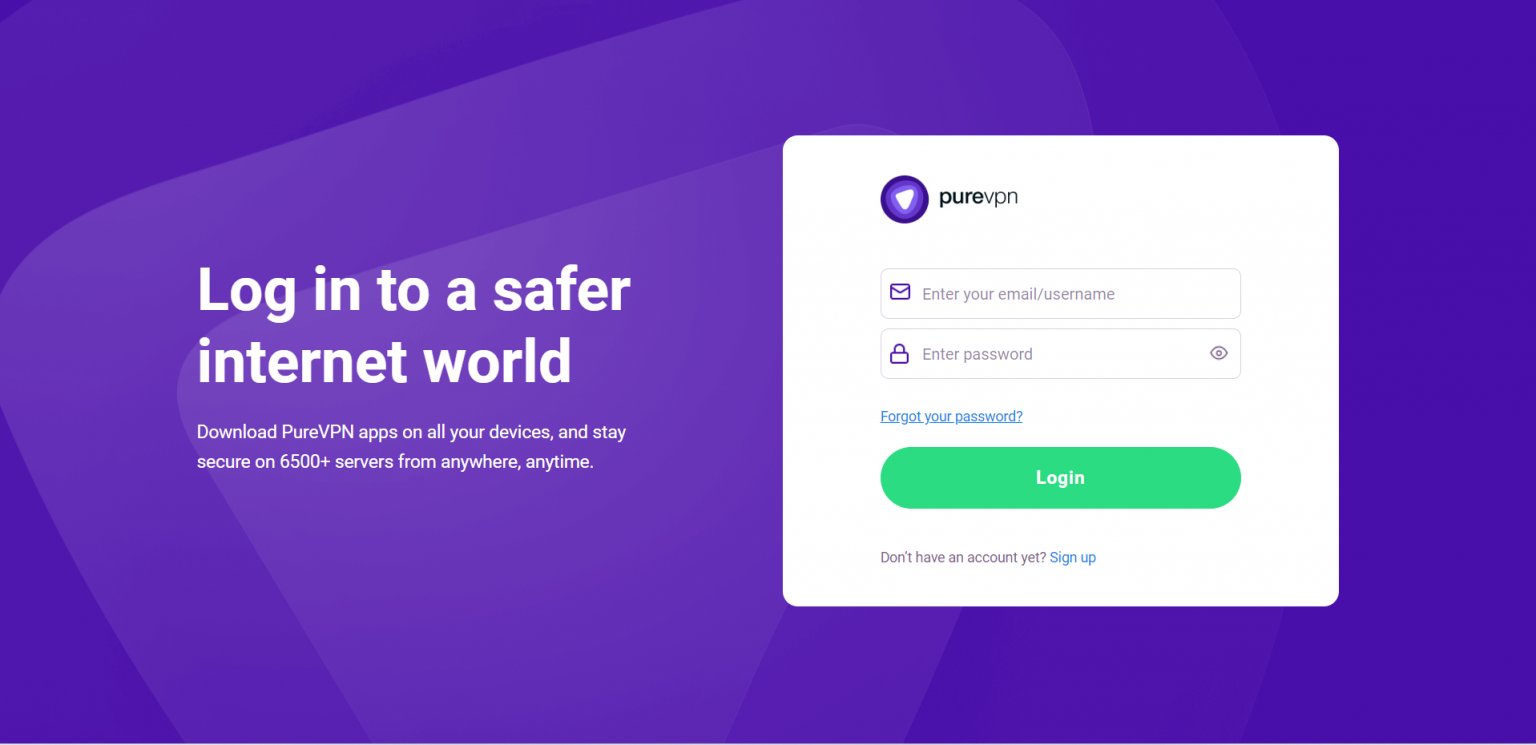
- On the Subscription tab scroll down to be able to view your VPN credentials.

- You will be able to see and copy your VPN credentials.
- Note down your PureVPN username and click the Eye icon to make your password visible and use it in the manual configuration.

How to set up OpenVPN on pfSense (2.5.2) router
- In order to configure OpenVPN on pfSense, first download the required OpenVPN files from link below and extract them.
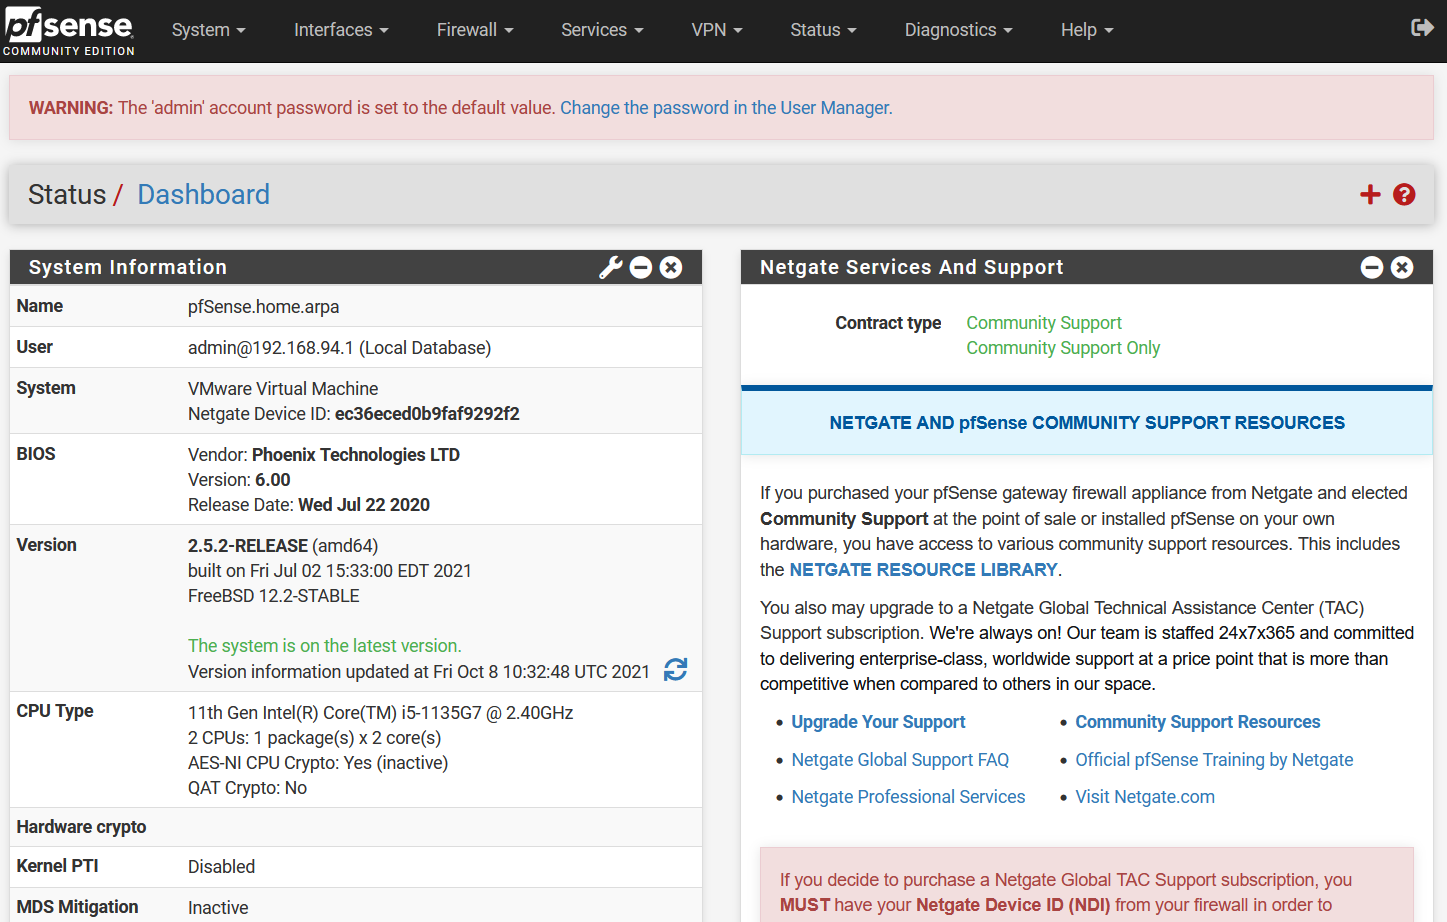
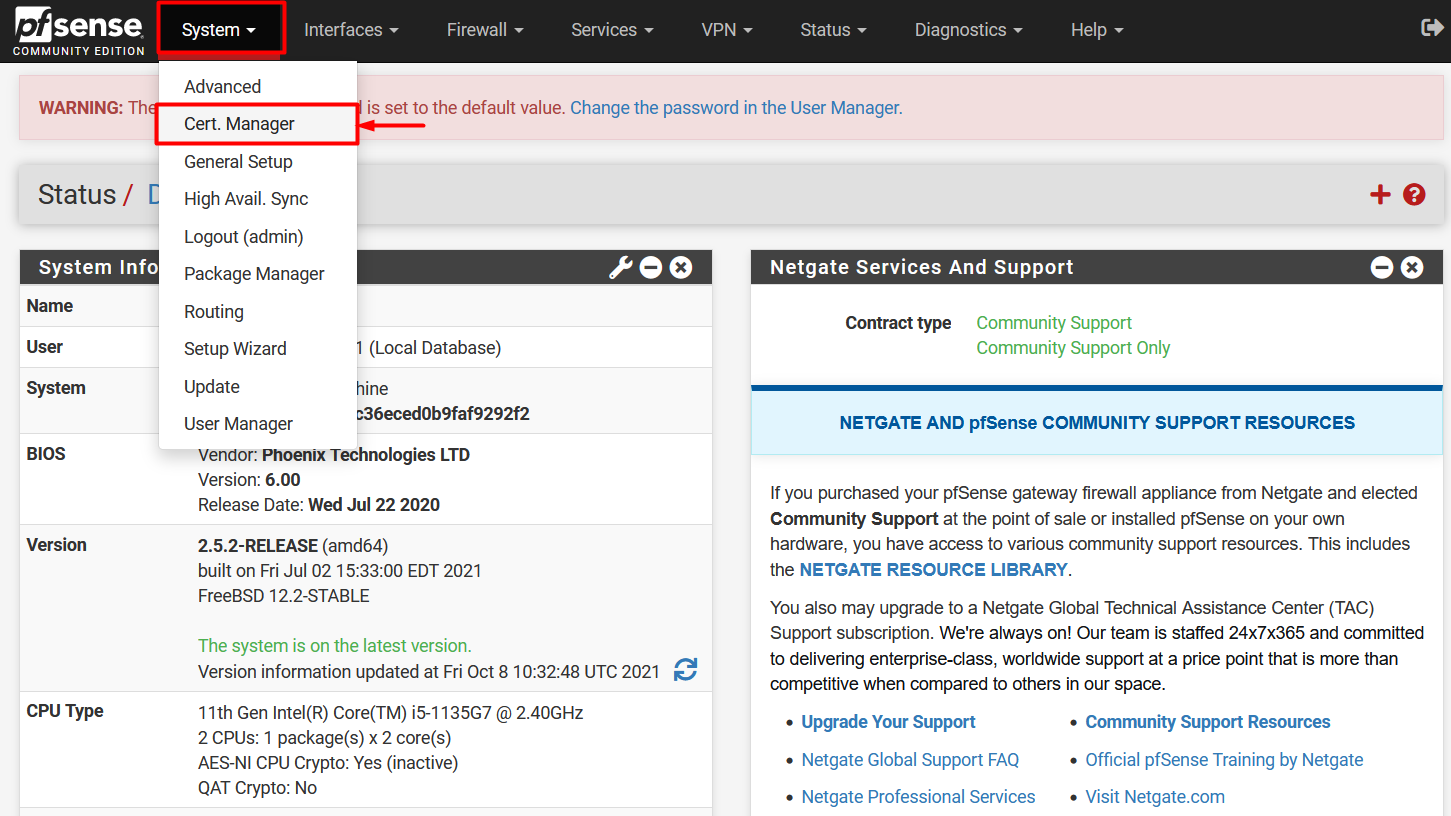
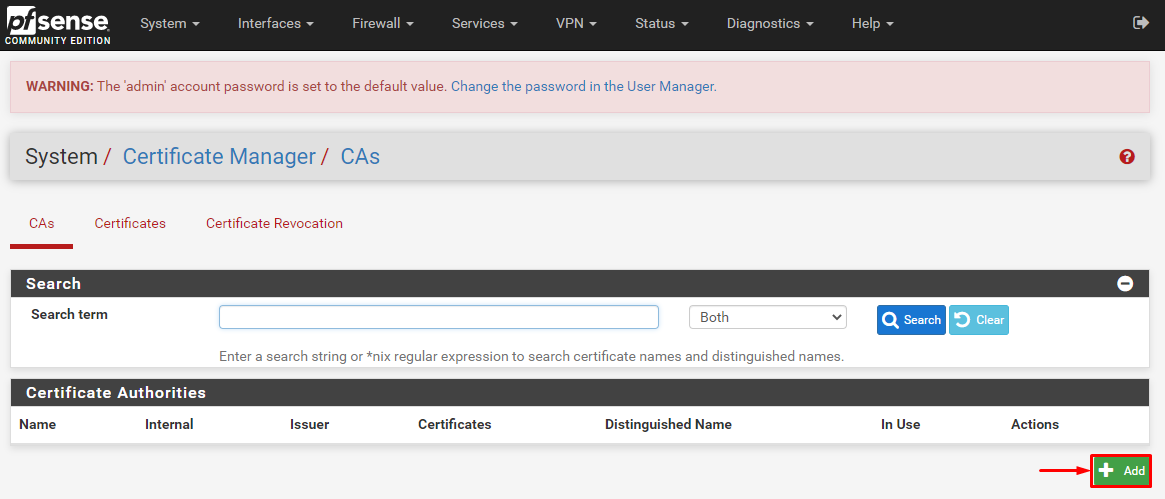
- After login, Go to the Cert Manager option under System and then click + Add to add a new CA certificate.
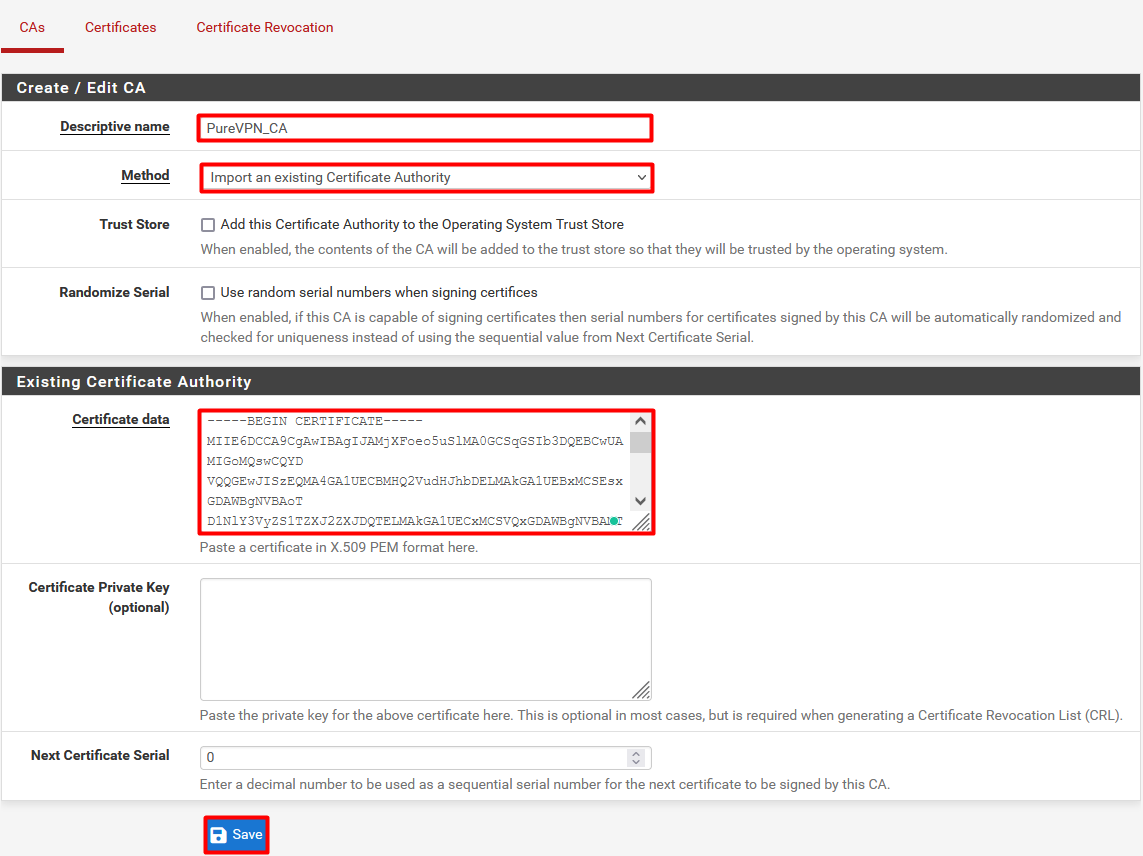
Now enter the following information:
- Descriptive name: PureVPN_CA
- Method: Import an existing Certificate Authority
- Certificate Data: Open the ca2.crt file, copy and paste it’s content in the box.
- Click Save button to save the file.
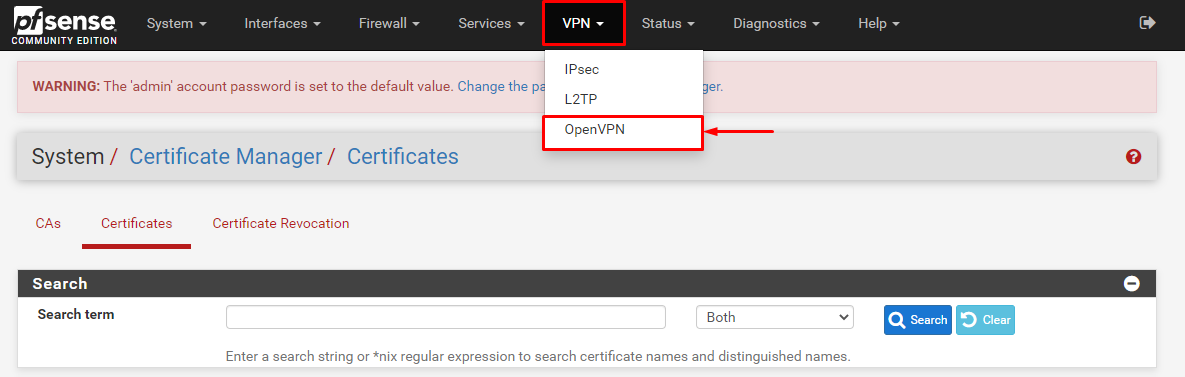
- Now go to the VPN option and select OpenVPN then select the Clients tab and then click + Add to create a VPN profile.

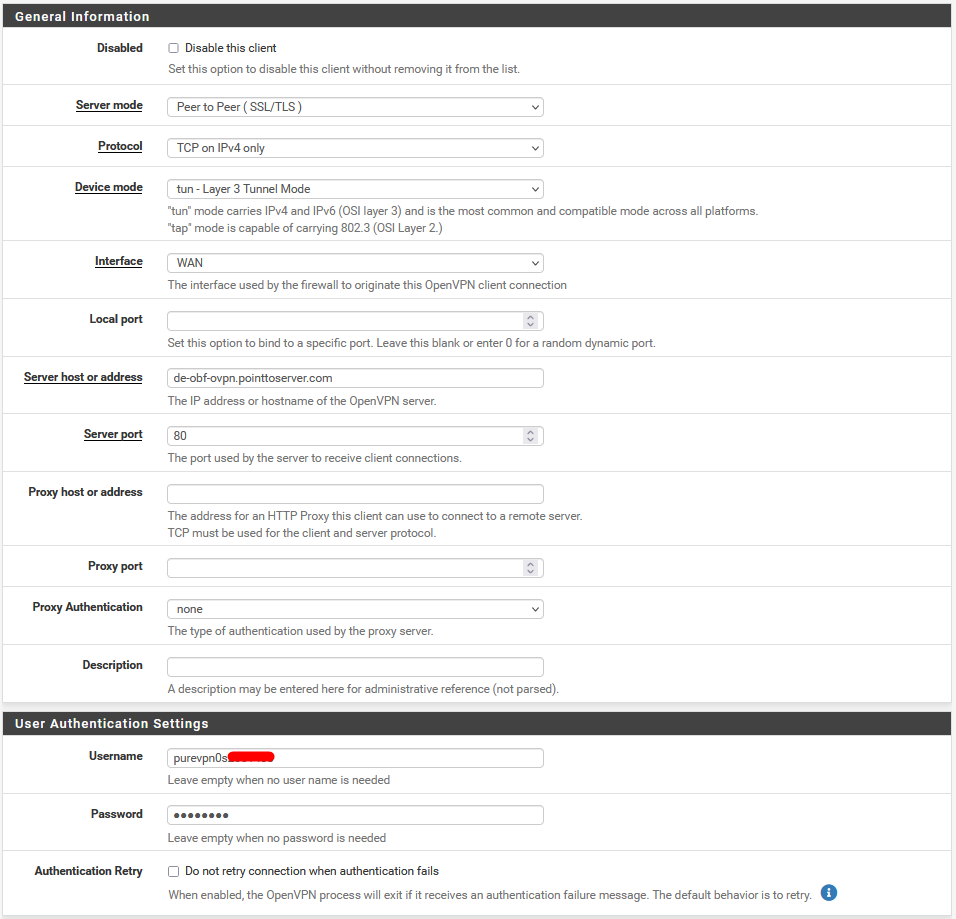
Now enter the following details:
- Server Mode: Peer-to-Peer (SSL/TLS)
- Protocol: TCP on IPv4 only or UDP on IPv4 only
- Device Mode: tun- Layer 3 Tunnel Mode
- Interface: WAN
- Server host or address: de-obf-ovpn.pointtoserver.com (You can use your desired server address here)
- Server Port: Enter 80 for TCP or 53 for UDP
- Proxy Authentication: None
- Avoid configuring or changing any other options.
- Username: Enter your PureVPN username.
- Password: Enter your PureVPN password.
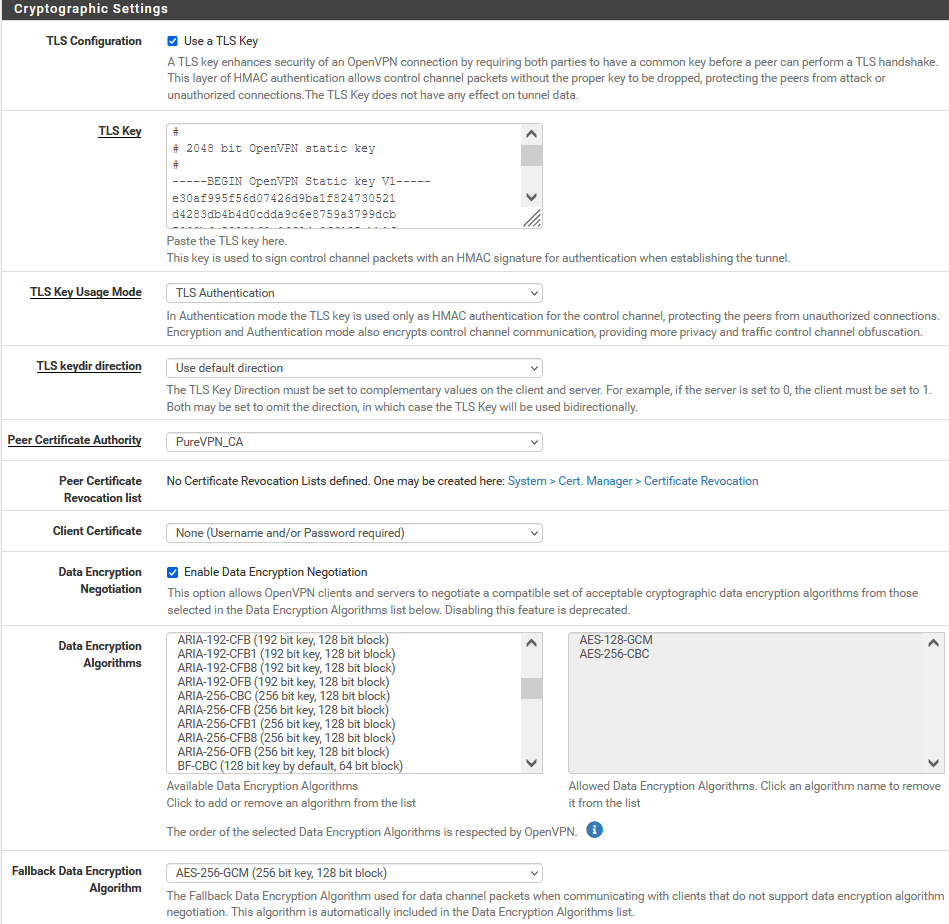
- Under ‘Cryptographic Settings’ select the following options:
- TLS Configuration: Use a TLS Key. Uncheck the ‘Automatically generate a TLS Key’.
- Open the Wdc.key, copy and paste its content in the next box that pops up.
- TLS Key Usage Mode: TLS Authentication
- TLS Keydir Direction: Use default direction
- Peer Certificate Authority: PureVPN_CA (select the CA you created in step#1)
- Client Certificate: None
- Enable Data Encryption Negotiation: Checked
- Data Encryption Algorithm: Add AES-128-GCM and AES-256-CBC in the allowed list.
- Fallback Data Encryption Algorithm: AES-256-CBC
- Authentication digest Algorithm: SHA1 (160 bit)
- Hardware Crypto: No Hardware Crypto Acceleration
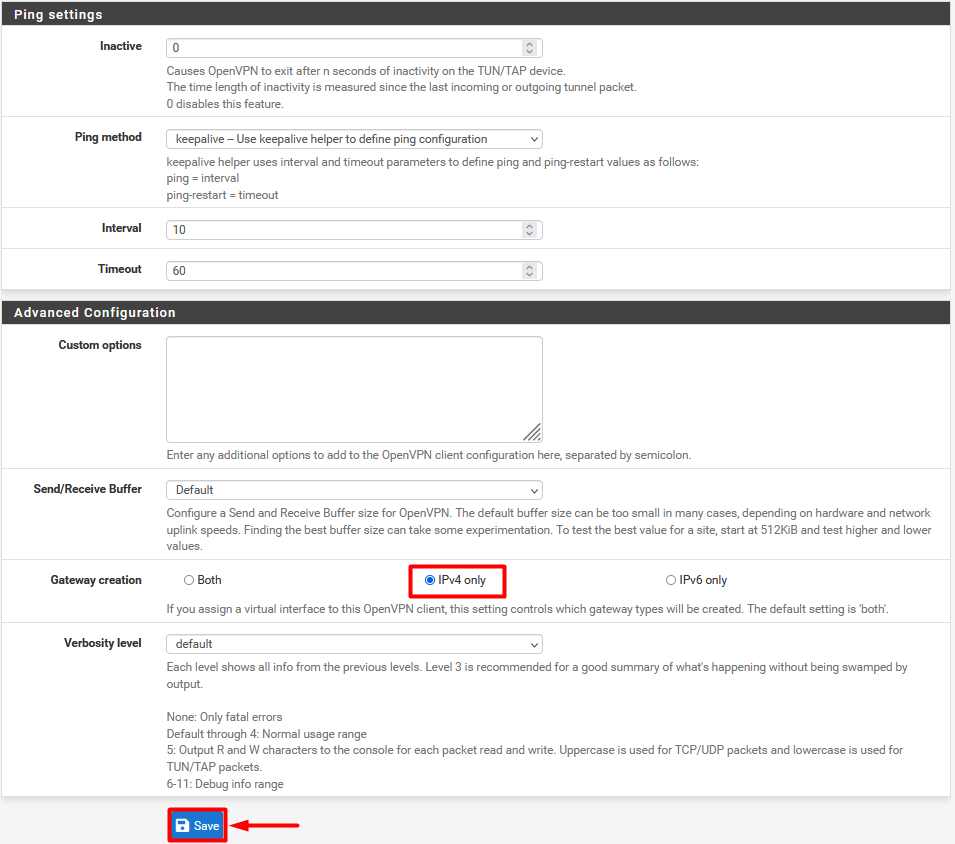
- Under Advanced Settings keep the Gateway as ‘IPv4 only
- After entering all the details, click the Save button.
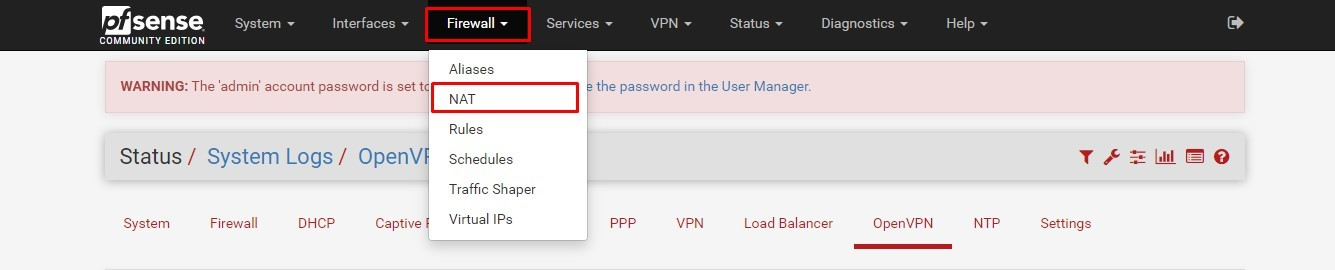
- Now go to the NAT option under Firewall tab.
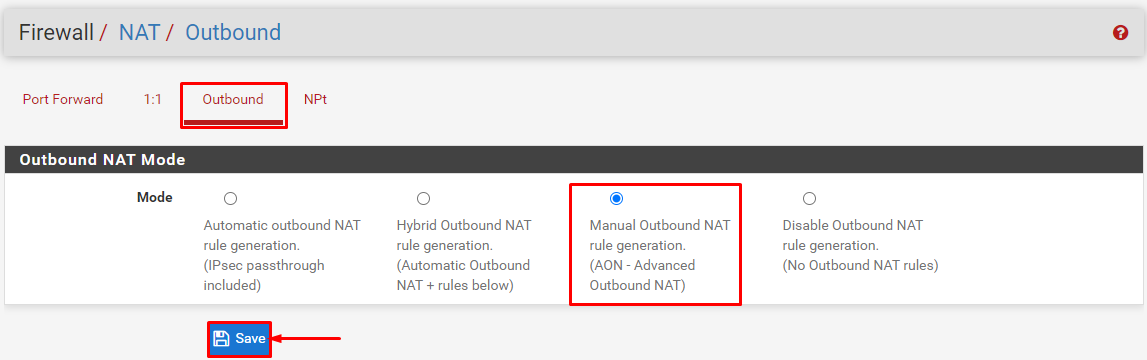
- Select Outbound and then click Manual Outbound NAT rule generation. Advanced Outbound NAT (AON) Click Save and then Apply Changes.
- You will see a Mappings window. Each WAN perimeter within needs to be changed to OpenVPN. This can be done after clicking the Edit button.
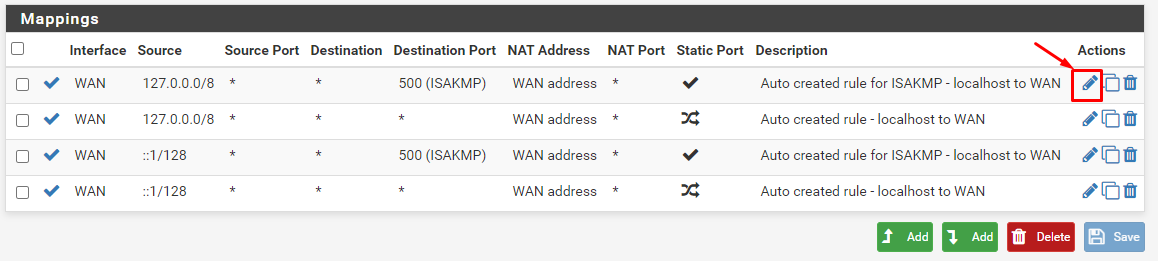
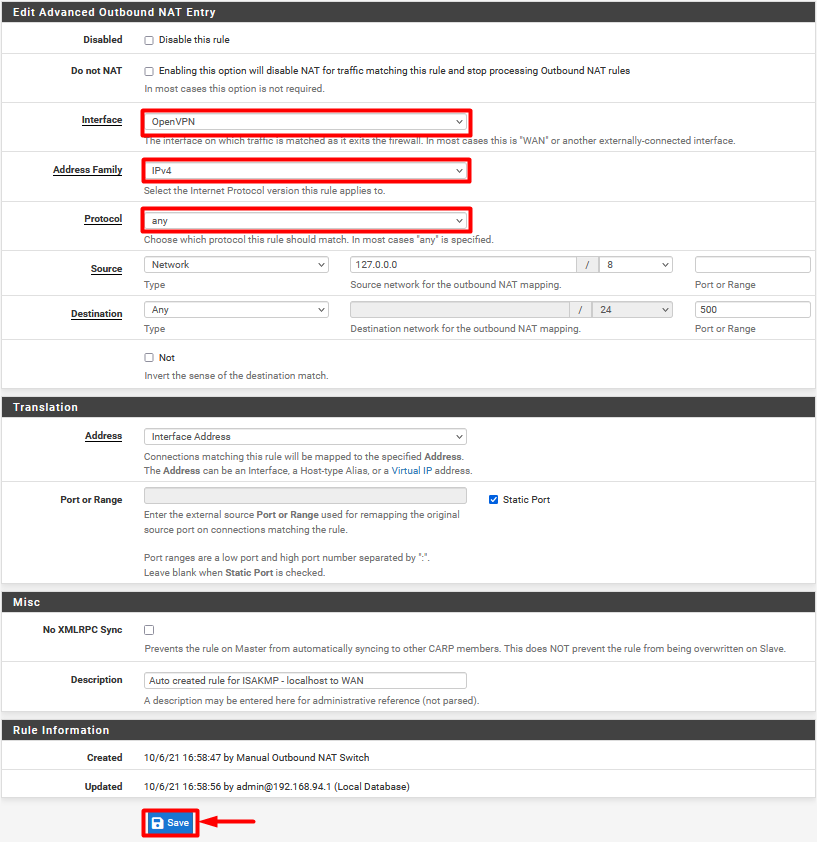
- Click the Edit icon and make the following changes:
- Change the Interface from WAN to OpenVPN.
- Address Family: IPv4
- Protocol: Any
- Once done, click Save to apply changes.
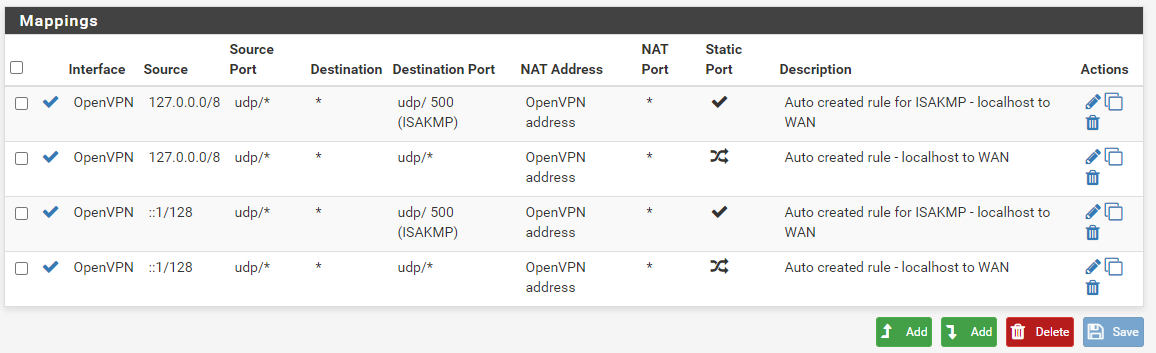
- Above step is repeated three times across the board for all interfaces to change them to OpenVPN, after which the mappings window will look something like this:
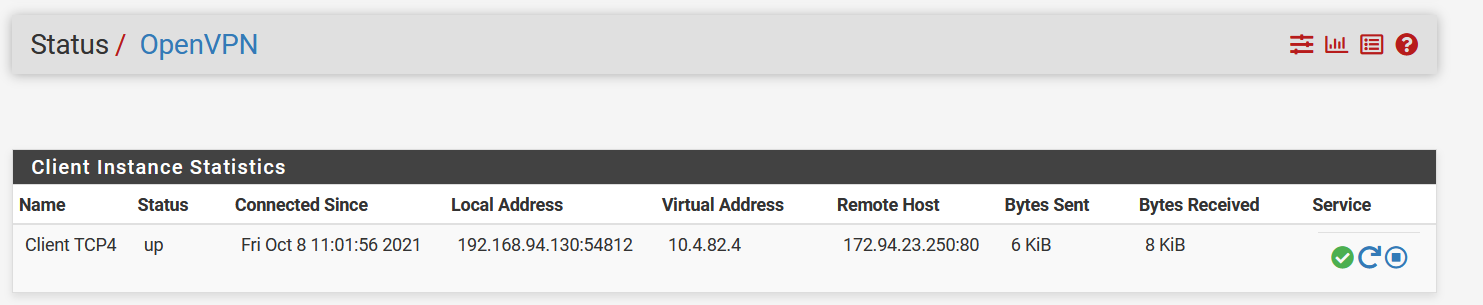
- Now go to the Status tab and select OpenVPN under it to check your connection status.
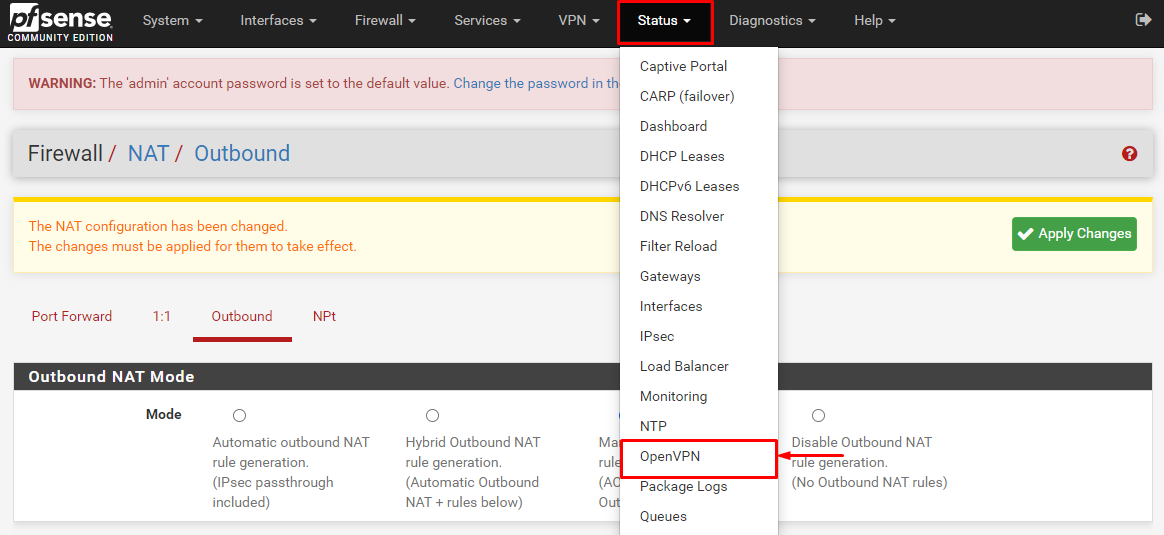
- PureVPN is connected now on your pfSense 2.4.5