Follow our instructions to configure PPTP and establish a secure VPN connection on your Kali Linux system. Enhance your online privacy and security effortlessly with our comprehensive tutorial.
Find your VPN credentials for manual configuration
To find your VPN credentials log into the PureVPN Member Area. Click 👉 here to visit Member Area.
- Login to the Member Area using your PureVPN registered email address and password.

- On Subscription tab scroll down to be able to view your VPN credentials.

- You will be able to see and copy your VPN credentials.
- Note down your PureVPN username and click the Eye icon to make your password visible and use it in the manual configuration.

How to connect PPTP on Linux Kali Linux
- Open Terminal.

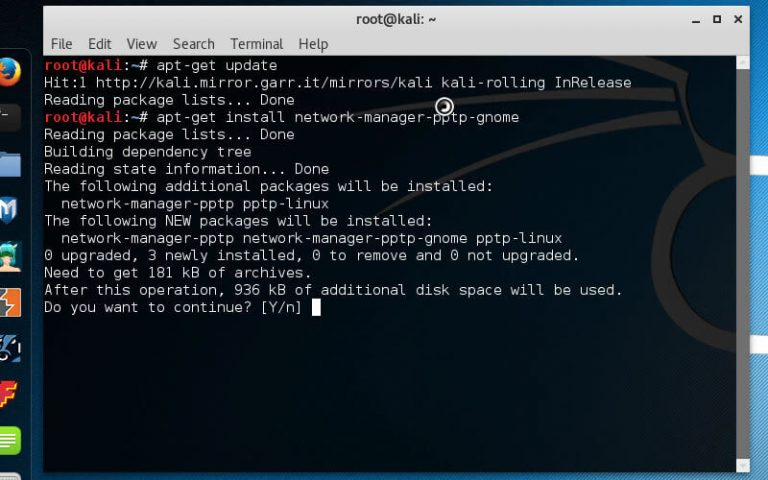
- Install required package by entering the commands mentioned below.
- apt-get update
- apt-get install network-manager-pptp-gnome
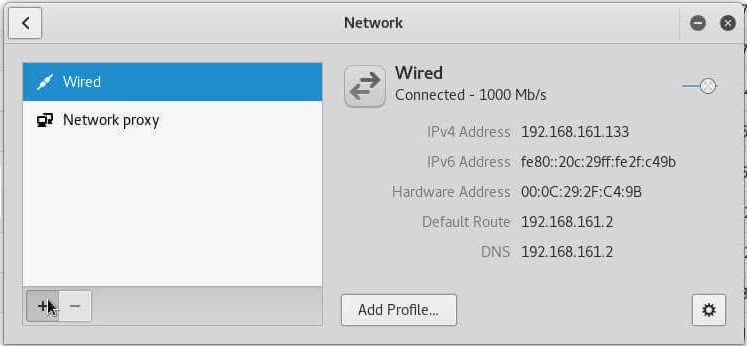
- Open Wired Settings (Network settings).

- Click + icon to create a new connection.
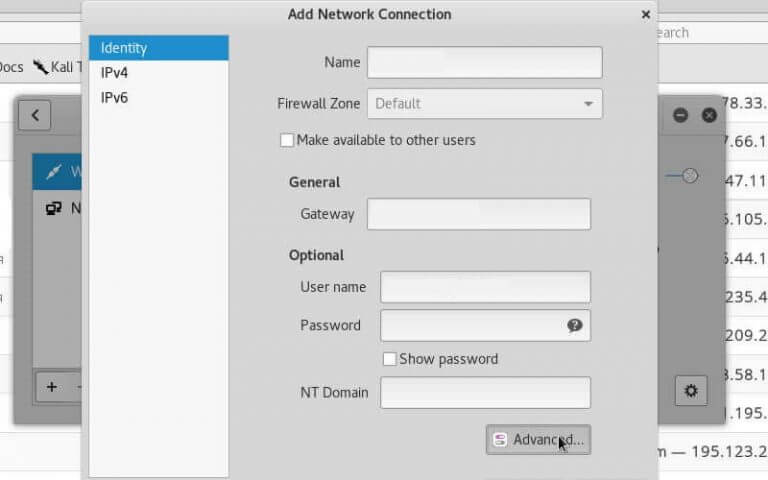
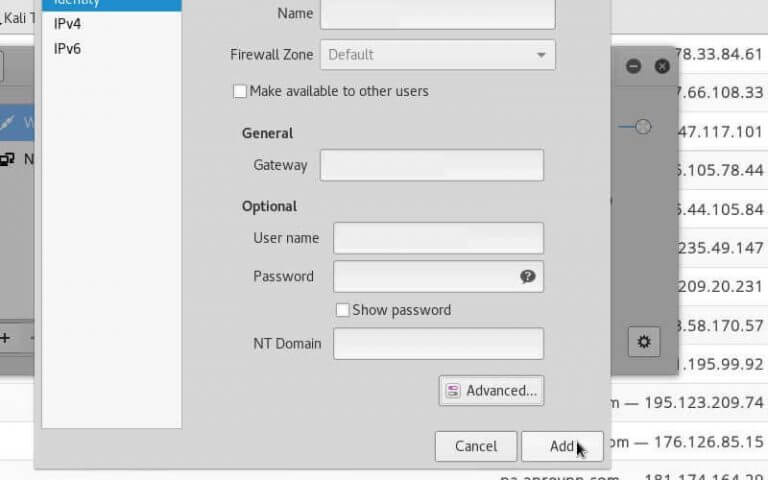
Insert the following details:
- Select Point-to-point Tunneling protocol (PPTP).
- Enter PureVPN PPTP in Name field.
- Insert the desired server: Please refer to the server address shared in the above note.
- Germany: de1.pointtoserver.com
- Netherlands: nl1.pointtoserver.com
- United Kingdom: ukl1.pointtoserver.com
- United States: ustx1.pointtoserver.com
- United States: uswdc1.pointtoserver.com
- Australia: au-sd1.pointtoserver.com
- Enter your VPN credentials. Here is how you can find your VPN credentials.
- Click Advanced.
- Check Use Point-to-Point encryption (MPPE) and click Ok.
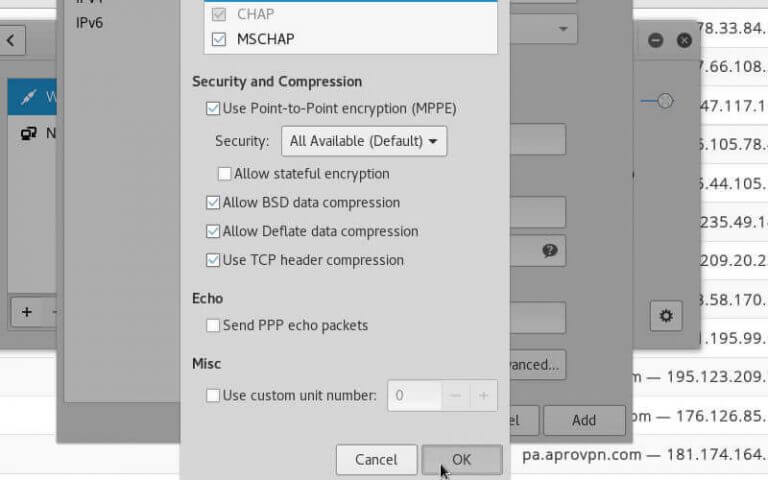
- Click Add.
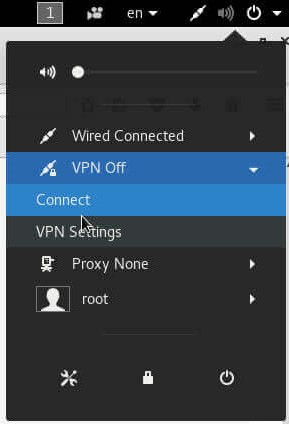
- Open Network Connections then VPN Off, click connect.
- If you're asked for authentication again, enter your PureVPN Password.

- Wait for PureVPN to establish your connection.
- You are now connected!

- If you wish to change the server address, do the following.
- Go to Network Connections.
- Edit PureVPN PPTP.
- Change Gateway field with a new server address.
- Click Apply.
How to connect OpenVPN on Linux Kali Linux
Learn how to set up OpenVPN on Kali Linux with our comprehensive guide. Follow our step-by-step instructions to configure OpenVPN and establish a secure and encrypted VPN connection on your Kali Linux system.
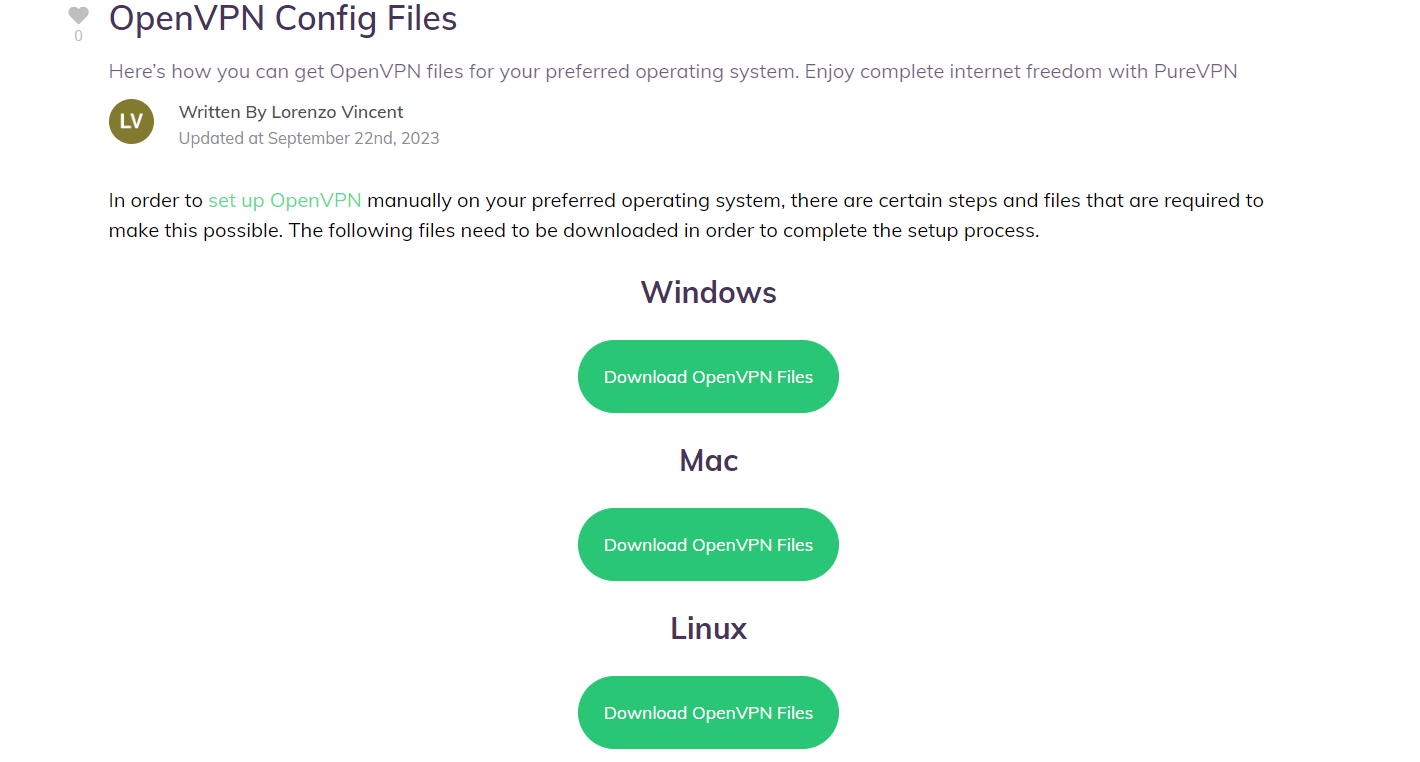
- The OpenVPN configuration files can be obtained by 👉clicking here. Use your preferred browser to download the ovpn zip file.
- You will get a prompt asking what to do with the ZIP archive, select Save File and click OK. It should be downloaded to your Downloads directory.
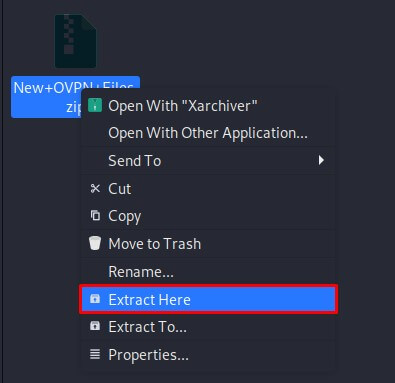
- Go to your Downloads directory, right click the ZIP archive and select Extract Here to extract the files.
- Now go to the Menu option and search and open the Terminal Emulator.
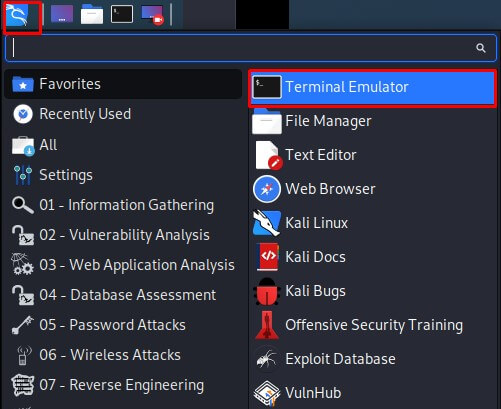
- Now you need to install OpenVPN packages. Type the following commands one by one:
- sudo apt-get update
- sudo apt-get install network-manager-openvpn
- sudo apt-get install network-manager-openvpn-gnome
-
Select the following options:
- Click Ethernet Network Connection.
- Go to VPN Connections.
- Select Add a VPN Connection…

- Select Import a saved VPN configuration option. Click the Create button.
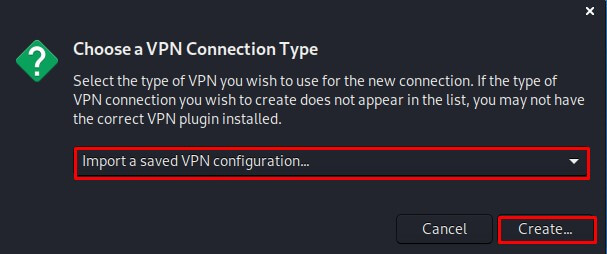
- Go to the Downloads directory, select the folder containing OpenVPN files i.e. New OpenVPN Files. Select the desired file with .ovpn extension. Click the Open button.

Now enter the details as mentioned below:
- Insert Connection name: PureVPN (Here we use PureVPN, you can change it any other name).
- Select Type: Password from drop down menu.
- Enter your VPN credentials. Here is how you can find your VPN credentials.
- Click the folder icon from the Certificate folder and add the ca.crt.crt file.
- Click Save.
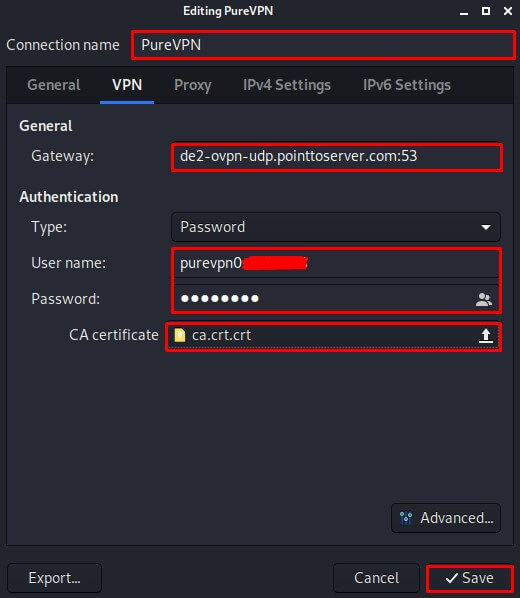
- Now go to the Ethernet Network Connections option and under VPN Connections click/check on the newly created PureVPN connection to activate VPN.
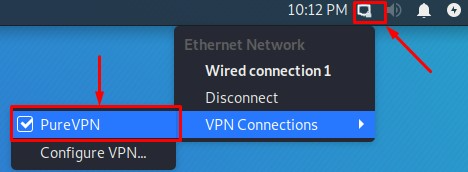
- You are now connected to PureVPN!

