If you're struggling with setting up PureVPN on Linux Cent OS devices, don't worry. This guide will walk you through the process in a simple and straightforward way, ensuring you can connect and stay secure on the internet.
Find your VPN credentials for manual configuration
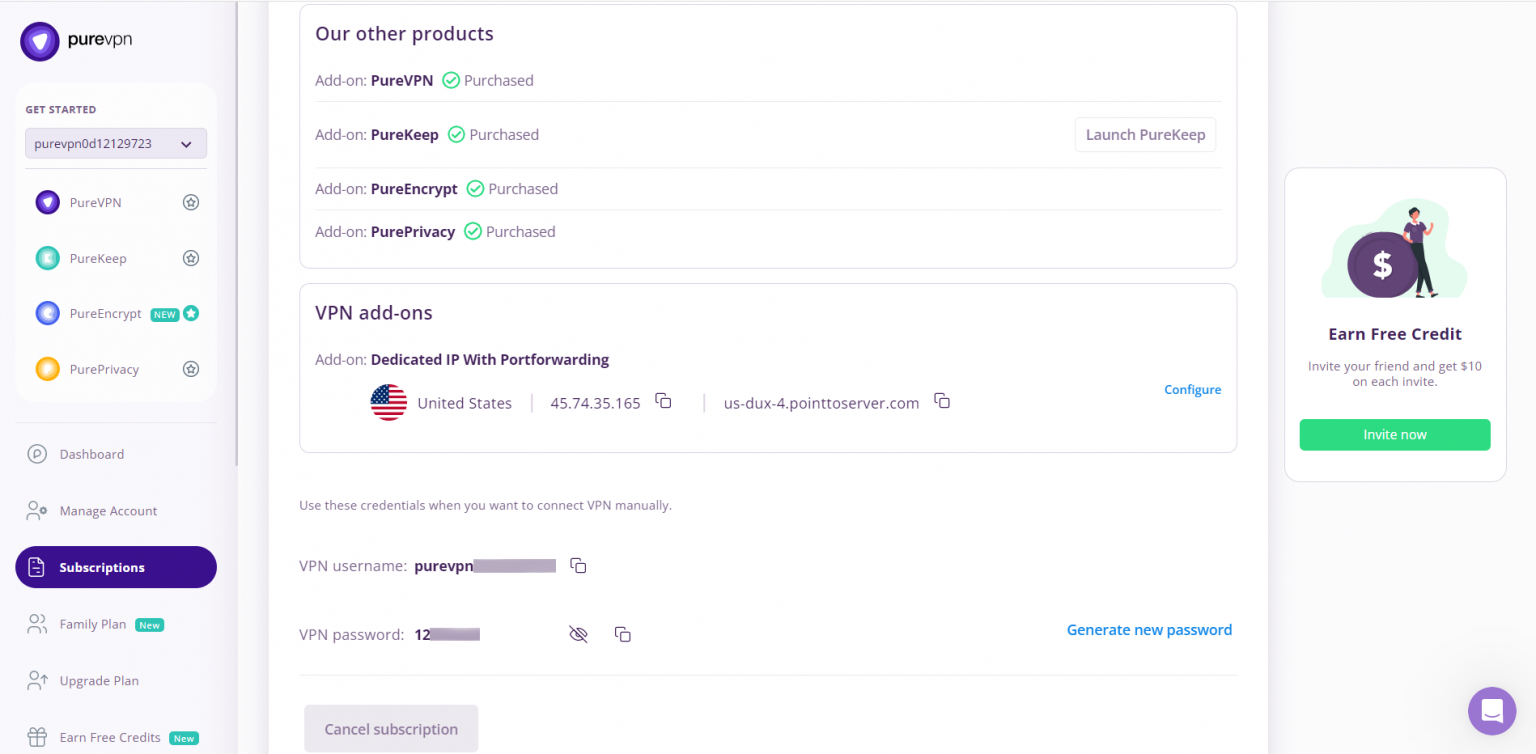
To find your VPN credentials log into the PureVPN Member Area. Click 👉 here to visit Member Area.
Login to the Member Area using your PureVPN registered email address and password.

On Subscription tab scroll down to be able to view your VPN credentials.

- You will be able to see and copy your VPN credentials.
- Note down your PureVPN username and click the Eye icon to make your password visible and use it in the manual configuration.
How to connect PPTP on Linux CentOS
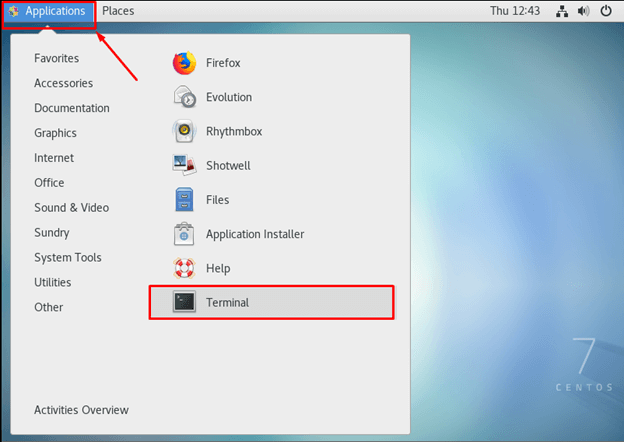
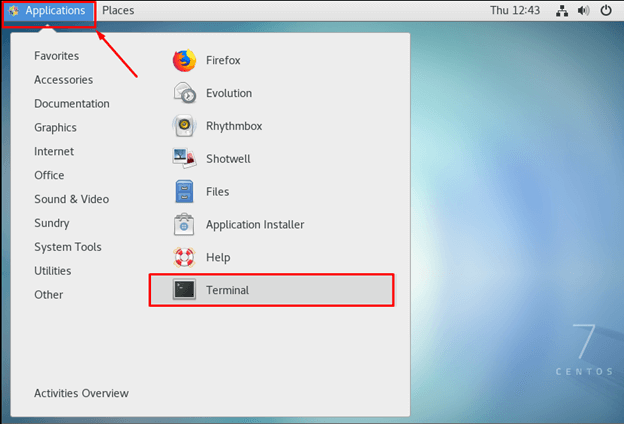
- Go to the Applications option and search and open the Terminal.
- Now you need to install PPTP Type the following three commands one by one:
- sudo yum update
- sudo yum install epel-release
- sudo yum install NetworkManager
- sudo yum install NetworkManager-pptp-gnome
- When you finish the commands, logout/login is required. (Or preferably, restart the system)
-
Select the following options:
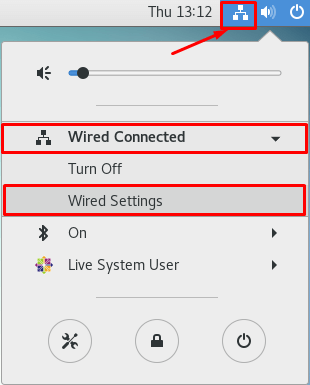
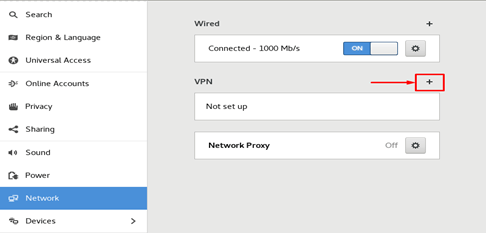
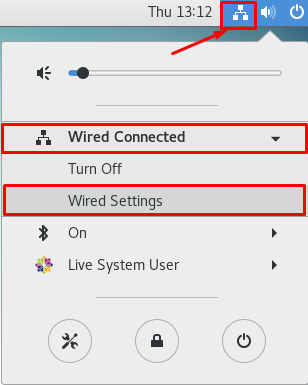
- Click Network Connection icon.
- Go to Wired Connected and select Wired Settings.
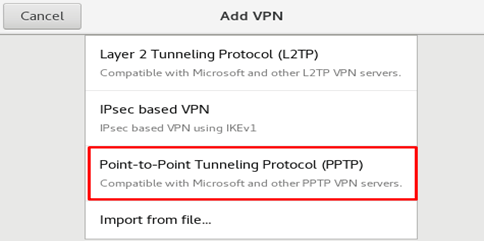
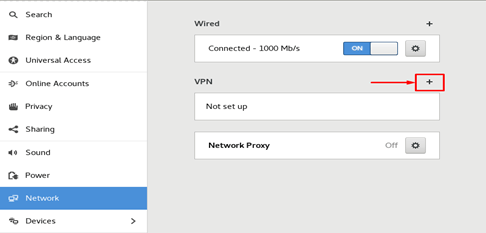
- Click the + icon to add a VPN connection and select Point to Point Tunneling Protocol (PPTP) option.
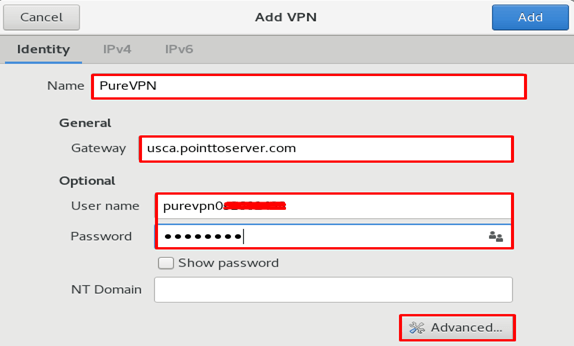
- When the new window appear, complete the fields as below
- Enter Connection name: PureVPN
- Insert the desired server: These servers can be utilized for the PPTP protocol.
- Germany: de1.pointtoserver.com
- Netherlands: nl1.pointtoserver.com
- United Kingdom: ukl1.pointtoserver.com
- United States: ustx1.pointtoserver.com
- United States: uswdc1.pointtoserver.com
- Australia: au-sd1.pointtoserver.com
- Enter your VPN credentials. Here is how you can find your VPN credentials.
- Click Advanced option.
-
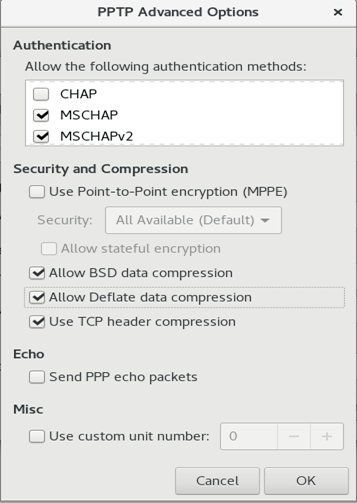
Now, select the following:
- MSCHAP.
- MSCHAPv2.
- Allow BSD data compression.
- Allow Deflate data compression.
- Use TCP header compression.
- Click OK and then click Add from the top right corner.
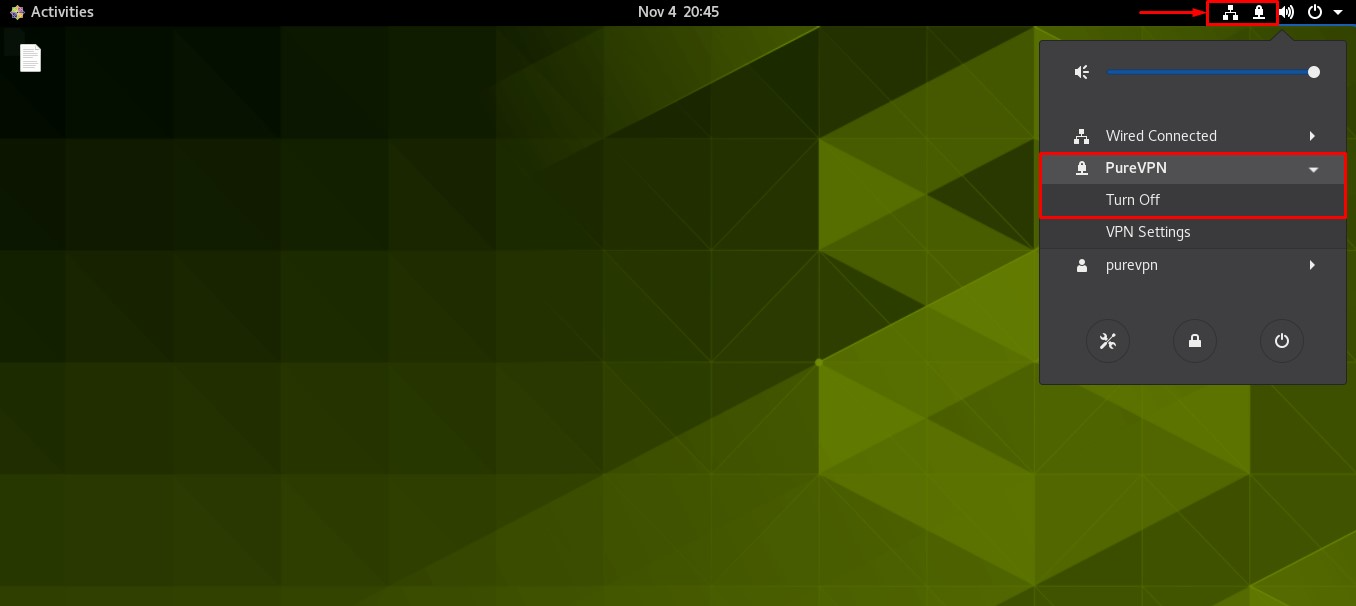
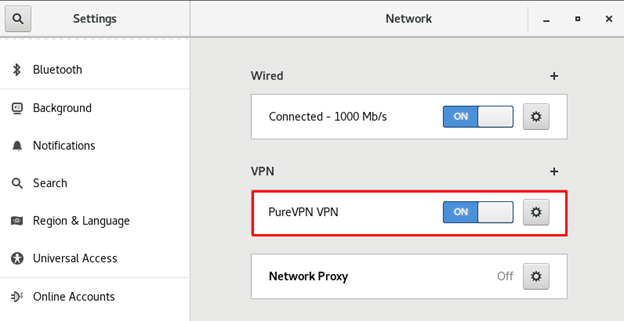
- Enable your VPN by swiping the toggle button.
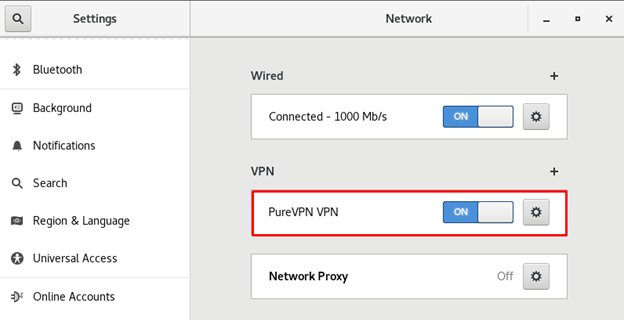
- You are now connected!
- You can turn off the VPN connection by swiping the toggle button Off.
How to connect L2TP on Linux CentOS
- Go to the Applications option and search and open the Terminal.
- Now, you need to install L2TP Type the following three commands one by one:
- sudo yum update
- sudo yum install epel-release
- sudo yum install NetworkManager
- sudo yum --enablerepo=epel-testing install NetworkManager-l2tp-gnome
- When you finish the commands, logout/login is required. (Or preferably, restart the system)
- Now, select the following options:
- Click Network Connection icon.
- Go to Wired Connected and select Wired Settings.
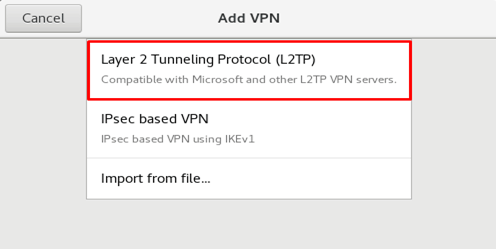
- Click the + icon to add a VPN connection and select Layer 2 Tunneling Protocol (L2TP) option.
- When the new window appear, complete the fields as below:
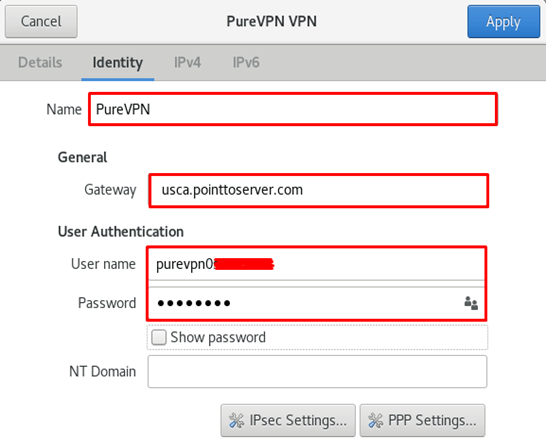
- Enter Connection name: PureVPN
- Insert desired server address in Gateway (Here we have used usca.pointtoserver.com)
- Enter your VPN credentials. Here is how you can find your VPN credentials.
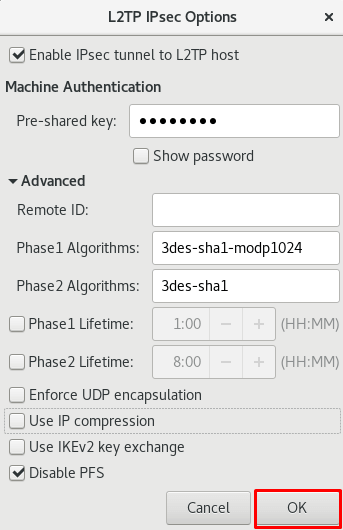
- Check the Enable Ipsec tunnel to IPsec host
- Pre-shared key: 12345678
- For phase 1= 3des-sha1-modp1024 and
- For phase 2 = 3des-sha1
- Check the Disable PFS option.
- Click OK.
- Go to the PPP Settings… button.
- Only allow the following options:
- MSCHAP.
- MSCHAPV2.
- Allow BSD data compression.
- Allow Deflate data compression.
- Use TCP header compression.
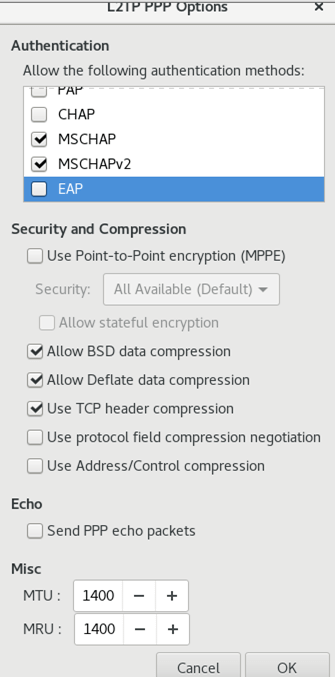
- Click OK and then click Add button from the top right corner.
- Enable your VPN by swiping the toggle button.
- You are connected now!
- You can turn off the VPN connection by swiping the toggle button Off
How to connect OpenVPN on Linux CentOS
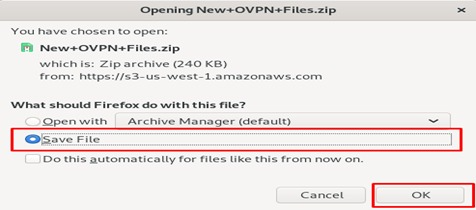
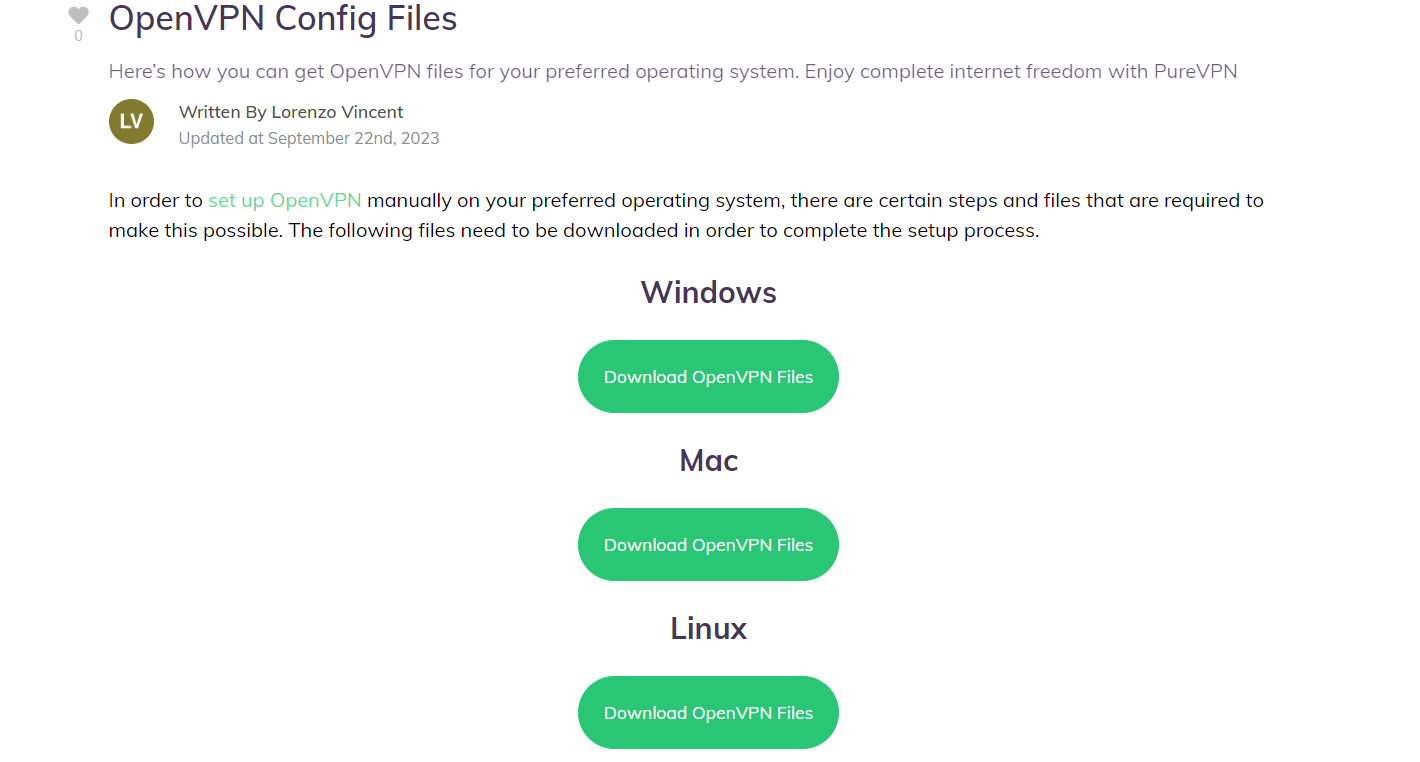
- Go to your desired web browser and download PureVPN OpenVPN configuration files, click👉 here.

- You will get a prompt asking what to do with the ZIP archive, select Save File and click OK. It should be downloaded to your Downloads directory.
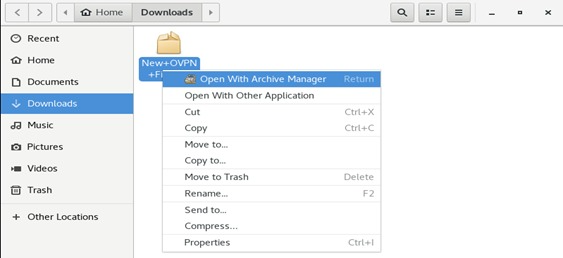
- Go to your Downloads directory, right click the ZIP archive and select Open With Archive Manager.
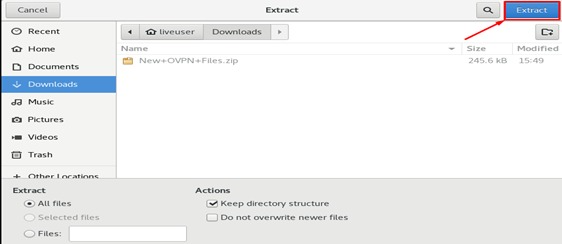
- Extract the files.
- Rename the Extracted file as openvpn.
- Next step is installing the config files. Installing config files requires sudo privilege. Copy and paste the contents of the Zip file to directories that override Selinux, such as /etc/ and /opt
- Follow the steps below when Selinux does not allow Network-Manager to access certificate files that are needed by OpenVPN. Click Applications at the top left of the screen, type Terminal in the search field to open the Terminal application.
- In order to copy the extracted files to /opt/ partition, first change your directory to Downloads.
- Run the following commands step by step:
- sudo su
cd Downloads/
- sudo yum install epel-release
- sudo yum install openvpn
- sudo yum install NetworkManager-openvpn-gnome
- mkdir -p /etc/openvpn
- sudo cp -rp openvpn /opt/
- sudo chmod 644 openvpn/*
- sudo chmod -R 755 /etc/openvpn/client.
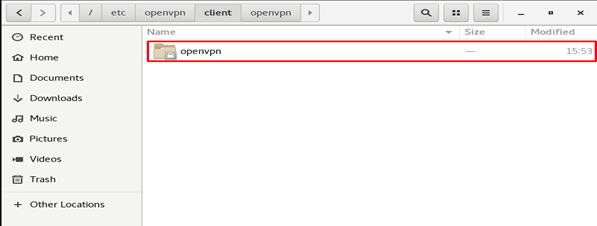
- Go to the Downloads directory, copy the openvpn folder and paste it under the etc >openvpn>client folder.
-
Select the following options:
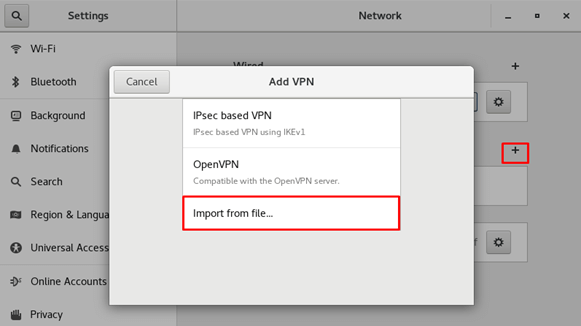
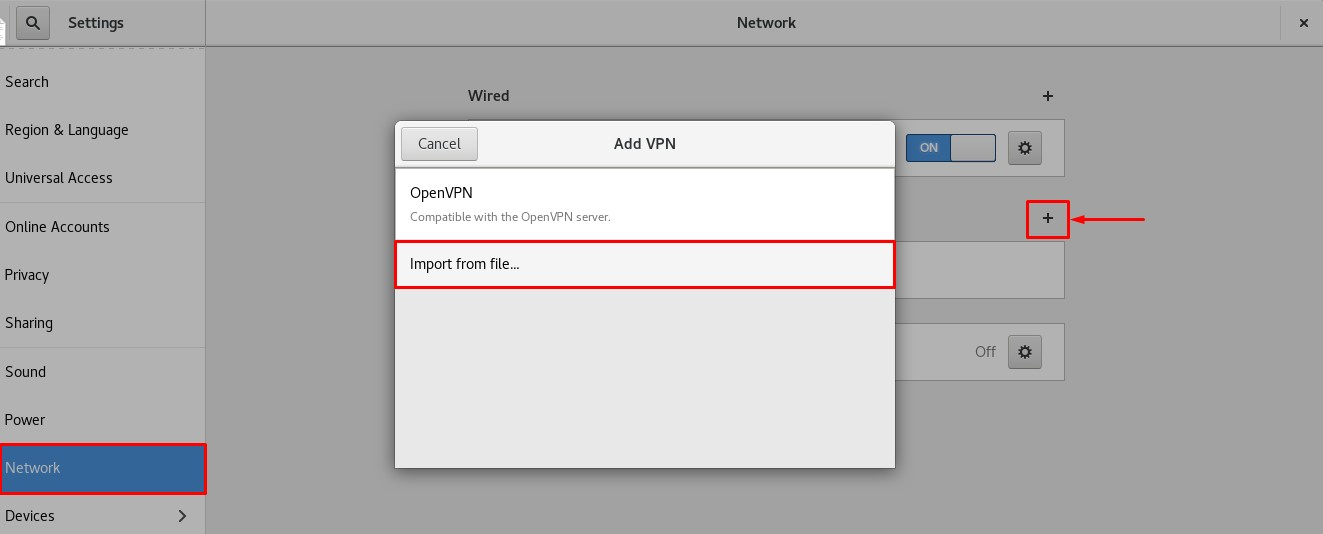
- Click Network Connection icon.
- Go to Wired Connected and select Wired Settings.

- Click the + icon to add a VPN connection and select Import from File Option option.
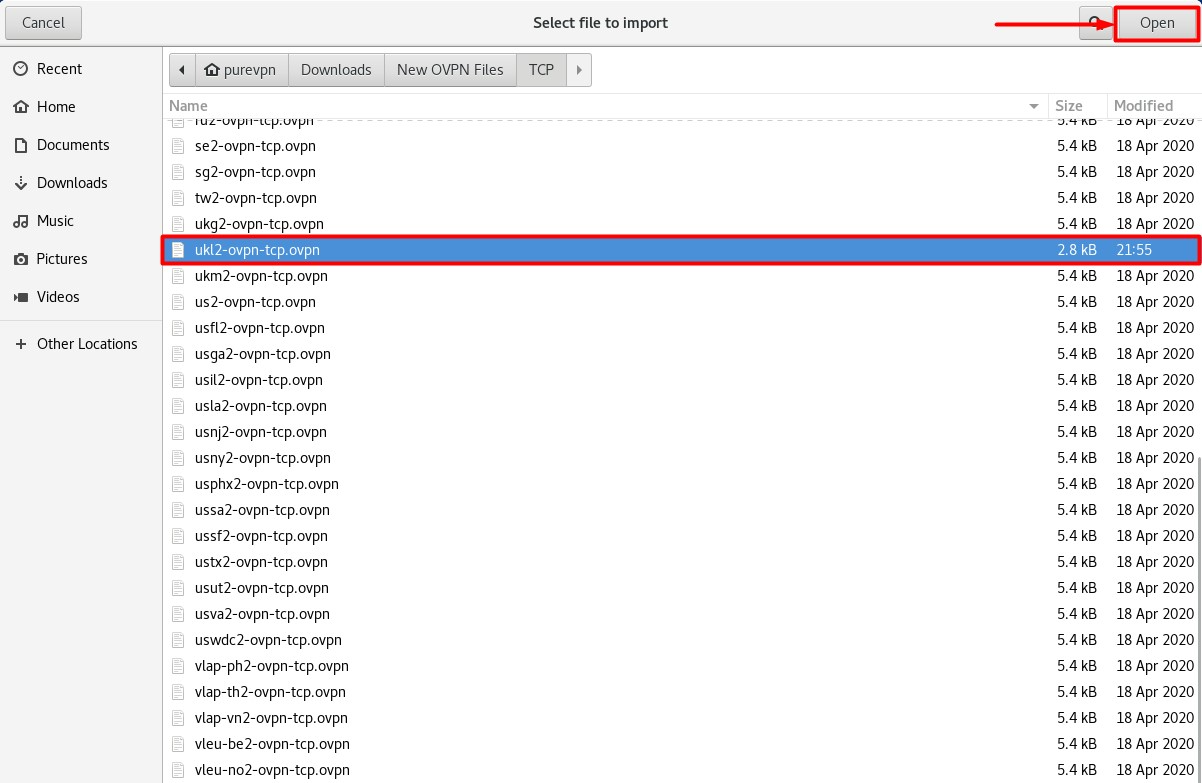
- Go to the newly created directory with config files in the openvpn folder under /etc/openvpn/client. Select the desired file with .ovpn extension.
- Click Open button.

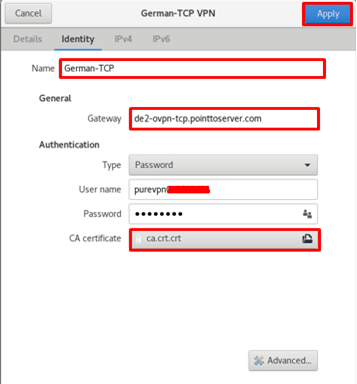
- Enter Connection name: German-TCP (Here we use German-TCP, you can change it any other name).
- Select Type: Password from drop down menu.
- Enter your VPN credentials. Here is how you can find your VPN credentials.
- Click Folder icon from the Certificate folder and add the ca.crt.crt file.
- Click Apply.
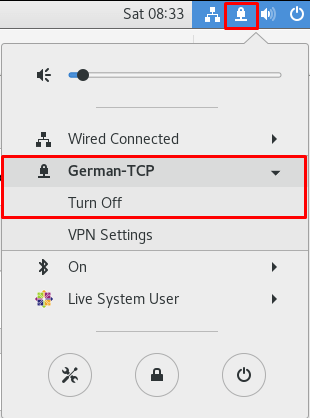
- Connect to PureVPN now. Select the VPN connection you have created. Toggle on the button to connect the VPN.
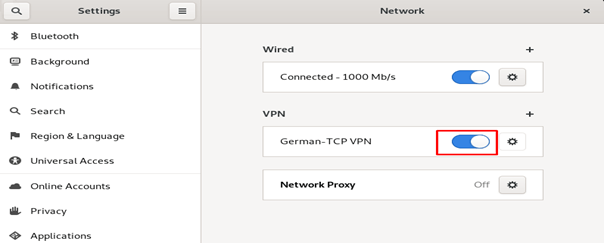
- You are connected to VPN now!
How to connect OpenVPN on Linux CentOS 8
- First, open the web browser (Firefox) and download the PureVPN OpenVPN configuration files from👉 this link then Save and Extract them.
- Go to the Terminal window and install OpenVPN client. Type the following commands one by one:
- sudo yum -y update
- sudo yum install epel-release
- sudo yum install openvpn
- sudo yum install NetworkManager-openvpn
- sudo yum install NetworkManager-openvpn-gnome
- Now Select the following options:
- Click Wired Connection.
- Go to Networks.

- Click the + icon to add a VPN connection and select Import from file… option to upload an OpenVPN profile.
- Go to the folder where you have downloaded the OpenVPN files and select your desired .ovpn file to connect.
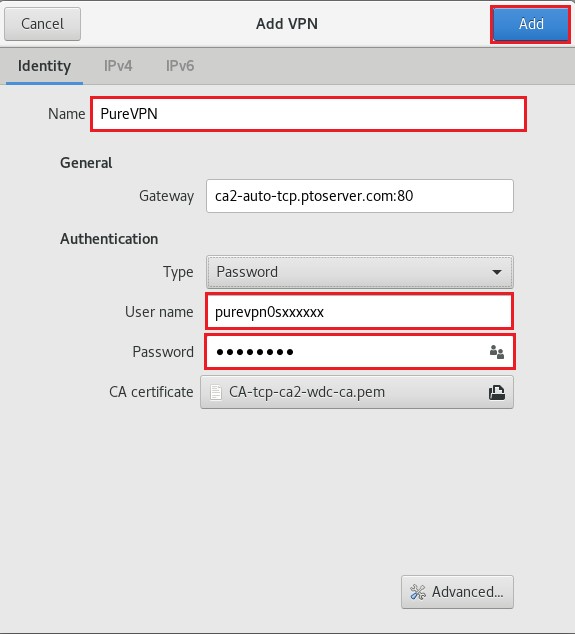
- When the new window appears, complete the fields as below:
- Insert Connection name: PureVPN
- Insert Gateway: (already selected/entered)
- Connection Type: Password from drop down menu
- Enter your VPN credentials. Here is how you can find your VPN credentials.
- CA Certificate: Already uploaded.
- Сlick Add button.
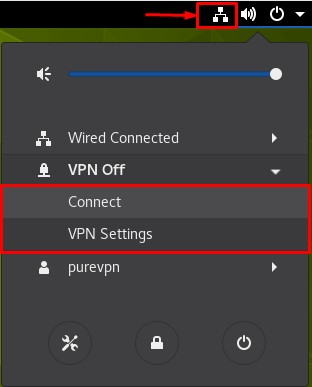
- Now go to the Wired Connections option and under VPN Connections click on the Connect button to activate the VPN connection.
- You are connected to PureVPN now!